The Ultimate Homemade Pumpkin Pie: A Foolproof Recipe for a Perfectly Spiced Holiday Dessert
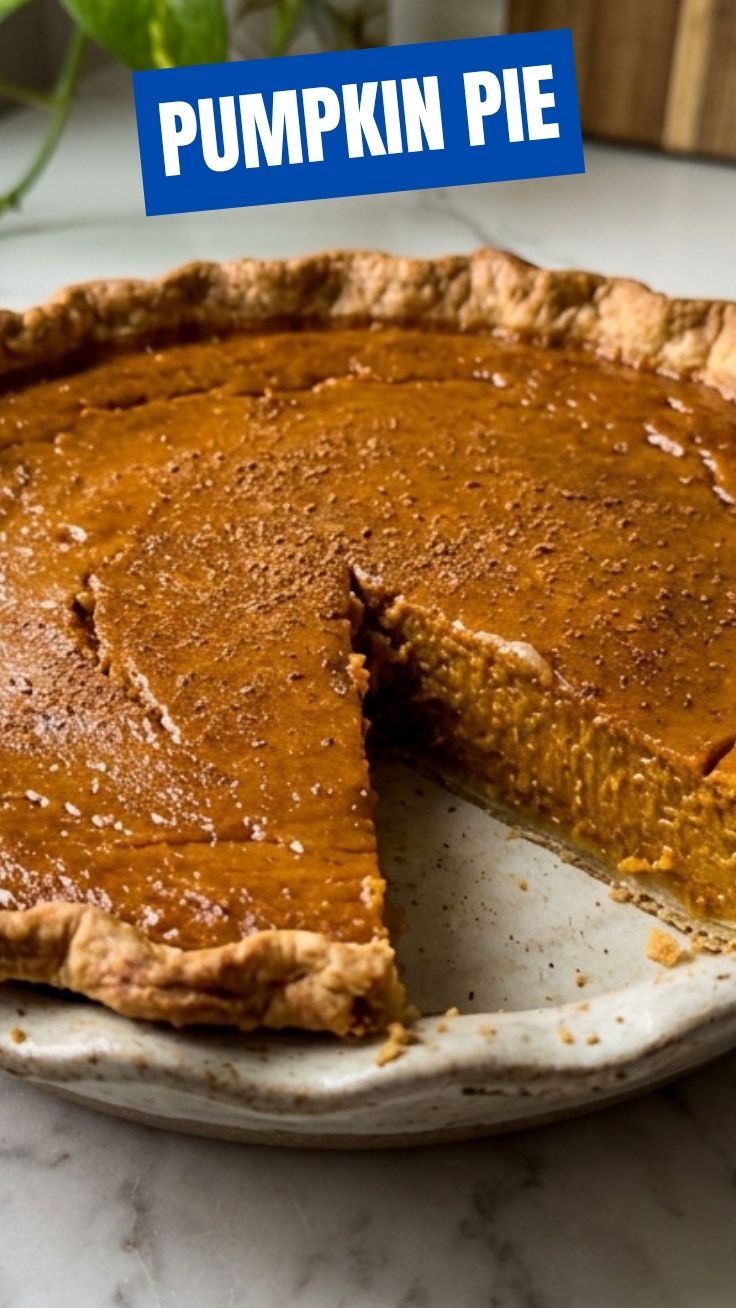
What if you could create a dessert so iconic it anchors the entire holiday table, filling your home with the warm embrace of cinnamon, nutmeg, and cloves? Homemade Pumpkin Pie isn’t just a dessert—it’s the centerpiece of a memorable Thanksgiving celebration. Preparing it from scratch gives you complete control over sweetness, spice, and texture, transforming a simple pie into a personal statement of culinary love. This recipe delivers a silky, custard-like filling inside a perfectly flaky crust, and it’s easier than you think.
Ingredients & Kitchen Tools
For the Crust (or use store-bought)
– 1 ¼ cups all-purpose flour – Provides structure; spoon and level for accuracy.
– ½ teaspoon salt – Balances sweetness and strengthens gluten.
– ½ cup cold unsalted butter, cubed – Keep butter ice-cold for flaky layers.
– 3–4 tablespoons ice water – Add one tablespoon at a time until dough holds together.
For the Filling
– 1 can (15 oz) pure pumpkin purée – Not pumpkin pie filling; this is unsweetened and pure.
– ¾ cup granulated sugar – You can reduce to ½ cup if you prefer less sweetness.
– 2 large eggs – Room temperature eggs blend more smoothly.
– 1 teaspoon vanilla extract – Enhances the warm spices.
– 1 teaspoon ground cinnamon – The backbone of pumpkin spice.
– ½ teaspoon ground ginger – Adds a gentle warmth.
– ½ teaspoon ground nutmeg – Freshly grated is best for aroma.
– ¼ teaspoon ground cloves – A little goes a long way; use sparingly.
– 1 cup heavy cream – Creates a rich, silky texture. Substitute with evaporated milk for a lighter version.
Kitchen Tools
– 9-inch pie dish (glass or metal work well)
– Mixing bowls (medium and large)
– Whisk and rubber spatula
– Rolling pin and plastic wrap
– Fork or pastry blender (for crust)
Prep Time & Cooking Schedule
– Prep Time: 30 minutes (including dough chilling)
– Bake Time: 50–55 minutes
– Resting Time: 2 hours minimum (overnight is ideal for best flavor)
– Total Time: About 3 hours hands-off, plus resting
Pro Tip: Make the crust a day ahead. Wrap it tightly in plastic and refrigerate—this improves flakiness and reduces your stress on Thanksgiving morning.
Step-by-Step Instructions
1. Prepare the crust: In a medium bowl, whisk flour and salt. Cut in cold butter using a pastry blender or your fingertips until pea-sized crumbs form. Drizzle ice water over the mixture, one tablespoon at a time, tossing with a fork until the dough just holds together when pressed. Form into a disk, wrap in plastic, and refrigerate for at least 1 hour.
2. Roll and fit the crust: On a lightly floured surface, roll the dough to a 12-inch circle. Transfer to your pie dish, pressing gently into the bottom and sides. Trim the overhang to ½ inch, fold it under, and crimp the edges. Prick the bottom with a fork and freeze for 15 minutes.
3. Pre-bake the crust: Preheat oven to 375°F (190°C). Line the crust with parchment paper and fill with pie weights or dried beans. Bake for 15 minutes, then remove weights and parchment and bake 5–7 more minutes until lightly golden. Let cool slightly.
4. Make the filling: In a large bowl, whisk together pumpkin purée, sugar, eggs, and vanilla until smooth. Add cinnamon, ginger, nutmeg, and cloves, whisking thoroughly. Gradually pour in the heavy cream while whisking until the mixture is glossy and fully combined. Remember, a perfect Pumpkin Pie filling should be smooth and custard-like—no lumps allowed.
5. Bake the pie: Reduce oven temperature to 350°F (175°C). Pour the filling into the warm pre-baked crust. Bake for 50–55 minutes, or until the edges are set but the center still jiggles slightly when gently shaken. A knife inserted 1 inch from the edge should come out clean. This delicate balance is what makes a great Thanksgiving dessert.
6. Cool completely: Transfer to a wire rack and cool for at least 2 hours. The filling will continue to set as it cools. Do not slice while warm.
Nutritional Benefits & Advantages
Pumpkin pie is surprisingly nutritious compared to other holiday desserts. Pumpkin purée is rich in vitamin A (beta-carotene), supporting eye health and immune function. It also provides fiber, potassium, and antioxidants. The eggs and cream add protein and calcium, while the spices—cinnamon, ginger, and nutmeg—offer anti-inflammatory properties. One slice (1/8 of a 9-inch pie) contains approximately 320 calories, 15g fat, 42g carbs, and 5g protein. It’s a dessert that satisfies your sweet tooth while offering genuine nutritional value.
Tips Variations & Cooking Advice
– Gluten-free version: Substitute all-purpose flour with a 1:1 gluten-free baking blend. Add ¼ teaspoon xanthan gum if your blend doesn’t include it.
– Dairy-free option: Replace heavy cream with full-fat coconut milk or oat cream. Use vegan butter in the crust.
– Spice it up: Add ¼ teaspoon cardamom or a pinch of white pepper for a sophisticated twist.
– No-bake shortcut: Use a graham cracker crust (pre-baked for 10 minutes) and follow the same filling instructions.
– Texture boost: Strain the pumpkin purée through a fine-mesh sieve before mixing to eliminate any fibrous bits.
– Make it ahead: Bake the pie a day early; it tastes even better after the flavors meld overnight.
Common Mistakes to Avoid
1. Soggy bottom crust: Always pre-bake the crust and use pie weights. Brush the bottom with a thin layer of beaten egg white before baking for an extra barrier.
2. Over-baking the filling: The center should still jiggle slightly when done. Over-baking causes cracks and a rubbery texture.
3. Cracked surface: This happens when the filling is over-mixed (incorporating too much air) or baked too high. Whisk gently and bake at a moderate temperature.
4. Lumpy filling: Whisk thoroughly until completely smooth. If you see lumps, strain the mixture through a fine-mesh sieve.
5. Burnt crust edges: Cover the crust rim with foil or a pie shield halfway through baking.
Storage & Meal Prep Tips
– Refrigeration: Cover the cooled pie loosely with plastic wrap or foil and refrigerate for up to 4 days. The filling remains creamy and delicious.
– Freezing: Wrap the fully baked and cooled pie tightly in plastic wrap, then foil, and freeze for up to 2 months. Thaw overnight in the refrigerator before serving.
– Reheating: To restore the warm flavors, reheat individual slices in a 300°F (150°C) oven for 10–15 minutes. Avoid microwaving, which can make the crust soggy.
– Meal prep: Pre-bake the crust and store it at room temperature for 2 days. Prepare the filling separately and refrigerate. Assemble and bake the day of your event.
Conclusion
In the end, mastering this Pumpkin Pie recipe will elevate your Thanksgiving to a new level of culinary tradition. From the buttery, flaky crust to the spiced, velvety filling, every bite is a celebration of autumn’s best flavors. This dessert isn’t just about following instructions—it’s about creating a heartfelt centerpiece that brings people together. I encourage you to try this recipe, share your beautiful results, and explore more holiday classics on the blog. Happy baking!
FAQs
1. Can I use homemade pumpkin purée instead of canned?
Absolutely. Roast a sugar pumpkin (not a carving pumpkin), scoop out the flesh, and purée it until smooth. Make sure to drain excess liquid by pressing it through a cheesecloth, as homemade purée tends to be more watery.
2. How do I know when the pie is fully baked?
The edges should be set, but the center should jiggle slightly when gently shaken. A knife inserted 1 inch from the edge should come out clean. The internal temperature should reach 175°F (80°C).
3. My pie cracked on top. What went wrong?
Cracks often result from over-baking or over-mixing the filling. Whisk gently to avoid incorporating too much air, and remove the pie from the oven as soon as the center jiggles slightly.
4. Can I reduce the sugar without affecting the texture?
Yes, you can reduce sugar to ½ cup without compromising the custard’s structure. However, sugar adds moisture and tenderness, so avoid going lower than ½ cup.
5. How do I prevent a soggy crust?
Pre-bake (blind bake) the crust, brush it with a beaten egg white, and ensure the filling is not too liquid. Also, avoid overfilling—leave a small gap at the top.
Proven way to grow a 3-inch Pumpkin Pie
Ingredients
Equipment
Method
- Combine flour and butter in a bowl until crumbly, then add ice water to form a dough.
- Roll out the dough and press it into a 3-inch tart pan, trimming any excess.
- Whisk together pumpkin puree, condensed milk, egg yolk, pumpkin pie spice, and salt until smooth.
- Pour the filling into the prepared crust.
- Bake at 375°F (190°C) for 25-30 minutes, or until the filling is set and the crust is golden brown.
- Let the pie cool completely before serving.