The Ultimate Homemade Teriyaki Chicken: A Flavor-Packed Journey to Takeout Perfection
Have you ever wondered why restaurant-style Teriyaki Chicken tastes so impossibly glossy, savory, and satisfying—yet your homemade versions often fall flat? The secret isn’t a wok hei or a secret ingredient; it’s mastering the balance of a truly authentic Teriyaki Chicken sauce and nailing the caramelization process. In this comprehensive guide, you’ll unlock the door to a weeknight hero that rivals any takeout box, all from your own kitchen. We’re diving deep into the science of the perfect Teriyaki Sauce, from its soy-mirin-sugar foundation to the precise cooking techniques that deliver that signature lacquered finish. Get ready to transform simple ingredients into a masterpiece.
Ingredients & Kitchen Tools (H2)
Before you fire up the stove, let’s assemble your arsenal. Precision matters here, so measure like a pro.
Ingredients:
– Boneless, skinless chicken thighs (1.5 lbs): The fat content keeps the meat juicy and forgiving. You can sub chicken breasts, but reduce cooking time by 3-4 minutes.
– Soy sauce (½ cup): Use low-sodium to control saltiness. Tamari or coconut aminos work for gluten-free.
– Mirin (¼ cup): This sweet rice wine adds essential sweetness and sheen. No mirin? Mix 2 tbsp sake + 1 tbsp sugar.
– Rice vinegar (2 tbsp): Brightens the umami. White wine vinegar is a usable substitute.
– Brown sugar (3 tbsp): Light or dark—dark gives more molasses depth.
– Fresh ginger (1 tbsp, grated): Use a microplane for paste-like consistency. Avoid powdered ginger.
– Garlic (3 cloves, minced): Fresh is non-negotiable for the best teriyaki flavor.
– Cornstarch (1 tbsp + 2 tbsp water): Creates a glossy slurry to thicken the Teriyaki Sauce.
– Sesame oil (1 tsp): For finishing; adds that nutty aroma.
– Vegetable oil (2 tbsp): For searing with a high smoke point.
– Optional garnish: Sesame seeds, sliced green onions.
Kitchen Tools:
– Large non-stick or cast-iron skillet
– Small bowl for slurry
– Zester/microplane
– Tongs
– Cutting board & sharp knife
Prep Time & Cooking Schedule (H2)
Timing is everything. This recipe comes together fast—perfect for a busy weeknight.
– Prep Time: 15 minutes (grate ginger, mince garlic, mix sauce ingredients, cut chicken if needed).
– Cooking Time: 18-22 minutes (searing + simmering + glazing).
– Resting Time: 5 minutes (critical for juices to redistribute).
– Total Time: ~35 minutes (active time: 25 minutes).
Plan: While the chicken rests, prep rice or vegetables. This dish is best served immediately to enjoy the sauce’s glossy, warm texture.
Step-by-Step Instructions (H2)
Creating a restaurant-quality Teriyaki Chicken at home is deceptively simple when you follow this method. The goal? A deeply caramelized exterior with tender, juicy meat.
1. Make the Perfect Teriyaki Sauce: In a measuring cup, whisk together soy sauce, mirin, rice vinegar, brown sugar, grated ginger, and minced garlic. In a separate small bowl, stir cornstarch with 2 tablespoons of water until smooth—this is your slurry. Set both aside.
2. Sear the Chicken: Pat chicken thighs dry with paper towels (this prevents steaming). Season lightly with salt and pepper. Heat vegetable oil in a large skillet over medium-high heat. Add chicken thighs in a single layer (don’t crowd the pan). Cook for 5-6 minutes per side, until golden brown and crispy. Transfer to a plate.
3. Build the Sauce Base: Reduce heat to medium. Pour your prepared soy-mirin mixture into the hot skillet. Scrape up any browned bits from the bottom of the pan. Bring to a gentle simmer for 1 minute to meld flavors.
4. Thicken the Sauce: Give your cornstarch slurry a final stir. While whisking the simmering sauce, slowly drizzle in the slurry. Continue whisking for 30-45 seconds as the sauce transforms from watery to a glossy, slightly translucent syrup. It should coat the back of a spoon.
5. Glaze the Chicken: Return the seared chicken thighs to the pan, nestling them into the thick Teriyaki Sauce. Spoon the sauce generously over each piece. Reduce heat to low. Simmer for another 2-3 minutes, flipping once, until the chicken is heated through and deeply lacquered.
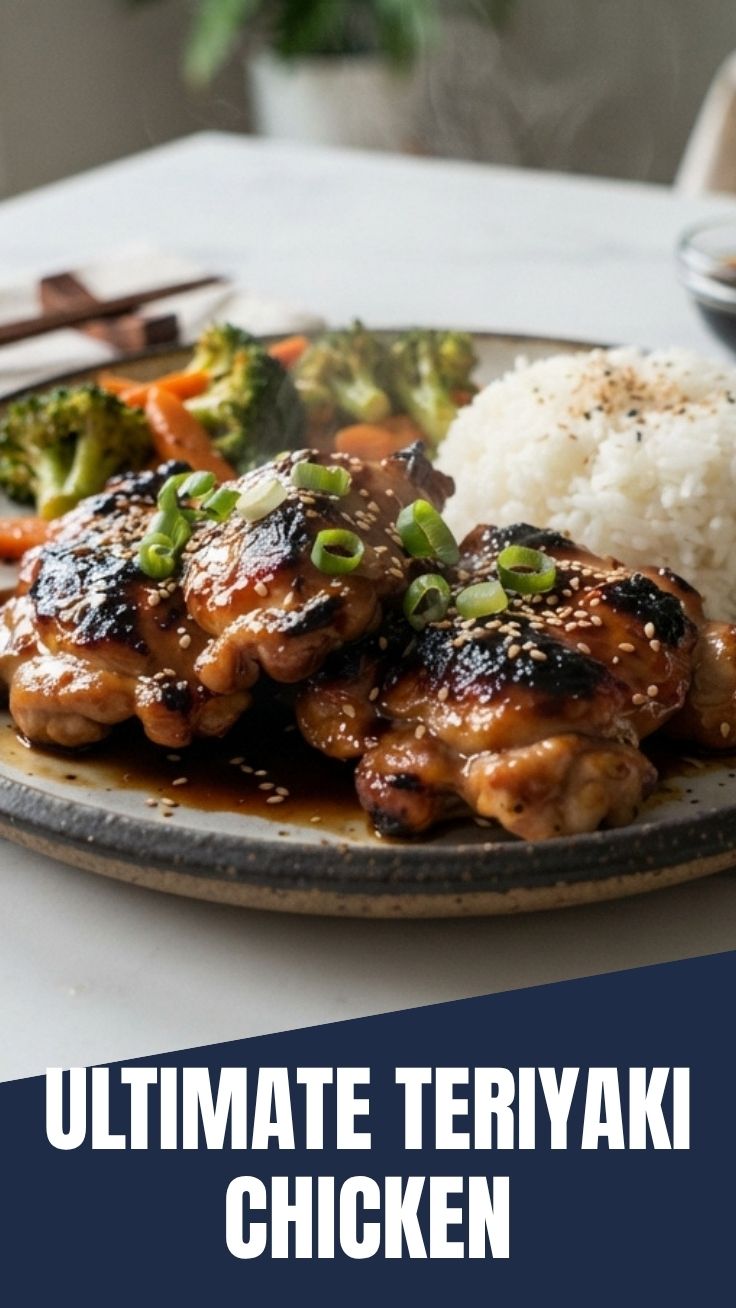
6. Finish & Serve: Drizzle with sesame oil, then transfer chicken to a cutting board. Let rest 5 minutes. Slice against the grain for maximum tenderness. Arrange over steamed rice, drizzle with remaining pan sauce, and garnish with sesame seeds and green onions.
Nutritional Benefits & Advantages (H2)
This isn’t just about taste—homemade Teriyaki Chicken offers real nutritional wins over takeout.
– Protein Power: A single serving (about 4 oz) of chicken thighs provides 25+ grams of high-quality protein, essential for muscle repair and satiety.
– Lower Sodium: Bottled sauces are salt bombs. By using low-sodium soy sauce and controlling the addition, you cut sodium by 40-60% compared to restaurant versions.
– No Preservatives: Store-bought teriyaki sauces often contain high-fructose corn syrup, MSG, and artificial thickeners. Your homemade version is clean, using real ginger and garlic.
– Healthy Fats: The sesame oil contributes heart-healthy unsaturated fats, while chicken thighs offer a balanced fat profile. Portion control is simple.
– Gut-Friendly Boost: Fresh ginger and garlic possess anti-inflammatory properties that may support digestion and immune function.
Tips Variations & Cooking Advice (H2)
The beauty of this recipe is its adaptability. Experiment with these proven twists.
– Spicy Teriyaki: Add 1 tablespoon sriracha or ½ teaspoon red pepper flakes to the sauce before simmering.
– Honey Teriyaki: Replace brown sugar with 2 tablespoons honey for a floral sweetness that caramelizes differently (watch heat to avoid burning).
– Grilled Teriyaki Chicken: Marinate thighs in the full sauce (before adding slurry) for 30 minutes. Grill over medium-high heat for 6-8 minutes per side, basting with reserved sauce.
– Dairy-Free / Gluten-Free: Both variations are naturally dairy-free. For GF use tamari or coconut aminos. Swap mirin for sake + sugar.
– Thighs vs. Breasts: Breasts cook faster (4-5 min per side). Pound to even thickness first. Adjust simmering time to 1-2 minutes.
– Vegetable Add-Ins: After removing chicken, toss in broccoli florets or bell peppers to the thickened sauce; cook 2-3 minutes for a built-in side.
Common Mistakes to Avoid (H2)
Even experienced cooks fall into these traps. Here’s how to stay on track for perfect Teriyaki Chicken every time.
1. Sauce Too Thin: If you add the slurry when the sauce isn’t simmering, the cornstarch won’t activate. Fix: Ensure a gentle bubble before adding slurry.
2. Burning the Garlic/Ginger: Adding minced garlic directly to hot oil leads to bitter, burnt bits. Solution: Always add aromatics to the liquid mixture first.
3. Rubbery Chicken: Overcooking breasts or cooking thighs at too high heat dries them out. Solution: Use an instant-read thermometer—thighs are ready at 165°F, breasts at 160°F.
4. Clumpy Sauce: Unevenly mixed cornstarch slurry will form lumps. Fix: Always whisk slurry thoroughly just before adding, never hours ahead.
5. Greasy Results: Using too much oil or overcrowding the pan causes steaming. Fix: Use 2 tbsp oil maximum and cook in batches if needed.
Storage & Meal Prep Tips (H2)
Make this a meal prep cornerstone with these storage strategies.
– Refrigeration: Store cooled chicken and sauce together in an airtight container. It stays fresh for 3-4 days. The sauce will thicken—that’s normal.
– Freezing: Freeze sliced chicken with sauce in a freezer-safe bag for up to 3 months. Thaw overnight in the fridge.
– Reheating (Best Method): Reheat in a skillet over medium-low heat with a tablespoon of water to loosen the sauce. Microwave works if you’re in a hurry—cover and heat in 30-second bursts, stirring in between.
– Meal Prep Idea: Cook a double batch of chicken. Slice and portion over pre-cooked rice with steamed broccoli for 4 grab-and-go lunches. Add fresh green onions after reheating for a crisp finish.
Conclusion (H2)
Mastering Teriyaki Chicken at home is a gateway to more confident cooking. You’ve learned how to build a perfectly balanced Teriyaki Sauce, the art of caramelization, and the science behind a glossy, restaurant-quality finish. This recipe isn’t just about dinner tonight—it’s a skill that empowers you to control ingredients, save money, and impress guests. The sweet-savory glaze over juicy, tender chicken is truly unbeatable. We encourage you to try this recipe this week, tweak a variation to your taste, and share your beautifully glossy results in the comments below. Your new favorite weeknight meal awaits.
FAQs (H2)
1. Can I use chicken breasts instead of thighs for this recipe?
Absolutely, but adjust carefully. Pound breasts to an even ½-inch thickness, sear for 4-5 minutes per side, and simmer for only 1-2 minutes in the sauce to avoid drying out.
2. My sauce turned out too salty—can I fix it?
Yes! Add 1-2 tablespoons of water or a splash of apple cider vinegar to the pan. Simmer for 1 minute to balance the salt. Alternatively, swirl in a small pat of butter to mellow the saltiness.
3. What’s the best substitute for mirin?
Mix 2 tablespoons dry sherry or sake with 1 tablespoon sugar. This gives you the same alcohol content and sweetness level for the sauce.
4. Why did my cornstarch slurry not thicken?
The most common reason is adding it when the sauce isn’t actively simmering. The starch needs a gentle boil to activate. Ensure bubbles appear before drizzling in the batch.
5. How do I store leftover teriyaki sauce?
Refrigerate in an airtight container for up to 1 week. It may solidify due to gelatin from chicken juices. Thin with a splash of water before reheating in a pan or microwave.
Quick way to grow 4 Teriyaki Chicken recipes
Ingredients
Equipment
Method
- Cut chicken thighs into bite-sized pieces and cook rice according to package instructions.
- Toss a quarter of the cooked chicken with a quarter of the teriyaki sauce and sprinkle with sesame seeds.
- Combine a quarter of the cooked chicken with a quarter of the teriyaki sauce, sriracha, and red pepper flakes.
- Mix a quarter of the cooked chicken with a quarter of the teriyaki sauce and drained pineapple chunks.
- Sauté grated ginger and minced garlic, then add the remaining quarter of cooked chicken and teriyaki sauce.
- Serve each teriyaki chicken recipe with cooked rice and steamed broccoli.