Honey Garlic Chicken: A Sweet, Savory, and Sticky Dinner Winner
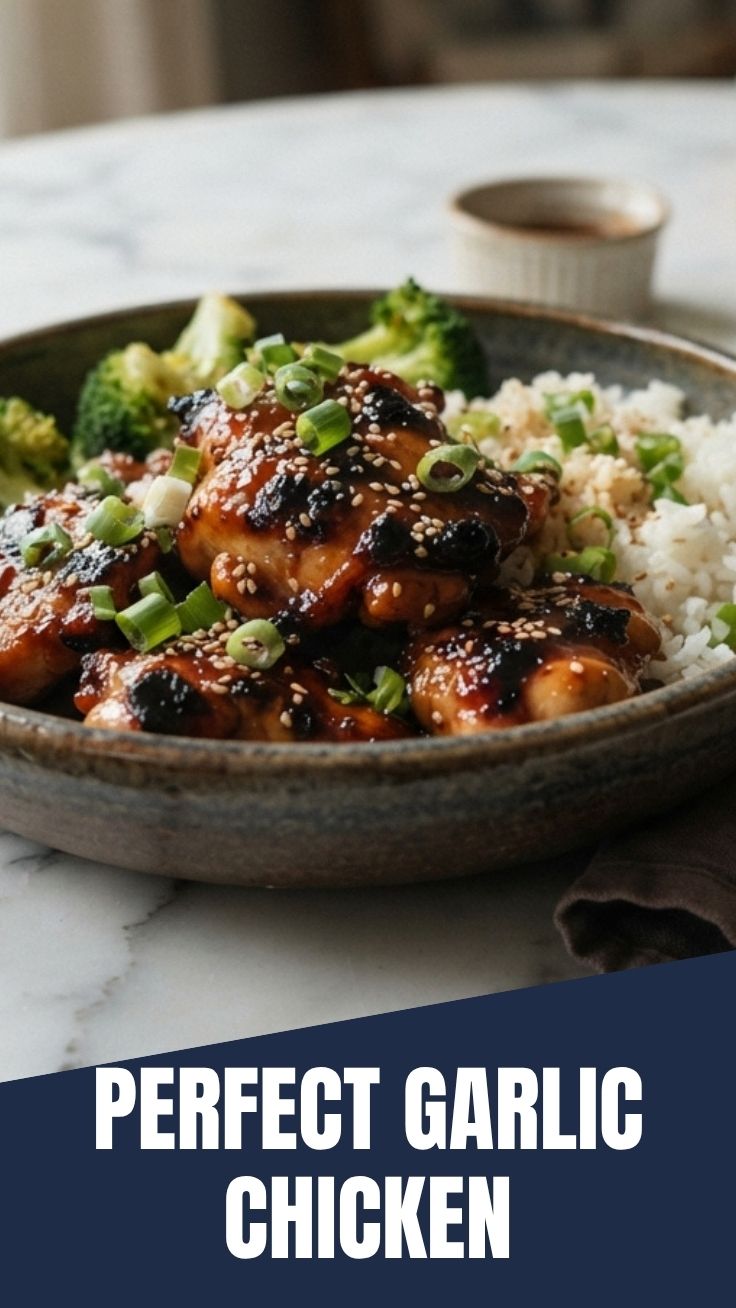
Have you ever craved a restaurant-quality meal that’s actually faster to make at home than ordering takeout? That’s exactly the magic of Honey Garlic Chicken—a dish that balances sticky sweetness, savory umami, and a hint of garlic in every bite. Preparing this recipe at home not only saves you money but also lets you control the quality of ingredients, from the purity of the honey to the freshness of the garlic. Plus, once you master this simple technique, you’ll unlock a foundation for countless Chicken Marinade Recipes that can transform any weeknight dinner into a flavorful event. In this post, I’ll walk you through every step, from ingredient selection to serving suggestions, so you can replicate (and improve upon) that glossy, caramelized perfection.
Ingredients & Kitchen Tools
Ingredients
– Boneless, skinless chicken thighs (1.5 lbs) – Thighs stay juicier than breasts; substitute with chicken breast if you prefer leaner meat.
– Honey (⅓ cup) – Use raw, unfiltered honey for deeper floral notes; maple syrup works as a vegan alternative.
– Soy sauce (¼ cup) – Low-sodium soy sauce prevents oversalting; tamari or coconut aminos for gluten-free.
– Garlic (6 cloves, minced) – Fresh garlic is non-negotiable; avoid pre-minced jars for best flavor.
– Rice vinegar (2 tbsp) – Adds brightness; apple cider vinegar or lemon juice can substitute.
– Cornstarch (1 tbsp) – For thickening the sauce; arrowroot powder works as a starch alternative.
– Sesame oil (1 tsp) – Toasted sesame oil for nuttiness; omit if you prefer a neutral profile.
– Vegetable oil (2 tbsp) – For searing; avocado or grapeseed oil are high-heat friendly.
– Salt and white pepper – White pepper blends visually; black pepper is fine.
– Garnish – Sliced green onions, sesame seeds.
Kitchen Tools
– Large skillet or cast-iron pan (12-inch) – Even heat distribution is key.
– Mixing bowls (small and medium) – For sauce and marinade.
– Whisk or fork – To combine sauce ingredients.
– Tongs – For flipping chicken without piercing.
– Microplane or garlic press – Minces garlic faster than chopping.
– Measuring spoons and cups – Accuracy matters for sauce balance.
Prep Time & Cooking Schedule
| Stage | Time | Notes |
|——-|——|——-|
| Prep (chop garlic, measure) | 10 minutes | Mince garlic, slice green onions. |
| Marinating (optional) | 15–30 minutes | Pat chicken dry, season with salt, then coat with 2 tbsp of the sauce. Skip if short on time. |
| Active cooking | 15 minutes | Sear chicken, then simmer sauce. |
| Resting | 5 minutes | Let chicken rest off heat before slicing to retain juices. |
Total time: 30–40 minutes (including optional marinating). This dish is perfect for a weeknight because you can start the rice cooker while the chicken sears.
Step-by-Step Instructions
1. Prepare the sauce and chicken. In a small bowl, whisk together honey, soy sauce, rice vinegar, minced garlic, and cornstarch until smooth. Set aside. Pat the chicken thighs dry with paper towels—moisture is the enemy of a good sear—and season lightly with salt and white pepper. If you have time, toss the chicken with 2 tablespoons of the sauce and let it rest for 15 minutes. This step is a classic trick in many Chicken Marinade Recipes to infuse flavor quickly.
2. Sear the chicken. Heat vegetable oil in a large skillet over medium-high heat until shimmering. Place the chicken thighs skin-side down (if using skin-on) or just flat in the pan. Cook without moving for 4–5 minutes until a deep golden-brown crust forms. Flip and cook another 3–4 minutes. The internal temperature should reach 165°F (74°C). Transfer to a plate and tent with foil.
3. Simmer and glaze. Reduce the heat to medium-low. Pour the prepared sauce into the same skillet, scraping up any browned bits (fond) with a wooden spoon. Let the sauce bubble gently for 2–3 minutes, stirring occasionally, until it thickens to a syrupy consistency. Return the chicken to the pan, turning to coat each piece in the glaze. Simmer for 1–2 minutes, spooning sauce over the tops.
4. Finish and serve. Drizzle with sesame oil, then garnish with green onions and sesame seeds. Serve immediately over steamed rice, quinoa, or with a side of roasted vegetables for a complete meal. For extra flavor, squeeze a wedge of lime over the top before eating.
Temperature control tip: If the sauce starts to burn or darken too quickly, add a splash of water or low-sodium chicken broth to thin it. The goal is a sticky, not scorched, glaze.
Nutritional Benefits & Advantages
This Honey Garlic Chicken delivers a balanced macronutrient profile. Chicken thighs provide about 20 grams of protein per serving, along with iron and B vitamins. Honey offers natural antioxidants and a lower glycemic index compared to refined sugar, though portion control is still wise. Garlic contributes allicin, which supports immune function and heart health. The dish is also naturally gluten-free if you use tamari instead of soy sauce, making it adaptable for many dietary needs. When paired with brown rice and steamed broccoli, it becomes a fiber-rich, satisfying meal that supports muscle repair and sustained energy.
Tips, Variations & Cooking Advice
– Flavor variations: Add a teaspoon of grated ginger or a pinch of red pepper flakes to the sauce for heat. Swapping honey with maple syrup or agave creates a different sweetness profile.
– Cooking method swap: For an oven-baked version, sear the chicken in an oven-safe skillet, then pour the sauce over and bake at 375°F for 15–20 minutes. For a slow cooker, brown the chicken first, then cook on low for 4 hours with the sauce (thicken with cornstarch slurry at the end).
– Dietary adaptations: To make it dairy-free, ensure your soy sauce is dairy-free (most are). For a low-carb version, use a sugar-free honey substitute or monk fruit sweetener, and serve with cauliflower rice.
– Portion changes: This recipe serves 4; double the sauce ingredients for a larger crowd, but be careful not to overcrowd the pan when searing.
Common Mistakes to Avoid
– Skipping the pat-dry step. Wet chicken steams instead of sears, resulting in a pale, rubbery exterior. Always blot thoroughly.
– Overcooking the sauce. The honey and sugar can burn quickly. Keep the heat at medium-low once the sauce is added, and stir constantly.
– Using a non-stick skillet for searing. Non-stick pans prevent the fond from developing, which is crucial for flavor. Use stainless steel or cast iron.
– Adding cornstarch directly to hot liquid. Always dissolve cornstarch in a tablespoon of cold water first (slurry) to avoid clumps. Alternatively, whisk it into the cold sauce before cooking.
Storage & Meal Prep Tips
– Refrigeration: Store leftover Honey Garlic Chicken in an airtight container for up to 4 days. The sauce will thicken as it cools; reheat gently.
– Freezing: Place cooled chicken and sauce in a freezer-safe bag or container for up to 3 months. Thaw overnight in the refrigerator before reheating.
– Reheating: For best texture, reheat in a skillet over medium-low heat with a splash of water or broth to loosen the sauce. Microwaving works but may dry out the chicken—cover with a damp paper towel and heat in 30-second bursts.
– Meal prep: Cook a double batch and portion into individual containers with rice and vegetables. This makes for quick lunches that taste even better the next day as flavors meld.
Conclusion
Honey Garlic Chicken proves that a few simple pantry staples can create a dinner that’s both impressive and effortless. By mastering the sear and the glaze, you’ve also gained a foundation for experimenting with Chicken Marinade Recipes that can be adapted to any cuisine—from Asian-inspired to Mediterranean. The key takeaways are: dry the chicken well, use fresh garlic, and watch the heat. I encourage you to try this recipe tonight, share your glossy results on social media, or explore other marinade-based dishes on our site. Your kitchen is now the best restaurant in town.
FAQs
1. Can I use chicken breasts instead of thighs?
Yes, but adjust cooking time. Boneless, skinless breasts cook faster (about 3–4 minutes per side) and can dry out more easily. Use a meat thermometer to avoid overcooking.
2. My sauce turned out too thin. How do I fix it?
Mix 1 teaspoon cornstarch with 2 tablespoons cold water, then stir into the simmering sauce. Cook 1–2 minutes longer until thickened. Avoid adding extra cornstarch directly.
3. How can I make this recipe spicier?
Add ½ teaspoon of red pepper flakes, a minced Thai chili, or a drizzle of sriracha to the sauce before simmering. You can also serve with a side of chili oil.
4. Is this recipe gluten-free?
Yes, if you use tamari or coconut aminos instead of traditional soy sauce (which contains wheat). Also check that your cornstarch is certified gluten-free.
5. Can I prepare the sauce ahead of time?
Absolutely. Whisk the sauce ingredients (except cornstarch) together and refrigerate for up to 3 days. Add the cornstarch just before cooking to prevent clumping.
Quick way to grow 4 Honey Garlic Chicken breasts
Ingredients
Equipment
Method
- In a bowl, whisk together honey, soy sauce, and minced garlic to create the honey garlic sauce.
- Season the chicken breasts with black pepper on both sides.
- Heat olive oil in a large skillet over medium-high heat.
- Add chicken breasts to the skillet and sear for 3-5 minutes per side until golden brown.
- Pour the honey garlic sauce over the chicken, reduce heat to medium-low, and simmer for 10-15 minutes, flipping occasionally, until the chicken is cooked through and the sauce has thickened.
- Remove chicken from the skillet and let it rest for a few minutes before serving.
- Spoon extra sauce over the chicken and serve hot with your favorite sides.