The Ultimate Fried Pickle Dip: A Tangy, Creamy Appetizer That Steals the Show
Have you ever craved that perfect crunch of a fried pickle but wished it came in a dippable, shareable form? That’s exactly what this fried pickle dip delivers—all the tangy, savory goodness of your favorite bar snack, transformed into a creamy, crowd-pleasing appetizer. Preparing this at home isn’t just about saving a trip to the restaurant; it’s about controlling quality, customizing flavors, and surprising your guests with something unforgettable. The magic comes from using pickle brine dip as a secret ingredient, adding depth and zing that store-bought versions simply can’t match.
—
Ingredients & Kitchen Tools
For the Dip Base
– 8 oz cream cheese, softened – Provides the creamy, rich foundation. Use full-fat for best texture, or Neufchâtel for lower fat.
– ½ cup sour cream – Adds tanginess and helps achieve a smooth, dippable consistency.
– ½ cup mayonnaise – Contributes richness and a silky finish. Greek yogurt can substitute for a lighter version.
– 1 cup dill pickles, finely chopped – Choose crisp, kosher-style dill pickles. Drain well to avoid watery dip.
– ¼ cup pickle brine – This is where the pickle brine dip essence shines. Use the brine from your pickle jar.
– 1 tbsp fresh dill, chopped – Brightens the flavor. Substitute 1 tsp dried dill if necessary.
– 1 tsp garlic powder – Provides savory depth without overpowering the pickles.
– ½ tsp onion powder – Complements the garlic and pickle flavors.
– ¼ tsp cayenne pepper – Optional but recommended for a subtle heat.
– Freshly ground black pepper to taste.
– Salt sparingly – Pickles and brine are already salty.
For the Crispy Topping (Optional but Highly Recommended)
– ½ cup panko breadcrumbs – Offers superior crunch compared to regular breadcrumbs.
– 2 tbsp butter, melted – Helps the panko brown evenly.
– ¼ cup grated Parmesan – Adds nutty, salty flavor to the topping.
Kitchen Tools
– Mixing bowls (medium and small)
– Rubber spatula
– Chef’s knife and cutting board
– Measuring cups and spoons
– 9-inch pie dish or small baking dish
– Small skillet (for toasting panko, optional)
—
Prep Time & Cooking Schedule
– Prep Time: 15 minutes
– Cook Time (if baking): 20–25 minutes
– Resting Time: 10 minutes after baking
– Chill Time (optional): 1 hour – Chilling the unbaked dip overnight allows flavors to meld beautifully. If you’re short on time, it’s fine to bake immediately.
Timing Note: Perfect for planning ahead. You can mix the dip base the night before, then simply add the topping and bake just before serving. This makes it an excellent choice for parties and holiday gatherings.
—
Step-by-Step Instructions
Step 1: Prepare the Base
In a medium mixing bowl, combine softened cream cheese, sour cream, and mayonnaise. Beat with a rubber spatula or hand mixer until smooth and completely lump-free.
Step 2: Incorporate Pickle Elements
Fold in the finely chopped dill pickles. Then add the pickle brine dip component—the ¼ cup pickle brine—and stir gently. The brine is key: it provides that unmistakable sour tang that defines this dip. Add fresh dill, garlic powder, onion powder, cayenne (if using), and fresh black pepper. Taste and adjust seasoning. Remember, the pickles and brine add salt, so go easy.
Step 3: Transfer to Baking Dish
Spread the mixture evenly into a 9-inch pie dish or small baking dish. Smooth the top with a spatula.
Step 4: Make the Crispy Topping
In a small skillet over medium heat, melt butter. Add panko breadcrumbs and stir constantly for 2–3 minutes until golden and fragrant. Remove from heat, stir in Parmesan cheese, and let cool slightly.
Step 5: Bake
Preheat oven to 375°F (190°C). Sprinkle the panko-Parmesan mixture evenly over the dip. Bake for 20–25 minutes until bubbly around the edges and the topping is deep golden brown.
Pro Tips:
– Temperature Control: If the topping browns too quickly, tent loosely with foil. For a deeper, crunchier topping, broil for 1–2 minutes at the end, watching closely.
– Texture Cues: The dip is ready when it’s hot throughout and slightly puffed at the edges. Let it rest 10 minutes before serving—this allows the texture to set slightly for easier dipping.
– Seasoning Adjustment: If your pickles are particularly sweet or mild, add an extra splash of brine or a pinch of salt. This fried pickle dip should be assertively tangy.
—
Nutritional Benefits & Advantages
While this dip is undeniably indulgent, it offers some surprising benefits:
– Probiotics from Pickles: Fermented dill pickles contain beneficial bacteria that support gut health. The brine is especially probiotic-rich.
– Calcium from Cream Cheese and Parmesan: Provides a respectable amount of calcium for bone health.
– Low-Carb Friendly: With minimal carbohydrates and no added sugar, this dip fits well into keto and low-carb diets. Serve with cucumber rounds, celery sticks, or pork rinds.
– Nutrient Density: Dill is rich in vitamins A and C, and pickles provide electrolytes like sodium and potassium.
—
Tips Variations & Cooking Advice
Flavor Variations
– Spicy Ranch Version: Add 1 tbsp ranch seasoning mix and ½ tsp smoked paprika.
– Classic Southern Style: Mix in ¼ cup finely chopped crispy bacon and a dash of hot sauce.
– Herb Garden Twist: Substitute fresh dill with equal parts fresh chives and parsley.
Ingredient Swaps
– Dairy-Free: Use vegan cream cheese, vegan sour cream, and vegan mayonnaise. Omit Parmesan topping or use a dairy-free alternative.
– Gluten-Free: Replace panko with crushed pork rinds or gluten-free panko. Ensure all seasonings are certified gluten-free.
Alternative Cooking Methods
– No-Bake Version: Skip the panko topping entirely. Simply mix, chill for 1 hour, and serve cold. This version is perfect for summer picnics.
– Air Fryer: Transfer dip to an oven-safe dish that fits your air fryer basket. Cook at 350°F for 12–15 minutes, checking for bubbly edges.
– Slow Cooker: Combine all ingredients (except topping) in a small slow cooker. Cook on low for 2 hours. Add crispy panko topping just before serving.
Portion Changes
– Crowd Size: Easily double or triple the recipe. For large parties, consider using a 9×13 baking dish and increase baking time by 5–10 minutes.
—
Common Mistakes to Avoid
1. Watery Dip Caused by Undrained Pickles – Always drain and pat pickles dry with paper towels after chopping. Excess moisture creates a runny dip that won’t hold its shape.
2. Overly Salty Flavor – Since pickles and brine are salty, taste before adding extra salt. Start with minimal salt and adjust later.
3. Burnt Topping with Cold Center – This happens when the oven is too hot. Bake at a moderate 375°F and check for bubbling edges as the doneness cue.
4. Lumpy Cream Cheese – Always bring cream cheese to room temperature before mixing. Cold cream cheese creates lumps that won’t incorporate smoothly.
5. Forgetting the Brine – The pickle brine dip element is non-negotiable. Without it, the dip lacks the characteristic tang that makes it taste authentically “fried pickle.”
—
Storage & Meal Prep Tips
– Refrigeration: Store leftover dip in an airtight container in the refrigerator for up to 5 days. The topping will lose its crunch but the flavor remains excellent.
– Freezing: The unbaked dip base (without topping) freezes well for up to 3 months. Thaw overnight in the refrigerator, then add fresh topping and bake as directed.
– Reheating: For best results, reheat in a 350°F oven for 10–15 minutes or until warmed through. The microwave works in a pinch (60–90 seconds), but the topping will be soft.
– Meal Prep Tip: Prepare the dip base up to 2 days ahead. Keep the topping components separate and assemble just before baking. This saves time while ensuring the crunchiest results.
—
Conclusion
This fried pickle dip proves that great appetizers don’t need complicated techniques—just bold flavors and smart ingredient choices. The secret lies in harnessing pickle brine dip as a flavor powerhouse, transforming a simple cream cheese base into something truly memorable. Whether you serve it with crunchy chips, fresh vegetables, or crispy pickle spears, this dip will disappear fast. Give it a try at your next gathering, and watch your guests ask for the recipe. For another tangy twist, explore our Fried Pickle Dip or try making pickle brine dip as a companion appetizer.
—
FAQs
1. Can I use sweet pickles instead of dill pickles?
No, sweet pickles will drastically alter the flavor profile. Dill pickles provide the essential tanginess. For a milder version, use half sweet and half dill, but adjust brine amounts accordingly.
2. My dip turned out too salty. How can I fix it?
Add a small amount of sour cream or plain cream cheese to dilute the saltiness. You can also mix in a little unseasoned Greek yogurt. For future batches, reduce the added salt and use low-sodium pickle brine.
3. Can I make this dip without mayonnaise?
Absolutely. Substitute the mayonnaise with an equal amount of full-fat Greek yogurt or additional sour cream. The texture will be slightly tangier and less rich but still delicious.
4. What should I serve with this dip besides chips?
Cucumber slices, celery sticks, bell pepper strips, and radish wedges work beautifully. For a low-carb option, use pork rinds or cheese crisps. For the full experience, serve alongside fried pickle spears.
5. How can I make the topping gluten-free?
Use gluten-free panko breadcrumbs or crushed pork rinds. If using pork rinds, reduce the butter slightly and omit Parmesan for a dairy-free version that still offers crunch.
Best way to grow Fried Pickle Dip with 3 easy steps
Ingredients
Equipment
Method
- In a medium bowl, combine softened cream cheese, sour cream, dill pickle juice, fresh dill, garlic powder, and black pepper. Mix until well combined and smooth.
- Gently fold in 1 cup of the crushed fried pickles and the shredded Cheddar cheese until evenly distributed.
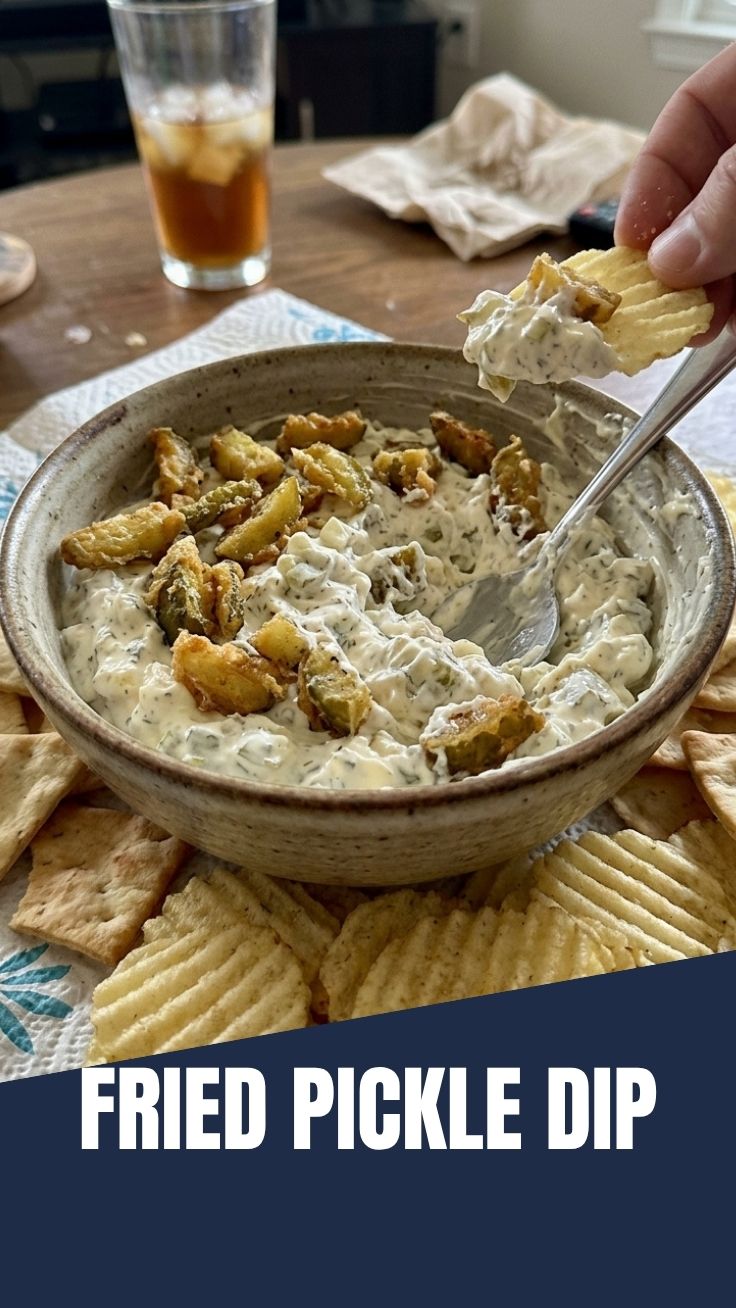
- Transfer the dip to a serving bowl and top with the remaining 1/2 cup of crushed fried pickles. Serve immediately with chips, crackers, or fresh vegetables.