Sweet and Savory Honey Garlic Shrimp: A Quick Weeknight Dinner
Have you ever craved a restaurant-quality dish that comes together in under 20 minutes without the takeout price tag? If you’re ready to transform simple pantry staples into a caramelized, garlicky masterpiece, this Honey Garlic Shrimp is your new go-to. I’ve refined this honey garlic shrimp recipe to be foolproof—no burnt garlic, no rubbery shrimp, just glossy, flavor-packed bites every time. Preparing it at home means you control the sweetness, saltiness, and spice, plus you save money while impressing anyone at the table. Let’s dive into the details that make this dish a weeknight legend.
—
Ingredients & Kitchen Tools
Essential Ingredients (serves 4)
– 1 lb (450g) large shrimp – peeled and deveined, tails on or off (tail-on adds presentation, off makes eating easier). Pat dry thoroughly for better searing.
– 4 cloves garlic, minced – fresh garlic is non-negotiable for that pungent, aromatic kick.
– 3 tbsp honey – use a runny, pure honey. If crystallized, warm slightly before mixing.
– 2 tbsp soy sauce – low-sodium preferred to balance sweetness. Tamari for gluten-free.
– 1 tbsp olive oil – or avocado oil for high-heat cooking.
– 1 tbsp unsalted butter – adds richness and silkiness at the end.
– ½ tsp red pepper flakes – optional, for gentle heat.
– 2 tbsp fresh lemon juice – brightens the glaze and cuts through richness.
– Salt and black pepper – to taste.
– Optional garnishes – chopped parsley, sliced green onions, sesame seeds.
Kitchen Tools
– Large non-stick skillet or cast-iron pan
– Mixing bowl
– Small bowl for sauce
– Tongs or spatula
– Garlic press (optional, but mincing by hand is fine)
Substitutions
– Honey → maple syrup or agave nectar (vegan option).
– Soy sauce → coconut aminos (gluten-free, lower sodium).
– Butter → ghee or vegan butter for dairy-free.
– Shrimp → chicken breast (cubed) or firm tofu for a non-seafood version.
—
Prep Time & Cooking Schedule
– Prep time: 10 minutes (thaw shrimp if frozen, mince garlic, mix sauce)
– Cook time: 6–8 minutes total
– Resting time: 2 minutes (after cooking, let shrimp sit in pan off heat to absorb glaze)
– Marinating time: None required, but you can toss shrimp with a pinch of salt and pepper 5 minutes ahead for better seasoning.
Planning tip: The actual hands-on cooking is lightning fast, so have all ingredients measured and within arm’s reach. This dish waits for no one—once shrimp hit the pan, you’re on a 3-minute timeline.
—
Step-by-Step Instructions
1. Prepare the sauce. In a small bowl, whisk together honey, soy sauce, lemon juice, and red pepper flakes. Set aside.
2. Season the shrimp. Pat shrimp dry, then season lightly with salt and pepper. Avoid over-salting because soy sauce adds salinity.
3. Sear the shrimp. Heat olive oil in a large skillet over medium-high heat until shimmering. Add shrimp in a single layer (work in batches if needed). Cook undisturbed for 1.5–2 minutes until bottoms are golden-pink. Flip and cook another 1 minute. Remove shrimp to a plate.
4. Bloom the garlic. Reduce heat to medium-low. Add butter and minced garlic to the skillet. Sizzle for 30 seconds until fragrant—do not let it brown or it will turn bitter.
5. Glaze the shrimp. Pour in the honey-soy mixture. Let it bubble for 30 seconds, then return shrimp and any accumulated juices. Toss gently to coat for 1–2 minutes until the sauce thickens into a clingy, caramel-like glaze. As you follow this Honey Garlic Shrimp, keep the heat moderate to avoid scorching. This exact honey garlic shrimp recipe ensures the garlic stays aromatic, not acrid.
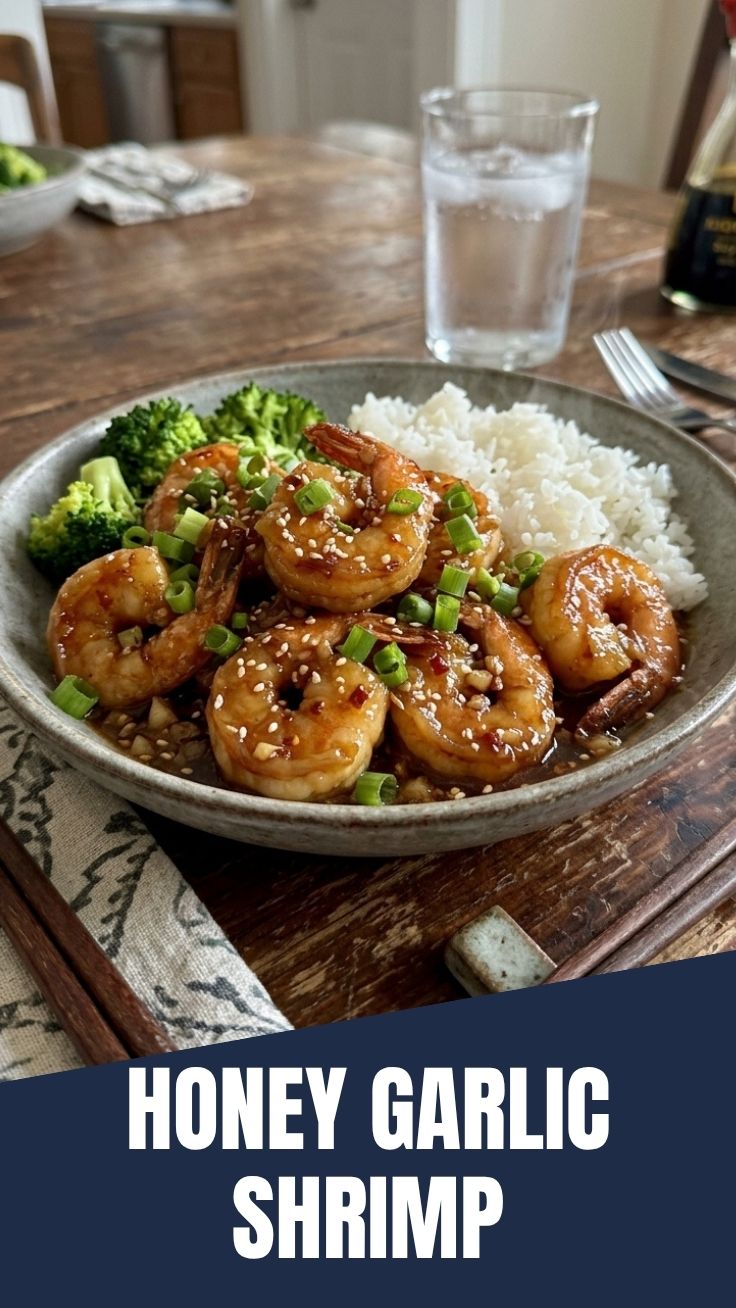
6. Finish and serve. Remove from heat. Taste and adjust salt or honey if needed. Garnish with parsley and sesame seeds. Serve immediately over rice, noodles, or alongside steamed vegetables.
Pro texture cues: Shrimp is done when it curls into a loose “C” shape and turns opaque throughout. An “O” shape means overcooked.
—
Nutritional Benefits & Advantages
– High-quality protein: A 4-ounce serving of shrimp provides about 20g of protein with only 100 calories, supporting muscle repair and satiety.
– Low in carbs, keto-friendly: With only 8g of net carbs per serving (from honey), this dish fits low-carb and keto lifestyles.
– Omega-3s and selenium: Shrimp is rich in anti-inflammatory omega-3 fatty acids and selenium, an antioxidant that supports thyroid function.
– Vitamin boost: Garlic offers allicin, which may support immune health; lemon juice adds vitamin C.
– Portion control built-in: Because shrimp cooks so fast, you’re less likely to overeat compared to heavy casseroles or fried dishes.
Advantage over takeout: Homemade Honey Garlic Shrimp has 60% less sodium and zero MSG, without sacrificing flavor.
—
Tips, Variations & Cooking Advice
Flavor Twists
– Asian ginger version: Add 1 tsp grated fresh ginger with the garlic.
– Spicy Sriracha glaze: Stir 1 tbsp Sriracha or sambal into the sauce.
– Citrusy orange: Replace lemon juice with orange juice and add orange zest.
Ingredient Swaps
– Shrimp → scallops (sear 2 minutes per side, then glaze briefly).
– Honey → brown sugar + 1 tbsp water (dissolve before adding).
– Soy sauce → fish sauce (use 1 tbsp fish sauce + 1 tbsp water for umami bomb).
Cooking Methods
– Air fryer: Toss raw shrimp with oil and seasonings. Air fry at 375°F for 5–6 minutes, then toss with warmed glaze.
– Grill: Thread shrimp onto skewers, grill 2–3 minutes per side, brush with glaze during last minute.
Portion & Dietary Adjustments
– Gluten-free: Use tamari or coconut aminos.
– Dairy-free: Replace butter with coconut oil or olive oil.
– Double batch: Cook shrimp in two batches to avoid overcrowding; otherwise, they steam instead of sear.
—
Common Mistakes to Avoid
| Mistake | Why It Happens | Solution |
|———|—————-|———-|
| Rubbery shrimp | Overcooking or crowding the pan. | Cook only until opaque; use high heat and single layer. |
| Burnt garlic | Garlic added too early or over high heat. | Add garlic on medium-low after removing shrimp. |
| Watery sauce | Not patting shrimp dry enough. | Blot shrimp thoroughly with paper towels before seasoning. |
| Too sweet or salty | Imbalance of honey and soy sauce. | Start with less honey; adjust at the end. Use low-sodium soy sauce. |
| Clumpy glaze | Sauce cooked too long or heat too high. | Keep heat medium; glaze should coat shrimp in 1–2 minutes. |
—
Storage & Meal Prep Tips
– Refrigeration: Store cooled shrimp and sauce in an airtight container for up to 3 days. The glaze will thicken; that’s normal.
– Freezing: Place shrimp in a single layer on a baking sheet, freeze until solid (1 hour), then transfer to a freezer bag. Freeze for up to 1 month. Thaw overnight in the fridge.
– Reheating: Warm in a skillet over low heat with a splash of water or chicken broth to loosen the glaze. Avoid microwave—it can toughen shrimp. Alternatively, reheat in a 300°F oven for 5–7 minutes.
– Meal prep tip: Cook shrimp and sauce separately. Store sauce in a jar; reheat and toss with freshly cooked shrimp for best texture.
—
Conclusion
This Honey Garlic Shrimp proves that extraordinary flavor can come from just a handful of everyday ingredients. The key takeaway: sear hard, glaze quick, and never walk away from the pan. By mastering this honey garlic shrimp recipe, you’ll turn a simple weeknight dinner into a memorable meal that rivals any Asian takeout. I encourage you to try it tonight, snap a photo of your glossy shrimp, and share your experience in the comments. Pair it with steamed jasmine rice and a side of sautéed bok choy for a complete feast!
—
FAQs
1. Can I use frozen shrimp directly?
Yes, but thaw first for even cooking. Place frozen shrimp in a colander under cold running water for 5–7 minutes, then pat dry. Do not cook from frozen—they will release too much water and steam instead of sear.
2. How do I make this less sweet?
Reduce honey to 1½ tablespoons and add an extra ½ tablespoon of soy sauce. You can also add a splash of rice vinegar for acidity to balance.
3. My sauce burned—what happened?
Honey burns quickly over high heat. Always bloom garlic on medium-low, then add sauce and shrimp. If the pan is too hot, the sugars in honey will caramelize into bitter char.
4. Can I use pre-cooked shrimp?
Not recommended. Pre-cooked shrimp will become rubbery when reheated in the glaze. Raw shrimp are best for fresh, tender texture.
5. Is this recipe keto-friendly?
Yes, with a few tweaks: use a keto-friendly sweetener like allulose (same amount) or monk fruit honey substitute, and pair with cauliflower rice. Each serving with real honey has about 8g net carbs.
—
Enjoy your Honey Garlic Shrimp journey—sweet, savory, and absolutely irresistible!
Quick way to grow honey garlic shrimp 5 ways
Ingredients
Equipment
Method
- In a medium bowl, whisk together honey, minced garlic, soy sauce, olive oil, and red pepper flakes (if using) to create the basic honey garlic sauce.
- To the prepared basic sauce, add lemon juice and dried parsley. Toss shrimp in this marinade to coat evenly.
- Heat a large skillet over medium-high heat. Add shrimp and cook for 2-3 minutes per side, until pink and opaque.
- Add sesame oil and sriracha to the basic honey garlic sauce, mixing well. Marinate shrimp in this mixture for 10-15 minutes.
- Preheat oven to 400°F (200°C). Spread shrimp on a baking sheet and bake for 8-12 minutes, or until cooked through, flipping halfway.
- Combine grated fresh ginger and lime juice with the basic honey garlic sauce. Toss shrimp in the sauce to marinate for at least 15 minutes.
- Preheat grill to medium-high heat. Thread shrimp onto skewers and grill for 2-3 minutes per side, until fully cooked.
- Mix sweet chili sauce into the basic honey garlic sauce. Add shrimp to the sauce and ensure they are well coated.
- Heat a wok or large skillet over high heat with a drizzle of oil. Add shrimp and stir-fry for 3-5 minutes until cooked and slightly caramelized.
- Whisk coconut milk and curry powder into the basic honey garlic sauce. Add shrimp to this mixture.
- Cook in a large skillet over medium heat for 5-7 minutes, stirring occasionally, until shrimp are cooked and sauce has thickened slightly.