The Ultimate Guide to Making the Perfect Chicken Salad at Home
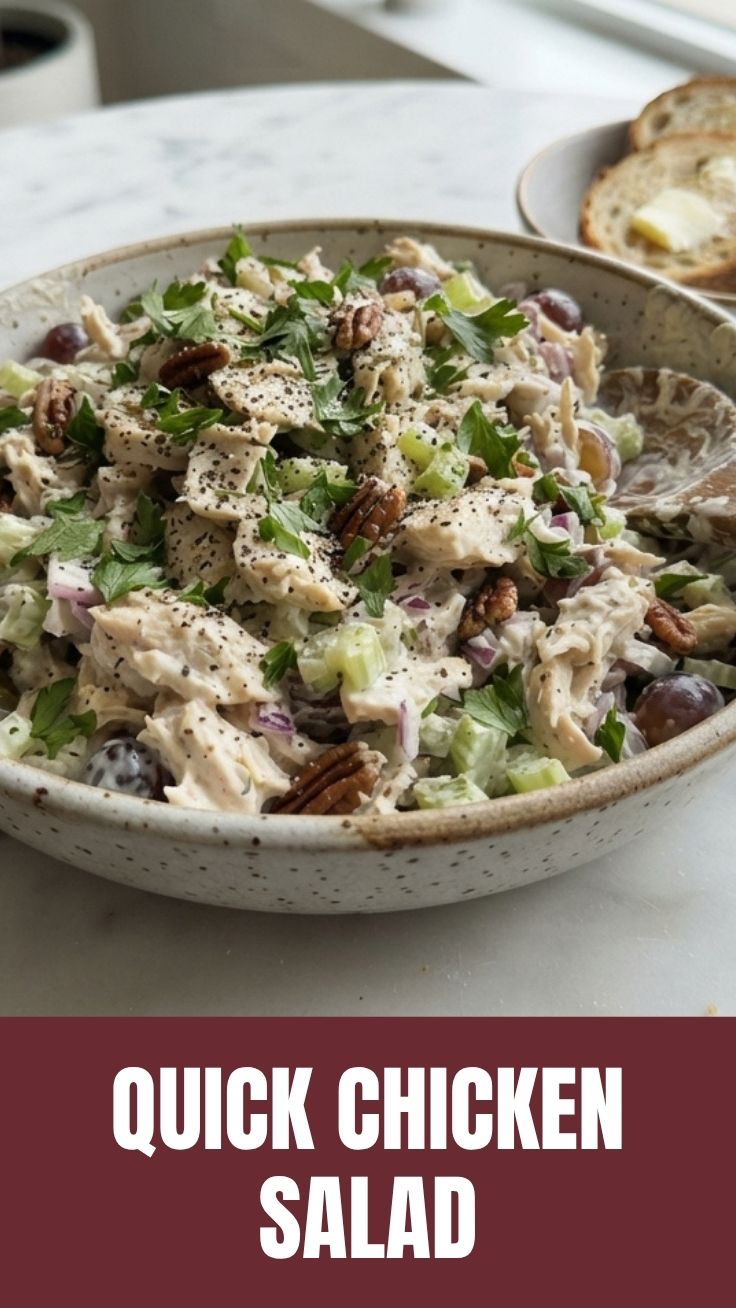
Have you ever wondered why store-bought chicken salad never tastes as fresh and satisfying as the one your grandmother used to make? The secret isn’t just nostalgia—it’s the quality of ingredients and the love that goes into homemade preparation. When you make Chicken Salad from scratch, you control every element, from the tenderness of the chicken to the creaminess of the dressing. This versatile dish can transform a simple lunch into a gourmet experience, and it’s surprisingly easy to master. Whether you’re meal-prepping for the week or hosting a brunch, this recipe delivers consistent, delicious results every time.
—
Ingredients & Kitchen Tools
For the Chicken Salad:
– 3 cups cooked chicken breast (shredded or diced) – Rotisserie chicken works perfectly for convenience.
– 1/2 cup mayonnaise – Use full-fat for creaminess; Greek yogurt can substitute for a lighter version.
– 1 tablespoon Dijon mustard – Adds tang and depth; yellow mustard works in a pinch.
– 1/2 cup celery (finely diced) – Provides crunch and freshness.
– 1/4 cup red onion (minced) – For sharpness; soak in cold water for 10 minutes to mellow the bite.
– 1/4 cup sweet pickles (chopped) – Or use dill pickles for a savory twist.
– 1 tablespoon fresh lemon juice – Brightens flavors and prevents browning.
– Salt and black pepper to taste.
– Optional add-ins: 1/4 cup toasted almonds, 1/2 cup halved grapes, 2 tablespoons fresh parsley, or 1/4 teaspoon paprika.
Kitchen Tools:
– Large mixing bowl
– Sharp knife and cutting board
– Measuring cups and spoons
– Fork or potato masher (for shredding chicken)
– Airtight storage container
—
Prep Time & Cooking Schedule
– Prep time: 15 minutes (including chicken shredding)
– Cook time: 0 minutes (if using pre-cooked chicken) or 25 minutes if cooking raw chicken breasts
– Chilling time: 30 minutes (recommended for best flavor)
– Total time: 45 minutes if cooking from scratch
Planning tip: Prepare the chicken a day ahead by poaching or roasting it. This allows flavors to meld when you assemble the salad the next day. If using rotisserie chicken, you can have this ready in under 20 minutes.
—
Step-by-Step Instructions
1. Prepare the chicken: If cooking from scratch, season two boneless, skinless chicken breasts with salt and pepper. Poach in simmering water for 15–18 minutes until internal temperature reaches 165°F. Let cool slightly, then shred using two forks or dice into small cubes. For rotisserie chicken, remove skin and bones, then shred.
2. Chop the vegetables: Dice celery and red onion into uniform, small pieces. Chop pickles finely. If adding grapes, cut them in half. For almonds, toast them in a dry skillet over medium heat for 2–3 minutes until fragrant.
3. Make the dressing: In a large bowl, whisk together mayonnaise, Dijon mustard, lemon juice, and a pinch of salt and pepper. Taste and adjust seasoning. The dressing should be creamy but not overly thick.
4. Combine ingredients: Add shredded chicken, celery, red onion, pickles, and any optional additions to the bowl. Fold gently with a spatula until evenly coated. Avoid over-mixing, which can make the salad mushy.
5. Chill and serve: Cover and refrigerate for at least 30 minutes. This allows the flavors to meld. For a quick version, serve immediately over lettuce greens or on crusty bread. The Chicken Salad Recipe reaches its peak flavor after a few hours of chilling, so plan ahead for the best results.
Pro tip: For extra moisture, add 1 tablespoon of pickle juice or chicken broth to the dressing. If the salad seems dry after chilling, stir in a little more mayonnaise before serving.
—
Nutritional Benefits & Advantages
This homemade chicken salad is packed with protein (about 25g per serving) from lean chicken breast, which supports muscle repair and satiety. Celery provides fiber and vitamin K, while red onion offers antioxidants and quercetin, which may reduce inflammation. Using Greek yogurt as a mayo substitute cuts calories by 40% while adding probiotics. Compared to store-bought versions, this recipe has no preservatives, less sodium, and customizable fat content. It’s an excellent option for low-carb, keto, or high-protein diets.
—
Tips Variations & Cooking Advice
– Flavor variations: Add 1/2 teaspoon curry powder for an Indian twist, or mix in 1 tablespoon fresh dill for a Scandinavian flair.
– Ingredient swaps: Replace mayonnaise with mashed avocado for a dairy-free/vegan version (use plant-based chicken). Substitute celery with fennel for a licorice note.
– Texture changes: Use a combination of shredded and diced chicken for varied mouthfeel. Add chopped walnuts or pecans for crunch.
– Dietary adaptations: For gluten-free, serve on lettuce wraps or gluten-free crackers. For dairy-free, ensure mayonnaise is vegan-friendly.
– Serving ideas: Stuff into hollowed-out tomatoes, spread on croissants, or use as a dip for vegetable sticks.
—
Common Mistakes to Avoid
1. Overcooking the chicken: Dry, stringy chicken ruins the texture. Use a meat thermometer and remove at 165°F.
2. Soggy salad: Drain pickles and pat vegetables dry. Excess moisture dilutes the dressing.
3. Too much mayonnaise: Start with half the amount; you can always add more. Over-dressing makes it greasy.
4. Skipping the chill time: Serving immediately results in flat flavors. Patience pays off.
5. Uneven chopping: Large chunks of onion or celery overpower the dish. Aim for uniform, bite-sized pieces.
—
Storage & Meal Prep Tips
– Refrigeration: Store in an airtight container for up to 4 days. Place a paper towel on top to absorb excess moisture; replace daily.
– Freezing: Not recommended due to mayo separation upon thawing. However, you can freeze cooked, shredded chicken for up to 3 months and assemble fresh salad later.
– Reheating: Do not microwave. Instead, let refrigerated salad sit at room temperature for 15 minutes before serving. If you prefer it warm, gently pan-sear the chicken salad in a non-stick skillet over low heat for 2–3 minutes.
– Meal prep tip: Prep ingredients separately (shredded chicken, chopped veggies, dressing) and combine only when ready to eat. This keeps textures crisp for up to 5 days.
—
Conclusion
Making this Chicken Salad at home is not only simple but also empowering—you control the quality, flavor, and nutrition. This Chicken Salad Recipe proves that a few fresh ingredients and a little chilling time can yield a dish far superior to anything from a deli counter. Whether you serve it as a sandwich filling, a lettuce wrap, or a dip for crackers, you’ll enjoy a versatile, crowd-pleasing meal. Try it this week and discover why homemade truly is better. Share your creations in the comments or tag us on social media—we’d love to see your twist on this classic!
—
FAQs
1. Can I use canned chicken instead of fresh?
Yes, but drain it well and flake it with a fork. The texture will be softer, so consider adding extra crunch with more celery or nuts.
2. How do I fix a too-salty chicken salad?
Add a squeeze of lemon juice and a pinch of sugar to balance the salt. Or mix in a handful of chopped, unsalted almonds or grapes.
3. What’s the best chicken cut for this recipe?
Boneless, skinless chicken breasts are lean and easy to shred. Thighs add more moisture but contain more fat. Rotisserie chicken offers convenience and flavor.
4. Can I make this dairy-free or vegan?
Absolutely. Use vegan mayonnaise or mashed avocado as a base. Substitute chicken with canned chickpeas (mashed) or shredded jackfruit for a plant-based version.
5. How long will chicken salad last in the fridge?
Properly stored in an airtight container, it stays fresh for 3–4 days. Discard if you notice any sour smell or watery separation after day 5.
How to grow Chicken Salad
Ingredients
Equipment
Method
- In a large bowl, combine the shredded cooked chicken, mayonnaise, chopped celery, and diced red onion.
- Add Dijon mustard, salt, and black pepper to the mixture.
- Stir all ingredients together thoroughly until well combined and the chicken is evenly coated.
- Taste and adjust seasoning as needed, adding more salt, pepper, or mayonnaise to your preference.
- Serve immediately or chill in the refrigerator for at least 30 minutes for best flavor.