The Ultimate Guide to Perfect Homemade Candy Apples
Have you ever bitten into a store-bought candy apple only to find a bland, soggy apple hiding under a rock-hard shell? There’s nothing quite like the crunch of a perfectly coated apple, but achieving that balance between a crisp coating and a juicy, tart apple can feel like a culinary magic trick. Preparing these treats at home isn’t just about saving money—it’s about controlling quality, customizing flavors, and creating a nostalgic experience that store-bought versions simply cannot match. Whether you’re aiming for the glossy red sheen of classic candy apples or the rich, buttery sweetness of caramel apples, mastering this recipe transforms a simple fruit into a show-stopping dessert.
Ingredients & Kitchen Tools
For the Apples:
– 6–8 medium Granny Smith apples (tartness balances sweetness; firm texture holds up to heat)
– 6–8 wooden craft sticks or lollipop sticks (ensure they are food-safe and sturdy)
For the Candy Coating (Red Shell):
– 2 cups granulated white sugar (creates the hard, glass-like shell)
– ½ cup light corn syrup (prevents crystallization)
– ½ cup water
– ½ teaspoon red food coloring (gel or liquid; gel gives deeper color)
– ½ teaspoon cinnamon extract (optional, for warm spice notes)
For the Caramel Coating:
– 1 cup unsalted butter (cubed, for rich flavor)
– 2 cups packed brown sugar (light or dark; dark adds deeper molasses notes)
– 1 can (14 oz) sweetened condensed milk (creates velvety texture)
– ½ cup light corn syrup
– 1 teaspoon vanilla extract
– Pinch of sea salt (enhances sweetness)
Kitchen Tools:
– Heavy-bottomed saucepan (2–3 quart; distributes heat evenly)
– Candy thermometer (essential for precision; avoid guesswork)
– Parchment paper or silicone baking mat (non-stick surface for cooling)
– Pastry brush (for brushing down sugar crystals from pan sides)
– Medium mixing bowls (for prepping coatings)
Optional Substitutions:
– Swap Granny Smith for Honeycrisp or Fuji if you prefer sweeter apples
– Use natural food coloring (beet powder) for a cleaner ingredient list
– Replace corn syrup with honey (will alter texture slightly; candy may be softer)
– Dairy-free caramel: use coconut oil instead of butter and full-fat coconut milk instead of condensed milk
Prep Time & Cooking Schedule
Prep Time: 15 minutes (washing, drying, inserting sticks)
Candy Coating Cook Time: 20–25 minutes (from start to hard crack stage)
Caramel Coating Cook Time: 15–20 minutes (until thick and golden)
Resting/Cooling Time: 30–45 minutes (until coatings are fully set)
Planning Tip: Prepare both coatings simultaneously if making a batch of mixed apples. Start the caramel first as it requires more stirring, then begin the candy coating once caramel is nearly done. This keeps both warm and ready for dipping. For best results, ensure apples are completely dry—any moisture will cause coatings to slide off.
Step-by-Step Instructions
1. Prepare the Apples: Wash apples thoroughly with warm water to remove wax coating (this step is critical—wax prevents adhesion). Dry completely with a clean towel. Insert a wooden stick into the stem end of each apple, pushing about halfway through. Set aside on a parchment-lined baking sheet.
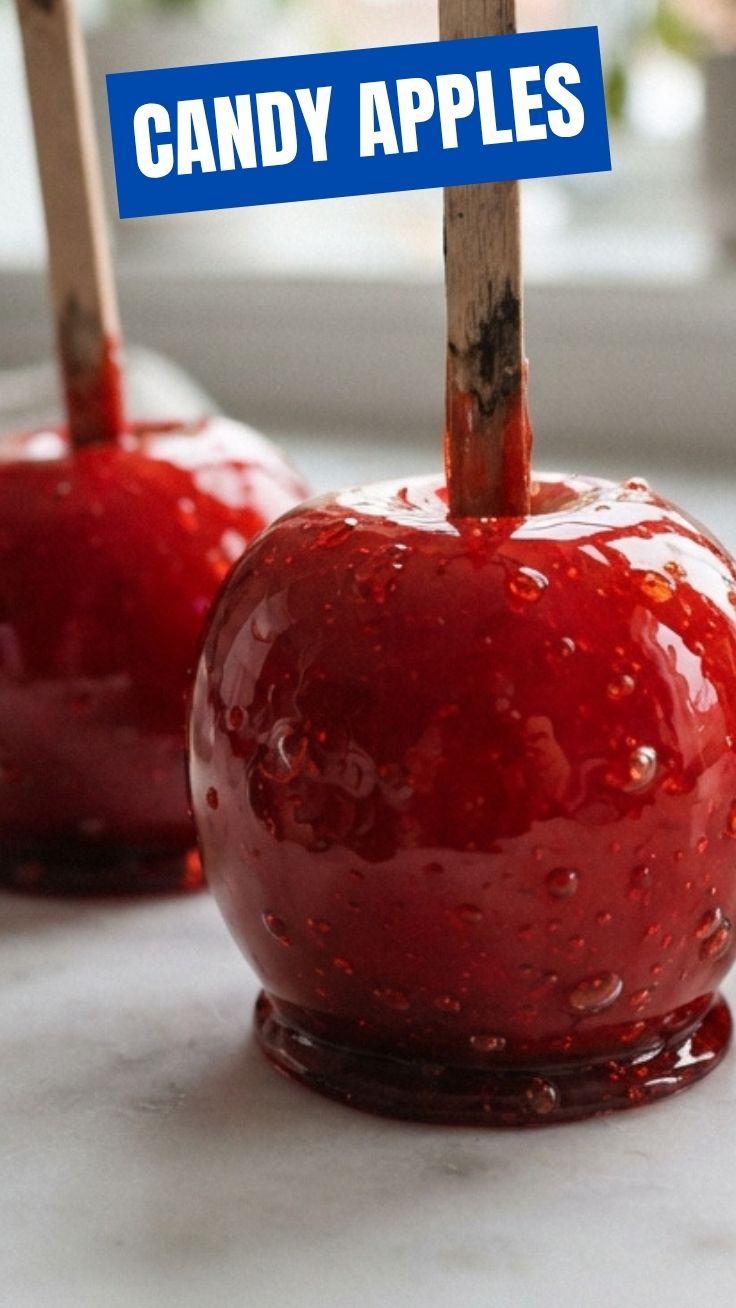
2. Make the Candy Coating: In a heavy-bottomed saucepan, combine sugar, corn syrup, and water. Stir gently over medium heat until sugar dissolves. Attach candy thermometer and bring mixture to a boil without stirring. Once boiling, brush down any sugar crystals from the sides of the pan using a damp pastry brush. Continue cooking until thermometer reaches 300°F–310°F (hard crack stage). Remove from heat, stir in food coloring and cinnamon extract. Let bubbles subside for 30 seconds.
3. Dip the Candy Apples: Working quickly (coating hardens fast), tilt the pan slightly and dip each apple, swirling to cover completely. Lift and allow excess to drip off. Place on prepared parchment. The coating will set in about 2–3 minutes. For perfect candy apples, ensure the coating is not too thick—a thin, even layer cracks beautifully upon biting.
4. Make the Caramel Coating: In a separate saucepan, melt butter over medium heat. Add brown sugar, condensed milk, and corn syrup. Stir constantly until mixture reaches 245°F–248°F (firm ball stage) on the thermometer. This should take about 12–15 minutes. Remove from heat, stir in vanilla and salt. Let cool for 2 minutes until slightly thickened.
5. Dip the Caramel Apples: While caramel is still warm and pourable, dip each apple, rotating to coat evenly. Allow excess to drip off, then place on parchment. For a thicker layer, let the first coat set for 5 minutes, then dip again. The velvety texture of caramel apples pairs wonderfully with chopped nuts or sea salt sprinkled on top immediately after dipping.
6. Cool and Set: Allow all apples to cool completely at room temperature (do not refrigerate while setting—condensation can ruin the glossy finish). Refrigerate only after fully set, about 30 minutes, for a firmer texture.
Nutritional Benefits & Advantages
While candy apples and caramel apples are indulgent treats, they do offer some redeeming qualities. The star ingredient—apples—provides dietary fiber (4–5 grams per medium apple), vitamin C (about 14% of daily value), and antioxidants like quercetin, which supports heart health. Choosing tart Granny Smith apples adds a lower sugar content compared to sweeter varieties, helping balance the overall sweetness of the coating.
The caramel version offers a small amount of calcium from dairy and butter, though it’s higher in saturated fat. For a lighter option, a thin candy coating adds less fat than caramel but more sugar. Portion control is key—one apple is typically enough for a satisfying dessert. As a seasonal treat rather than a daily snack, these apples can fit into a balanced diet without guilt.
Tips Variations & Cooking Advice
Flavor Twists:
– Add ½ teaspoon of peppermint extract to candy coating for a holiday spin
– Stir ¼ cup of peanut butter into warm caramel for a nutty depth
– Sprinkle crushed freeze-dried strawberries or edible glitter onto wet candy coating
Dietary Adaptations:
– Gluten-Free: Both coatings are naturally gluten-free (verify corn syrup brand)
– Dairy-Free Caramel: Use vegan butter and oat-based condensed milk
– Keto-Friendly: Use a sugar-free hard candy recipe with erythritol and monk fruit (will need a different cooking technique)
Cooking Methods:
– For a quicker set, use a microwave for caramel (heat in 30-second bursts, stirring between)
– Oven method for candy: not recommended due to uneven heating
– Air-fryer step: set apples in air fryer at 350°F for 5 minutes to soften coating slightly for easier slicing
Portion Changes:
– Mini candy apples: use small lady apples or cut large apples into wedges, insert toothpicks, and dip
– Candy apple bites: core and slice apples horizontally, then dip each ring
Common Mistakes to Avoid
1. Soggy Apples: This happens when apples aren’t dried thoroughly or when they are refrigerated before setting. Always dry apples with a paper towel and let them rest at room temperature until fully set.
2. Grainy Candy Coating: Crystallization occurs if sugar crystals fall into the pan or if you stir during boiling. Fix by brushing down pan sides with water and avoiding stirring once the mixture boils.
3. Caramel Too Thin: If caramel runs off the apple, it hasn’t reached the correct temperature. Use a candy thermometer and aim for 245°F–248°F. If it’s still too thin, cook for another 2–3 minutes.
4. Coating Sliding Off: This is almost always due to apple wax. Scrub apples with hot water and a little vinegar, then dry thoroughly. The coating needs a clean, dry surface to grip.
5. Sticky Candies in Humid Weather: High humidity prevents candy from setting properly. Only make these on dry days (below 60% humidity) or run a dehumidifier in the kitchen.
Storage & Meal Prep Tips
Refrigeration: Store in an airtight container separated by parchment paper layers. Do not stack apples directly—they will stick. Refrigerated candy apples stay fresh for up to 5 days, while caramel apples last 3–4 days.
Freezing: Not recommended for candy apples (coating becomes brittle and cracks upon thawing). Caramel apples can be frozen for up to 2 months. Wrap each individually in plastic wrap, then foil, and thaw in the refrigerator overnight.
Reheating: Caramel apples can be reheated in the microwave for 10–15 seconds to soften the coating. Candy apples should not be reheated—they lose their signature crunch.
Meal Prep: Make the caramel coating up to 3 days in advance and store in the refrigerator. Reheat gently on the stovetop before dipping. Candy coating must be made fresh, as it hardens quickly and cannot be remelted.
Conclusion
Creating these nostalgic treats at home is a rewarding experience that lets you control every aspect of flavor and quality. From the glossy, crackling shell of candy apples to the soft, buttery richness of caramel apples, each bite delivers a perfect balance of sweet and tart. We’ve covered the essential techniques—from selecting the right apples to mastering the temperature—ensuring your first batch turns out beautifully. Don’t be afraid to experiment with toppings, colors, or flavor extracts to make these apples your own. Share your creation with friends and family, or explore more dessert recipes to continue your culinary journey. The joy of that first satisfying crunch is worth every moment in the kitchen.
FAQs
Q: Can I use any type of apple for candy apples?
A: Firm, tart apples like Granny Smith work best because their acidity balances the sweet coating. Softer apples like Red Delicious may become mushy during the dipping process.
Q: My candy coating turned out grainy—what went wrong?
A: Graininess is usually caused by sugar crystallization. This happens if you stir the mixture after it starts boiling, or if sugar crystals from the sides of the pan fall back into the syrup. Use a wet pastry brush to wash down the pan sides and avoid stirring.
Q: How do I prevent caramel from sliding off the apples?
A: Ensure apples are completely dry and free of wax. Wash them in warm water with a splash of vinegar, then dry thoroughly. Also, let the caramel cool slightly before dipping—if it’s too hot, it will run off.
Q: Can I make these apples dairy-free or vegan?
A: Yes! For vegan caramel, use coconut oil, plant-based butter, and sweetened condensed coconut milk. The candy coating is naturally dairy-free, but check the food coloring to ensure it’s vegan-friendly.
Q: How long do homemade candy apples stay fresh?
A: Stored in an airtight container in the refrigerator, candy apples last up to 5 days. Caramel apples last 3–4 days. Avoid stacking them directly to prevent sticking.
Best way to grow 5 Candy Apples
Ingredients
Equipment
Method
- Wash and thoroughly dry the apples, then remove the stems and insert wooden skewers into the core of each apple.
- In a medium saucepan, combine the sugar, corn syrup, and water, then cook over medium-high heat until the sugar dissolves.
- Continue cooking without stirring until the mixture reaches 300-310°F (149-154°C) on a candy thermometer, then remove from heat and stir in the food coloring and vanilla extract.
- Carefully dip each apple into the hot candy mixture, turning to coat evenly, and allow any excess to drip off.
- Place the coated apples on a parchment-lined baking sheet and let them cool completely until the candy shell hardens.