Why These Peanut Butter Blossoms Deserve a Spot in Your Kitchen
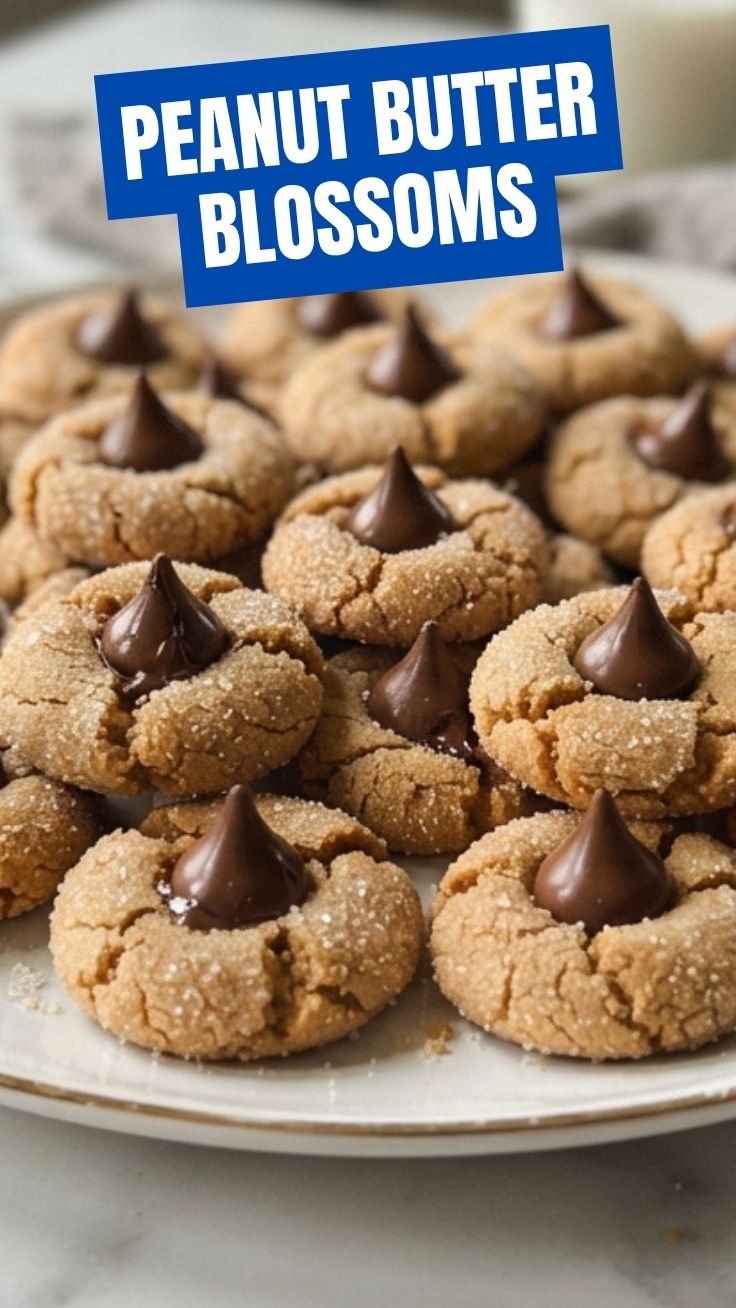
Have you ever bitten into a soft, chewy cookie only to discover a perfect chocolate kiss nestled in the center? That magic combination is exactly what makes Peanut Butter Blossoms an enduring favorite. While store-bought versions are convenient, preparing them at home gives you control over ingredients, texture, and freshness. The foundation of these cookies is, of course, classic peanut butter cookies, but with a holiday-ready twist. In this post, you’ll learn how to nail the perfect balance of nutty dough and melted chocolate—no pastry degree required.
—
Ingredients & Kitchen Tools
Ingredients
– 1/2 cup unsalted butter, softened – Adds richness and helps cookies spread evenly.
– 1/2 cup creamy peanut butter – Use natural or commercial; avoid oily separation for best results.
– 1/2 cup granulated sugar (plus extra for rolling) – Creates a crisp exterior.
– 1/2 cup packed light brown sugar – Provides moisture and depth of flavor.
– 1 large egg – Binds the dough; room temperature works best.
– 1 teaspoon vanilla extract – Enhances the nutty notes.
– 1 3/4 cups all-purpose flour – Substitute with a 1:1 gluten-free blend if needed.
– 1 teaspoon baking soda – Leavening for a soft, puffy texture.
– 1/2 teaspoon salt – Balances sweetness.
– 24–30 milk chocolate kisses (Hershey’s or similar) – Unwrapped, room temperature.
Kitchen Tools
– Electric mixer (hand or stand) – Makes creaming effortless.
– Medium mixing bowls
– Baking sheets (lined with parchment or silicone mats)
– Wire cooling rack
– Small bowl for rolling sugar
– Measuring cups and spoons
—
Prep Time & Cooking Schedule
– Prep time: 20 minutes (including rolling and shaping)
– Chill time: 30 minutes (optional but recommended for less spread)
– Bake time: 10–12 minutes at 350°F (177°C)
– Cooling & assembly: 5–8 minutes after baking
Plan ahead: The dough can be refrigerated for up to 2 days. If you’re in a rush, skip the chill and bake immediately—just expect slightly flatter cookies.
—
Step-by-Step Instructions
1. Preheat oven to 350°F (177°C). Line two baking sheets with parchment paper.
2. Cream butter, peanut butter, and sugars with an electric mixer on medium speed until light and fluffy (about 2 minutes). Scrape the bowl halfway through.
3. Add the egg and vanilla; beat just until combined. Avoid overmixing—this toughens the dough.
4. Whisk together flour, baking soda, and salt in a separate bowl. Gradually add to the wet mixture on low speed until no streaks remain.
5. Chill the dough (optional): wrap in plastic and refrigerate for 30 minutes. Chilling prevents excessive spreading and keeps the centers soft.
6. Shape and coat: Roll 1-tablespoon portions into balls, then roll each ball in granulated sugar. Place them 2 inches apart on prepared sheets.
7. Bake for 10–12 minutes until the edges are lightly golden but the centers still look slightly underdone. Remove from oven.
8. Immediately press one chocolate kiss into the center of each warm cookie. Let the cookie sit on the sheet for 2 minutes to allow the chocolate to soften, then transfer to a wire rack to cool completely.
9. Pro tip: If the chocolate starts to melt excessively, refrigerate the cookies for 5 minutes before serving. This keeps the kiss intact yet soft.
At this stage, your Peanut Butter Blossoms are nearly ready. The secret to a perfect blossom? Don’t overbake—the residual heat will finish cooking the cookie while you add the kiss. And remember, these are essentially upgraded peanut butter cookies, so any peanut butter cookie recipe can be adapted with a chocolate center.
—
Nutritional Benefits & Advantages
Peanut butter provides heart-healthy monounsaturated fats and plant-based protein (about 4g per cookie). Dark chocolate kisses (if you swap) offer antioxidants, while the moderate sugar content makes these a balanced occasional treat. Compared to store-bought cookies, homemade versions allow you to cut sugar by 20% without sacrificing taste. Plus, you avoid preservatives and hydrogenated oils.
—
Tips, Variations & Cooking Advice
– Flavor twist: Swap milk chocolate kisses for dark chocolate, white chocolate, or even caramel-filled chocolates.
– Gluten-free: Use a 1:1 gluten-free flour blend plus 1/4 teaspoon of xanthan gum if your blend lacks it.
– Vegan option: Replace butter with plant-based sticks, use a flax egg (1 tbsp flax + 3 tbsp water), and choose dairy-free chocolate.
– Texture change: Add 1/2 cup chopped peanuts for crunch, or use crunchy peanut butter.
– Portion control: Make mini blossoms with 1-teaspoon dough balls and mini kisses—bake 6–8 minutes.
—
Common Mistakes to Avoid
– Overmixing: Once flour is added, mix only until combined. Overworking develops gluten, making tough cookies.
– Skipping the chill: Warm dough spreads too much, leaving no place for the kiss. Chill if you have time.
– Burnt chocolate: If you add kisses immediately from the fridge, they won’t soften. Let them sit at room temperature first.
– Overbaking: The centers should look slightly puffy and pale. They will set as they cool.
– Using oily peanut butter: Natural peanut butter with separated oil can make dough greasy. Stir well and measure after stirring.
—
Storage & Meal Prep Tips
– Room temperature: Store in an airtight container for up to 5 days. Place wax paper between layers to prevent sticking.
– Freezing: Freeze baked cookies for up to 3 months (wrap individually, then place in a freezer bag). Thaw at room temperature.
– Freezing dough: Shape balls, freeze on a tray, then transfer to a bag. Bake from frozen (add 1–2 minutes).
– Reheating: Warm cookies in a 300°F oven for 5 minutes to revive the soft center and slightly melted kiss.
—
Conclusion
Mastering these Peanut Butter Blossoms at home is a rewarding baking project that delivers bakery-level results with simple ingredients. Whether you’re preparing them for a holiday cookie swap or a casual family snack, the combination of nutty, buttery dough and a sweet chocolate center is irresistible. And because they start with classic peanut butter cookies, you’re already on solid ground. Give this recipe a try, then share your photos and tag us—we’d love to see your perfect blossoms!
—
FAQs
1. Can I use natural peanut butter?
Yes, but stir it well and ensure it’s not too oily. If the dough feels greasy, add 1–2 tablespoons of flour.
2. My cookies spread too much—what went wrong?
Either the dough wasn’t chilled, or your butter was too soft. Chill for 30 minutes next time and measure flour correctly.
3. How do I keep the chocolate kiss from melting completely?
Press the kiss in as soon as the cookies come out of the oven, then let them cool on the sheet for only 2 minutes before moving. If it’s very warm, refrigerate for 5 minutes.
4. Can I make these dairy-free?
Absolutely. Use vegan butter (like Earth Balance) and dairy-free chocolate kisses (e.g., Enjoy Life brand). The dough works beautifully.
5. Why do some recipes add extra sugar for rolling?
The sugar coating creates a delicate, crackly crust that contrasts with the soft interior. Don’t skip it if you want that classic look.
Quick way to grow 25 Peanut Butter Blossoms
Ingredients
Equipment
Method
- Preheat oven to 375°F (190°C) and line baking sheets with parchment paper.
- In a small bowl, whisk together flour, baking soda, and salt.
- In a large bowl, cream together butter, granulated sugar, and brown sugar until light and fluffy.
- Beat in peanut butter, egg, and vanilla extract until well combined.
- Gradually add dry ingredients to the wet ingredients, mixing until just combined.
- Roll dough into 1-inch balls and place them about 2 inches apart on the prepared baking sheets.
- Bake for 8-10 minutes, or until edges are lightly golden.
- Immediately press a Hershey's Kiss into the center of each hot cookie.
- Let cool on the baking sheets for a few minutes before transferring to a wire rack to cool completely.