The Ultimate Guide to Perfect Homemade Breadsticks: Crispy, Buttery, and Irresistible
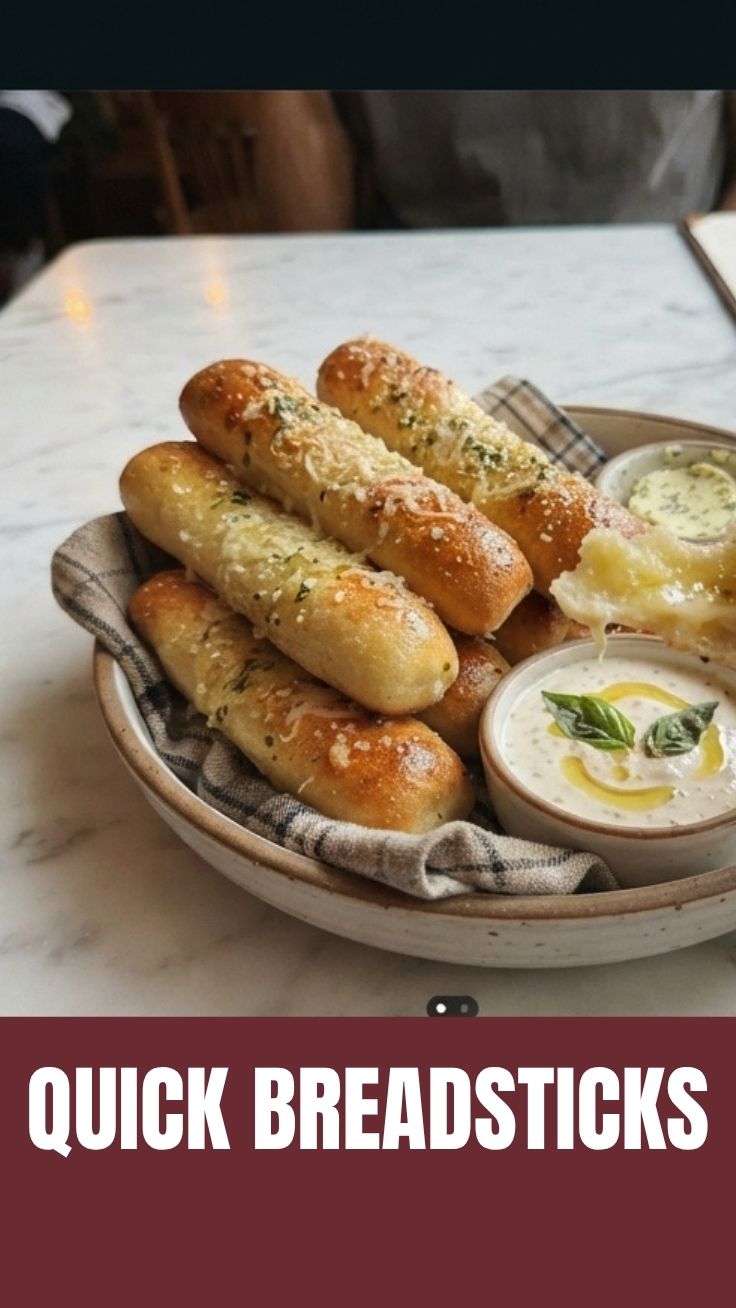
Have you ever wondered why restaurant Breadsticks taste so impossibly good—crispy on the outside, soft on the inside, and dripping with garlicky butter? The secret isn’t a fancy oven or a secret ingredient; it’s a combination of proper dough handling, temperature precision, and a few expert techniques you can easily master at home. Whether you’re serving them alongside pasta, soup, or as a standalone snack, learning to make homemade breadsticks not only saves money but also fills your kitchen with an irresistible aroma. In this guide, you’ll learn how to create bakery-quality breadsticks with minimal effort, using ingredients you likely already have. Let’s dive in and turn your kitchen into a breadstick haven.
Ingredients & Kitchen Tools
Ingredients
– 3 cups all-purpose flour (or bread flour for chewier texture)
– 1 packet (2 ¼ tsp) active dry yeast – ensures proper rise
– 1 cup warm water (110°F) – activates yeast without killing it
– 2 tbsp olive oil – adds moisture and richness
– 1 tsp salt – balances flavor
– 1 tbsp sugar – feeds yeast and aids browning
– 4 tbsp unsalted butter, melted – for brushing
– 2 cloves garlic, minced – for optional garlic version
– ¼ cup grated Parmesan cheese (optional, for topping)
Kitchen Tools
– Large mixing bowl
– Wooden spoon or dough hook
– Measuring cups and spoons
– Baking sheet
– Parchment paper or silicone mat
– Pastry brush
– Kitchen towel or plastic wrap
– Knife or bench scraper (optional)
– Oven thermometer (recommended)
Optional Substitutions
– Gluten-free: Use 1:1 gluten-free flour blend with xanthan gum
– Dairy-free: Substitute coconut oil or vegan butter for butter
– Herb variations: Add dried oregano, rosemary, or thyme to dough
Prep Time & Cooking Schedule
– Prep time: 20 minutes (including mixing and kneading)
– Rising time: 1 hour (first rise) + 30 minutes (second rise)
– Bake time: 12–15 minutes
– Total time: Approximately 2 hours
Plan ahead: Start this recipe when you have at least 2 hours of uninterrupted time. The dough is forgiving, but a warm, draft-free spot (like an oven with the light on) will speed up rising. You can also refrigerate the dough overnight for slower fermentation, which develops deeper flavor.
Step-by-Step Instructions
1. Activate the yeast: In a small bowl, combine warm water (110°F) with sugar and yeast. Stir gently and let sit for 5–10 minutes until frothy. If no bubbles appear, your yeast may be dead—start over.
2. Mix dry ingredients: In a large bowl, whisk together flour and salt.
3. Combine wet and dry: Add the yeast mixture and olive oil to the flour. Stir with a wooden spoon until a shaggy dough forms.
4. Knead the dough: Turn dough onto a floured surface and knead for 8–10 minutes until smooth and elastic. The dough should feel tacky but not sticky. If using a stand mixer, knead with a dough hook for 6 minutes on medium speed.
5. First rise: Place dough in a lightly oiled bowl, cover with a damp towel, and let rise in a warm spot for 1 hour, or until doubled in size.
6. Shape the breadsticks: Punch down dough and divide into 12 equal pieces. Roll each piece into a 6-inch rope. Place on a parchment-lined baking sheet, leaving 1 inch between each.
7. Second rise: Cover with a towel and let rest for 30 minutes. They should puff slightly.
8. Preheat oven: Set oven to 400°F (200°C). For extra crispiness, place a baking pan of water on the bottom rack to create steam.
9. Bake: Brush breadsticks with half the melted butter. Bake for 12–15 minutes until golden brown. Pro tip: For even browning, rotate the baking sheet halfway through.
10. Garlic butter finish: Immediately after baking, brush with remaining melted butter mixed with minced garlic and fresh parsley. This is where the magic happens—the warm breadsticks absorb the garlic flavor perfectly.
11. Optional topping: Sprinkle with Parmesan and coarse salt while still warm.
Temperature tip: If your breadsticks brown too quickly, reduce oven temperature to 375°F. For a softer exterior, skip the water pan—this creates less steam but keeps the crust tender.
Texture cue: Perfect breadsticks should sound hollow when tapped on the bottom and have a light golden color.
Now, while making these, consider experimenting with Garlic breadsticks by doubling the garlic butter or adding a pinch of red pepper flakes for heat. The key is to let the dough fully rise—patience is your best tool.
Nutritional Benefits & Advantages
Homemade breadsticks have distinct advantages over store-bought versions: you control the quality and quantity of ingredients. All-purpose flour provides complex carbohydrates for sustained energy, while olive oil adds heart-healthy monounsaturated fats. Garlic, when used in moderation, offers antibacterial properties and may support immune health. Compared to commercial breadsticks, homemade versions contain no preservatives, hydrogenated oils, or excess sodium. For a healthier twist, use whole wheat pastry flour (mix half with all-purpose) to boost fiber content. Each breadstick contains approximately 120-150 calories (depending on butter and cheese), making them a satisfying but moderate portion.
Tips, Variations & Cooking Advice
– Flavor variations: Add 1 tsp of Italian seasoning, smoked paprika, or rosemary to the flour for aromatic twists.
– Cheese-stuffed: Flatten dough ropes, place a small cube of mozzarella in the center, and seal before rolling.
– Sesame or everything bagel topping: Brush with egg wash before baking and sprinkle with seeds.
– Gluten-free version: Use a high-quality gluten-free flour blend and add 1 tsp of xanthan gum. The dough will be stickier—use wet hands to shape.
– Air fryer adaptation: Cook at 350°F for 8–10 minutes, flipping halfway. They’ll be extra crispy without deep frying.
– Portion flexibility: Cut dough into 16 pieces for thinner, crispier breadsticks (reduce bake time by 2 minutes).
Common Mistakes to Avoid
1. Overproofing the dough: Letting it rise too long (over 2 hours) causes a dense, doughy texture with large air bubbles. Stick to the schedule—set a timer.
2. Under-kneading: A shaggy dough leads to flat, chewy breadsticks. Proper kneading develops gluten for structure and rise. The “windowpane test” (stretch a small piece until it’s translucent without tearing) confirms readiness.
3. Incorrect water temperature: Water above 130°F kills yeast; below 90°F slows activation. Use an instant-read thermometer or test on your wrist—it should feel like warm bathwater.
4. Skipping the second rise: This step relaxes the gluten, ensuring soft, tender breadsticks rather than tough, dense ones.
5. Baking cold dough: If taken straight from the fridge, let it sit at room temperature for 20 minutes before shaping. Cold dough resists rising and becomes heavy.
Storage & Meal Prep Tips
Short-term storage: Keep leftover breadsticks in an airtight container at room temperature for up to 2 days. Line the container with paper towels to absorb excess moisture—they’ll stay crisp on the outside.
Refrigeration: Not recommended, as the refrigerator dries out breadsticks quickly. If you must, wrap them tightly in foil and reheat within 24 hours.
Freezing: Freeze baked breadsticks (unbuttered) on a baking sheet, then transfer to a freezer bag for up to 3 months. To reheat, bake at 350°F for 5–8 minutes from frozen, brush with butter after.
Reheating for texture: For best results, reheat in a 375°F oven for 3–5 minutes. Avoid microwaving, which makes them rubbery. If you must, wrap in a damp paper towel and microwave for 15 seconds.
Meal prep: Prepare dough through the first rise, then refrigerate up to 24 hours. When ready, shape and bake directly from the fridge (add 5 minutes to second rise). You can also freeze shaped, unbaked breadsticks on a tray, then transfer to a bag—bake from frozen, adding 3–4 minutes to the bake time.
Conclusion
Perfecting homemade Breadsticks is one of those rewarding kitchen milestones—it’s simple enough for a weekday dinner but impressive enough for guests. By mastering yeast activation, proper kneading, and the art of the double rise, you’ll consistently produce golden, buttery sticks that rival any restaurant. Don’t forget to experiment with Garlic breadsticks for an extra punch of flavor. Whether you serve them with marinara, Alfredo, or olive oil and balsamic, these homemade treats will become a family favorite. Try them this week—your taste buds will thank you, and your kitchen will smell divine.
FAQs
Q: Can I use instant yeast instead of active dry yeast?
Yes, in equal amounts. Skip the activation step: mix instant yeast directly with the flour and warm water. The dough will rise faster (about 30 minutes).
Q: Why are my breadsticks hard and dry?
Overbaking is the most common cause—check at 12 minutes. Also, ensure you’re not skipping the second rise. If they’re still dry, increase water by 2 tablespoons next time.
Q: Can I make these without butter for a vegan version?
Absolutely. Use olive oil or coconut oil for brushing. Garlic oil works beautifully. The dough itself is already vegan-friendly if you use sugar (which is usually vegan).
Q: How do I get extra crispy breadsticks?
Bake at 425°F for 10–12 minutes, and use a baking stone or preheated baking sheet. The steam pan method also helps. For even more crunch, brush with a mixture of egg white and water before baking.
Q: My dough didn’t rise—what went wrong?
Likely dead yeast (expired or water too hot/cold). Also, cold kitchens slow down rising—place dough in an oven with the light on (around 90°F). Test your yeast before starting to save time.
Proven way to grow your own 7 Breadsticks
Ingredients
Equipment
Method
- In a large bowl, combine flour, yeast, sugar, and salt, then gradually add warm water and olive oil, mixing until a shaggy dough forms.
- Knead the dough on a lightly floured surface for about 5-7 minutes until it becomes smooth and elastic.
- Place the dough in a lightly oiled bowl, cover it with plastic wrap, and let it rise in a warm place for 1 hour, or until doubled in size.
- Preheat your oven to 400°F (200°C) and lightly grease a baking sheet.
- Punch down the risen dough, divide it into 7 equal pieces, and roll each piece into a 10-inch long breadstick shape.
- Arrange the breadsticks on the prepared baking sheet, then bake for 12-15 minutes until golden brown.
- While the breadsticks are baking, mix melted butter, garlic powder, and dried oregano in a small bowl.
- Once baked, brush the warm breadsticks with the garlic butter mixture and sprinkle with grated Parmesan cheese before serving.