The Ultimate Heirloom Tomato Tart: A Summer Celebration on a Plate
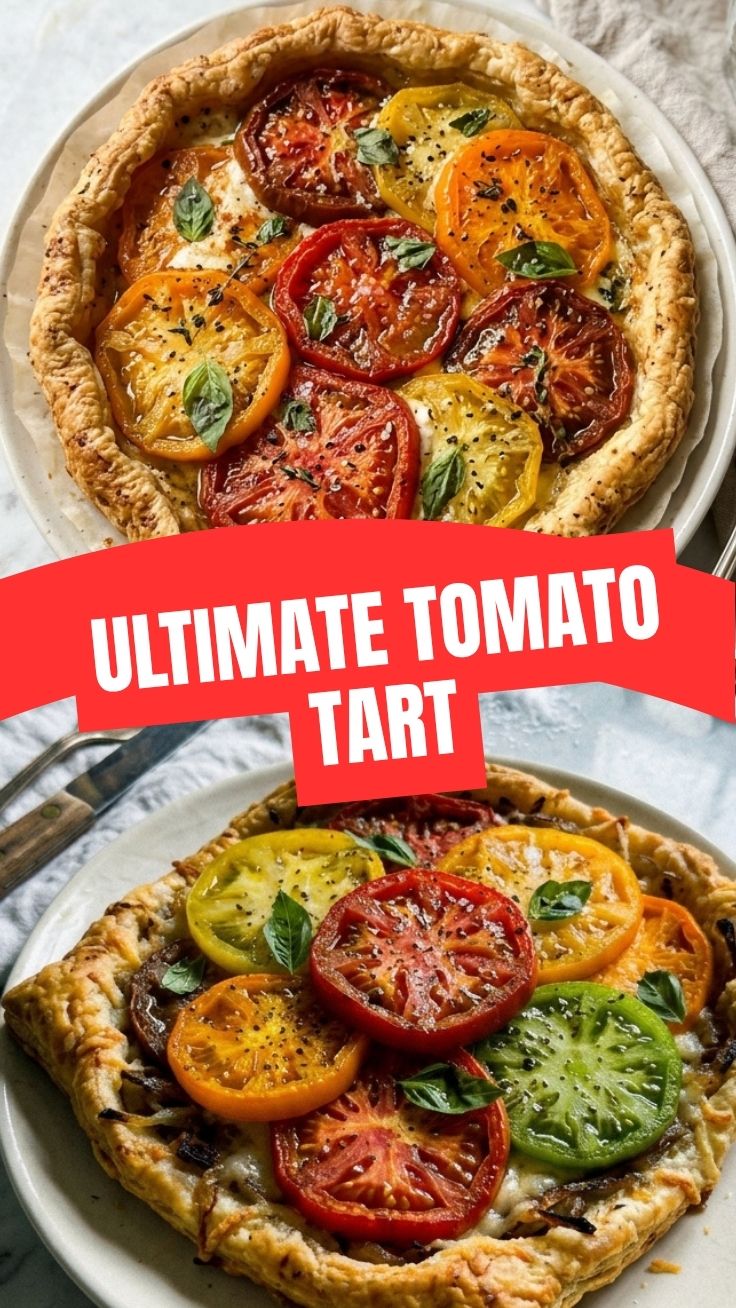
Have you ever bitten into a tomato so perfectly sweet, so intensely flavorful that it tasted like sunshine itself? That’s the magic of heirloom varieties. This Tomato Tart (Heirloom) transforms those colorful, knobby gems into a stunning savory centerpiece. Making this dish at home isn’t just about following a recipe; it’s about capturing peak summer produce in a buttery, flaky crust. You avoid the soggy, mass-produced versions from bakeries and gain complete control over ingredient quality. Plus, exploring Heirloom Tomato Recipes opens a world of culinary creativity beyond simple salads. This tart is a celebration of texture, color, and pure, unadulterated flavor.
Ingredients & Kitchen Tools
For the Crust:
– 1 ¼ cups all-purpose flour (or gluten-free 1:1 blend)
– ½ cup cold unsalted butter, cubed (keep very cold)
– ¼ teaspoon salt
– 3–4 tablespoons ice water
For the Filling:
– 4–5 medium heirloom tomatoes (mix colors: red, yellow, green)
– 1 cup whole milk ricotta cheese (drained if watery)
– ½ cup grated Parmesan cheese
– 2 cloves garlic, minced
– 2 tablespoons fresh basil, chiffonade (plus more for garnish)
– 1 tablespoon fresh thyme leaves
– 1 egg yolk (for egg wash)
– Salt and freshly ground black pepper to taste
– Optional: ¼ teaspoon red pepper flakes for heat
Kitchen Tools:
– 9-inch tart pan with removable bottom (prevents sticking)
– Rolling pin
– Parchment paper
– Large skillet or baking sheet
– Chef’s knife and cutting board
– Pastry brush
Prep Time & Cooking Schedule
– Prep Time: 25 minutes (includes chilling dough)
– Blind Baking Time: 15 minutes
– Assembly & Final Bake: 35–40 minutes
– Resting Time: 10 minutes (critical for clean slices)
Planning Tip: Salt your sliced tomatoes 30 minutes before assembly, then pat dry. This removes excess moisture—the #1 enemy of a crisp tart crust. Start the dough first, chill it while you prep tomatoes. This timing ensures everything comes together seamlessly.
Step-by-Step Instructions
1. Make the Crust: In a food processor, pulse flour and salt. Add cold butter cubes; pulse until pea-sized crumbs form. Add ice water 1 tablespoon at a time, pulsing until dough just holds together. Flatten into a disc, wrap in plastic, chill 30 minutes.
2. Blind Bake the Crust: Preheat oven to 375°F (190°C). Roll dough to ⅛-inch thickness, transfer to tart pan. Prick bottom with fork. Line with parchment, fill with pie weights or dried beans. Bake 15 minutes, remove weights, bake 3 more minutes until lightly golden.
3. Prepare the Filling: In a bowl, mix ricotta, Parmesan, garlic, basil, thyme, ½ teaspoon salt, and ¼ teaspoon pepper. Spread evenly over pre-baked crust.
4. Layer the Tomatoes: Arrange sliced tomatoes (¼-inch thick, patted dry) in overlapping concentric circles. Season with salt and pepper.
5. Bake: Brush tomato edges lightly with egg yolk mixed with 1 teaspoon water. Bake 35–40 minutes until crust is golden brown, tomatoes are tender but not collapsing. The filling should be set and slightly puffed.
6. Cool & Serve: Let rest 10 minutes before slicing. Garnish with fresh basil.
Temperature Control Tip: If tomatoes release too much liquid during baking, rotate the pan halfway through. For extra crispness, finish under the broiler for 1–2 minutes—watch carefully! This Tomato Tart (Heirloom) technique prevents sogginess while concentrating flavor. Pairing this dish with other Heirloom Tomato Recipes helps you master tomato cookery in general.
Nutritional Benefits & Advantages
Heirloom tomatoes are nutritional powerhouses. They’re rich in lycopene—a potent antioxidant linked to heart health and cancer prevention—which becomes more bioavailable when cooked. One serving provides 20% of daily Vitamin C and 10% of Vitamin K. The ricotta adds protein (6g per serving) and calcium, while fresh herbs contribute anti-inflammatory compounds. This dish is naturally vegetarian and can be made gluten-free. Compared to store-bought tarts, you control sodium and fat content, making it a smarter indulgence.
Tips, Variations & Cooking Advice
– Flavor Swaps: Use goat cheese instead of ricotta for tanginess. Add caramelized onions as a base layer.
– Dietary Adaptations: For dairy-free, use cashew ricotta and omit Parmesan. Gluten-free? Use a 1:1 flour blend with 1 teaspoon xanthan gum.
– Herb Variations: Try oregano, rosemary, or tarragon depending on your tomato variety.
– Portion Changes: Make mini tartlets in a muffin tin (bake 18–22 minutes).
– Seasonal Swaps: In winter, use roasted cherry tomatoes or sun-dried tomatoes.
Common Mistakes to Avoid
1. Soggy Bottom: Skipping the salting step or not patting tomatoes dry is the #1 culprit. Always salt, rest, and blot.
2. Burnt Crust Edges: Cover edges with foil strips halfway through baking if browning too fast.
3. Watery Filling: Drain ricotta in a cheesecloth-lined sieve for 30 minutes if it looks wet.
4. Undercooked Center: The filling should jiggle slightly but not be liquid. A knife inserted near center should come out clean.
5. Slicing Too Early: Always rest 10 minutes. Cutting hot tart causes filling to spill out.
Storage & Meal Prep Tips
– Refrigeration: Store in airtight container up to 3 days. Place paper towel beneath to absorb moisture.
– Freezing: Bake fully, cool completely, wrap tightly in foil, then plastic. Freeze up to 2 months. Thaw overnight in fridge.
– Reheating: For best texture, reheat in a 350°F oven for 10–12 minutes. Microwaving makes crust soggy—avoid if possible.
– Meal Prep: Blind bake crust up to 2 days ahead. Assemble and bake fresh when ready to serve.
Conclusion
This Tomato Tart (Heirloom) captures the essence of summer in every slice—vibrant, juicy, and deeply savory. By mastering this technique, you’ll never fear a soggy tart again. The key takeaways are simple: treat your tomatoes right (salt and dry them), keep your butter cold, and don’t rush the resting step. This dish is incredibly versatile, perfect for brunch, lunch, or a light dinner with a side salad. I encourage you to try it this weekend and share your colorful creations! Exploring various Heirloom Tomato Recipes will expand your summer cooking repertoire and make the most of farmer’s market bounty.
FAQs
1. Can I use regular tomatoes instead of heirloom?
Yes, but heirlooms offer superior flavor and moisture balance. Roma or beefsteak tomatoes work—just salt them longer to remove extra water.
2. Why did my crust shrink during baking?
Dough was overworked or not chilled enough. Rest it longer next time, and avoid stretching when pressing into the pan.
3. Can I make this vegan?
Absolutely. Use cashew ricotta, nutritional yeast instead of Parmesan, and a plant-based butter in the crust. Bake same time.
4. How do I prevent the tart from being too greasy?
Use cold butter, don’t overwork dough, and blind bake with weights. Also, drain ricotta thoroughly.
5. What’s the best way to slice cleanly?
Use a serrated knife with a gentle sawing motion. Let tart cool fully (at least 10 minutes). Wipe knife clean between cuts.
Quick way to grow your Tomato Tart (Heirloom)
Ingredients
Equipment
Method
- Preheat your oven to 400°F (200°C) and line a baking sheet with parchment paper.
- Carefully unroll the thawed puff pastry sheet onto the prepared baking sheet.
- Arrange the sliced heirloom tomatoes on top of the puff pastry, leaving a 1-inch border around the edges.
- Sprinkle the crumbled goat cheese and fresh thyme evenly over the tomatoes.
- Drizzle with olive oil and season with salt and black pepper.
- Bake for 25-30 minutes, or until the pastry is golden brown and puffed, and the tomatoes are slightly softened.
- Allow the tart to cool for a few minutes before slicing and serving.