Why This Red Velvet Cake Will Become Your New Favorite Dessert
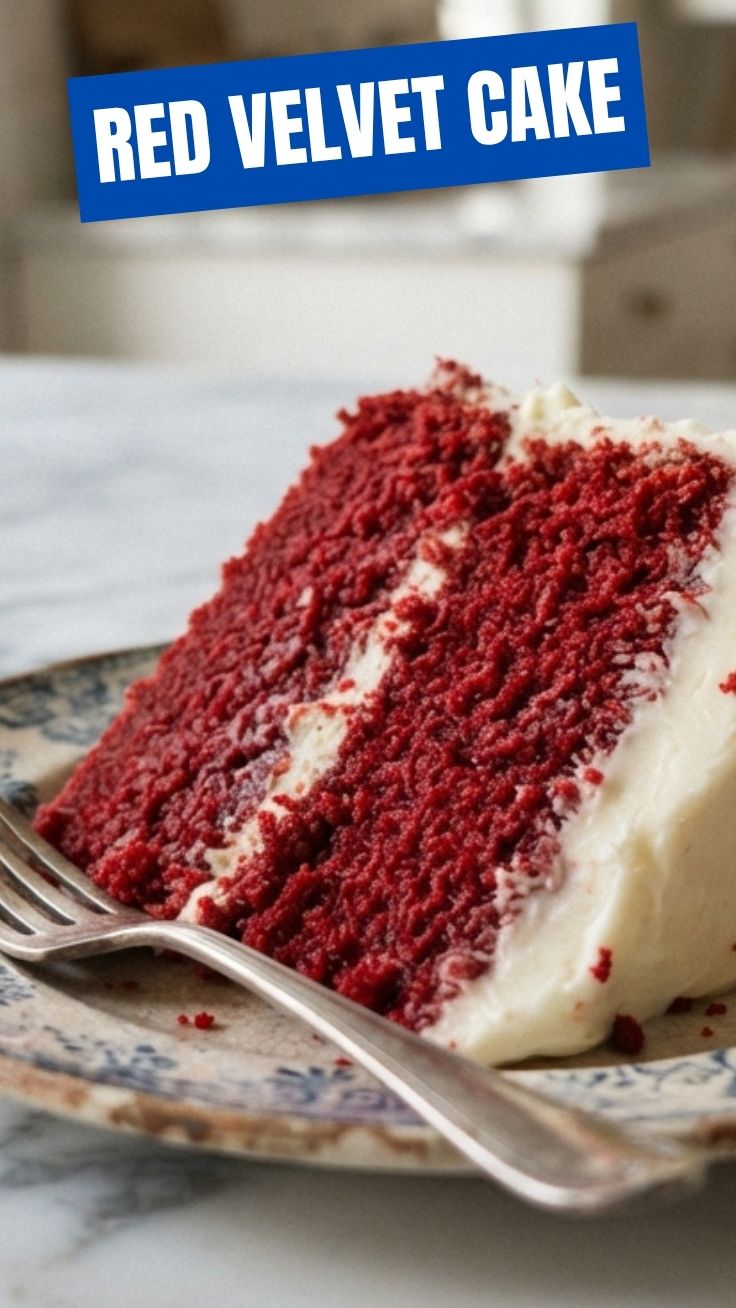
Have you ever wondered what makes a truly unforgettable slice of cake? Is it the velvety crumb, the subtle chocolate flavor, or the signature tangy frosting that makes your taste buds dance? The answer lies in mastering the perfect Red Velvet Cake right in your own kitchen. Preparing this iconic dessert at home isn’t just about following a recipe—it’s about creating a centerpiece for celebrations, controlling the quality of ingredients, and experiencing the satisfaction of pulling a stunning layered masterpiece from your oven. Whether you’re baking for Juneteenth, a birthday, or simply because you deserve something special, homemade versions far surpass anything you’ll find in a bakery. The secret weapon? A luscious cream cheese frosting that perfectly balances the cake’s subtle cocoa notes with its signature tangy finish.
Ingredients & Kitchen Tools
For the Cake Layers
– 2½ cups all-purpose flour – Sifted for lightness; substitute with gluten-free 1:1 blend for dietary needs
– 1½ cups granulated sugar – Adds sweetness and structure; coconut sugar works as alternative
– 1 cup buttermilk – Room temperature; provides moisture and activates leavening; mix 1 cup milk + 1 tbsp lemon juice if needed
– 1 cup vegetable oil – Ensures ultra-moist crumb; canola or melted coconut oil fine
– 2 large eggs – Room temperature for better emulsion
– 2 tbsp unsweetened cocoa powder – Dutch-process preferred for deeper color
– 1 tsp vanilla extract – Pure extract enhances flavor complexity
– 1 tsp white vinegar – Reacts with buttermilk for tender texture
– 1½ tsp baking soda – Leavening agent; ensure fresh
– ½ tsp salt – Balances sweetness
– 2 tbsp red food coloring – Gel or liquid; natural beet powder as alternative
For Cream Cheese Frosting
– 16 oz cream cheese – Full-fat, softened; dairy-free cream cheese works
– 1 cup unsalted butter – Softened; vegan butter alternative
– 4 cups powdered sugar – Sifted to avoid lumps
– 1 tsp vanilla extract
– Pinch of salt
Kitchen Tools
– Two 9-inch round cake pans
– Electric mixer (stand or hand)
– Mixing bowls (large and medium)
– Rubber spatula
– Cooling rack
– Offset spatula for frosting
– Parchment paper rounds
– Sifter or fine-mesh strainer
Prep Time & Cooking Schedule
Planning your baking timeline ensures stress-free results. Here’s what to expect:
– Prep Time: 25 minutes (measuring, mixing, pan preparation)
– Bake Time: 25–30 minutes at 350°F (175°C)
– Cooling Time: 1 hour in pans, then 1 hour on rack (completely cool before frosting)
– Assembly Time: 20 minutes (layering, crumb coating, final frosting)
– Chill Time: 30 minutes (optional but recommended for clean slices)
Total Time: Approximately 3 hours 45 minutes, including cooling. For best results, bake the cake layers a day ahead, wrap tightly in plastic wrap, and refrigerate overnight. This enhances moisture and makes frosting easier.
Step-by-Step Instructions
Preparing the Cake Batter
1. Preheat oven to 350°F (175°C). Grease two 9-inch round pans, line bottoms with parchment, and dust with cocoa powder.
2. In a medium bowl, whisk together flour, cocoa powder, baking soda, and salt. Sift to remove lumps and aerate.
3. In a large bowl, beat sugar and oil on medium speed until combined, about 2 minutes. Add eggs one at a time, then vanilla.
4. Alternate adding dry ingredients and buttermilk, starting and ending with flour mixture. Mix on low until just incorporated—overmixing develops gluten and toughens the cake.
5. In a small bowl, mix vinegar and red food coloring. Fold into batter gently. The vinegar activates the baking soda for lift.
6. Divide batter evenly between pans. Bake 25–30 minutes until a toothpick inserted in center comes out with a few moist crumbs. Perfect Red Velvet Cake layers should spring back lightly when touched.
7. Cool in pans 10 minutes, then turn onto wire racks. Cool completely before frosting.
Making the Cream Cheese Frosting
8. Beat cream cheese and butter on medium speed until smooth, about 3 minutes. Scrape bowl.
9. Gradually add powdered sugar on low speed, then increase to medium and beat 2 minutes until fluffy. Add vanilla and salt.
10. For best texture, chill frosting 15 minutes before assembling. The cream cheese frosting should be spreadable but firm enough to hold layers.
Assembly
11. Level cake layers with a serrated knife if domed. Place first layer on cake board, add 1 cup frosting, spread evenly.
12. Top with second layer, apply thin crumb coat, chill 15 minutes. Finish with remaining frosting, creating swirls or smooth finish.
Nutritional Benefits & Advantages
While red velvet cake is an indulgence, it offers some surprising benefits when made from scratch. Cocoa powder contains flavonoids that support heart health and reduce inflammation. Buttermilk provides probiotics and calcium, though much is lost during baking. The cream cheese frosting offers protein and calcium from dairy, plus vitamin A from butter. Compared to store-bought versions, homemade cake contains no preservatives, artificial stabilizers, or hydrogenated oils. You control sugar levels—reduce by ¼ cup without affecting texture. For a healthier twist, substitute half the oil with unsweetened applesauce, which adds fiber and reduces calories by approximately 30%. The vinegar in the batter helps lower the glycemic response, making this a slightly more balanced treat than standard chocolate cake.
Tips Variations & Cooking Advice
Flavor Variations
– Chocolate Intensified: Add 1 oz melted dark chocolate to batter
– Citrus Twist: Add 1 tbsp orange zest to frosting
– Spiced Version: Add ½ tsp cinnamon and ¼ tsp nutmeg to dry ingredients
Dietary Adaptations
– Gluten-Free: Use 1:1 gluten-free baking flour; add 1 tbsp additional buttermilk
– Dairy-Free: Use vegan cream cheese, plant butter, and oat milk + lemon juice for buttermilk
– Egg-Free: Replace each egg with ¼ cup unsweetened applesauce
Cooking Methods
– Cupcakes: Bake 18–22 minutes; yields 24 cupcakes
– Sheet Cake: Bake in 9×13 pan for 30–35 minutes; double frosting recipe
– Naked Cake: Use ½ amount frosting for rustic look
Common Mistakes to Avoid
Overmixing batter develops gluten, resulting in tough, dense layers. Mix only until flour disappears.
Skipping room temperature ingredients causes poor emulsion. Cold eggs and buttermilk produce lumpy batter and uneven rise.
Using too much red dye creates bitter aftertaste. Stick to 2 tablespoons gel coloring or substitute with 3 tablespoons beet powder.
Frosting warm cake leads to melting cream cheese frosting. Wait until layers are completely cool to touch.
Not sifting cocoa powder leaves brown specks. Always sift cocoa with dry ingredients for uniform color.
Overbaking dries out the cake. Start checking at 22 minutes and remove when toothpick has moist crumbs, not clean.
Storage & Meal Prep Tips
Room Temperature: Store frosted cake in an airtight container for up to 2 days. Keep away from direct sunlight and heat.
Refrigeration: Wrap unfrosted layers tightly in plastic wrap and refrigerate up to 5 days. Frosted cake keeps 4 days in fridge—bring to room temperature 30 minutes before serving.
Freezing: Wrap unfrosted layers in plastic wrap, then foil, freeze up to 3 months. Thaw overnight in refrigerator. Frosting freezes separately in airtight container for 2 months; thaw overnight and re-whip before use.
Reheating: For that fresh-from-oven feel, microwave individual slices for 10 seconds or warm at 300°F for 5 minutes.
Meal Prep Tip: Bake layers on Sunday, refrigerate, then frost on serving day. This enhances moisture and saves time.
Conclusion
Mastering this iconic dessert transforms any occasion into a celebration. The combination of tender, cocoa-kissed layers with tangy cream cheese frosting creates an unforgettable experience that store-bought versions simply cannot replicate. Whether you’re baking for Juneteenth, a holiday gathering, or a cozy weekend treat, this Red Velvet Cake delivers consistent, showstopping results every time. We encourage you to try this recipe, experiment with variations, and share your beautiful creations with friends and family. Your kitchen is about to become the most popular dessert destination in town.
FAQs
Can I reduce the sugar without affecting texture?
Yes, reduce by up to ¼ cup. Sugar affects tenderness and browning, so beyond that may alter results. Use superfine sugar for better dissolution.
Why did my cake turn out dense?
Likely overmixing or expired baking soda. Check your leavener by dropping ½ tsp in vinegar—it should fizz vigorously. Also ensure ingredients are room temperature.
How do I get a deeper red color without artificial dye?
Use 3 tablespoons beet powder mixed with 2 tablespoons hot water. Alternatively, use natural red food coloring from annatto or hibiscus. The color will be slightly muted but still beautiful.
Can I make this cake ahead of time?
Absolutely. Bake layers up to 2 days ahead, wrap tightly, and refrigerate. Frost no more than 24 hours before serving for best texture. The flavors actually deepen overnight.
My cream cheese frosting is too runny. How do I fix it?
Refrigerate 15 minutes, then re-whip. If still runny, add 2 tablespoons powdered sugar. Ensure cream cheese is cold but not hard—overly warm cream cheese causes separation.
Quick way to grow your Red Velvet Cake
Ingredients
Equipment
Method
- Preheat your oven to 350°F (175°C) and grease and flour two 9-inch round cake pans.
- In a medium bowl, whisk together flour, sugar, cocoa powder, baking soda, and salt.
- In a large bowl, whisk together eggs, buttermilk, oil, food coloring, vinegar, and vanilla extract.
- Gradually add the dry ingredients to the wet ingredients, mixing until just combined and smooth.
- Divide the batter evenly between the prepared cake pans.
- Bake for 25-30 minutes, or until a toothpick inserted into the center comes out clean.
- Cool the cakes in the pans for 10 minutes before transferring them to a wire rack to cool completely.
- In a large bowl, beat cream cheese and butter until light and fluffy.
- Gradually add confectioners' sugar, beating until smooth.
- Stir in vanilla extract until well combined.
- Once the cakes are completely cool, spread a layer of frosting on top of one cake layer.
- Place the second cake layer on top and cover the entire cake with the remaining frosting.
- Decorate as desired and serve.