The Ultimate Key Lime Pie Recipe: Tangy, Creamy, and Easy to Make at Home
Have you ever tasted a dessert so perfectly balanced between sweet and tart that it instantly transports you to a sunny Florida beach? That’s exactly what a well-crafted Key Lime Pie delivers—a slice of pure sunshine. While store‑bought versions often rely on artificial flavors or cloying sweetness, making this citrus‑forward classic from scratch is surprisingly simple and far more rewarding. The magic lies in using real key lime juice, which lends a floral, tangy punch that regular limes can’t replicate. With a buttery graham cracker crust, a silky filling, and a cloud‑like meringue or whipped cream topping, homemade Key Lime Pie beats anything from a bakery. Ready to whip up your own? Let’s dive into every detail you need.
—
Ingredients & Kitchen Tools
Ingredients
– Graham crackers (1½ cups crushed) – Forms the crust; use gluten‑free crackers if needed.
– Unsalted butter (⅓ cup, melted) – Binds the crust; substitute coconut oil for dairy‑free.
– Granulated sugar (¼ cup for crust + ½ cup for filling) – Balances acidity; coconut sugar works but darkens the crust.
– Egg yolks (4 large) – Thickens the filling; for a vegan version, use silken tofu (¾ cup).
– Sweetened condensed milk (1 can, 14 oz) – The non‑negotiable base for creamy texture and sweetness; no substitutes unless making a completely different dessert.
– Key lime juice (½ cup, freshly squeezed) – The star ingredient; bottled key lime juice is acceptable but lacks the full aromatic complexity.
– Lime zest (1 tablespoon) – Boosts citrus intensity; add more if you love zing.
– Heavy cream (1 cup, optional for topping) – For whipped cream; canned coconut cream works for dairy‑free.
Kitchen Tools
– 9‑inch pie dish
– Mixing bowls (medium and small)
– Whisk or electric mixer
– Zester or fine grater
– Citrus juicer (manual or electric)
– Measuring cups and spoons
– Rubber spatula
– Saucepan (if toasting crust)
– Oven
—
Prep Time & Cooking Schedule
Prep Time: 20 minutes
Bake Time (crust): 10 minutes
Bake Time (filled pie): 15 minutes
Cooling & Chilling Time: 4 hours minimum (overnight is best)
Total Active Time: 35 minutes
Overall Time (including chilling): about 5 hours (or overnight)
Plan ahead: The pie needs at least 4 hours to set in the refrigerator before slicing. The filling firms up as it cools, and the flavors meld beautifully overnight. If you’re serving for a dinner party, prepare the pie the morning of – or even the day before.
—
Step-by-Step Instructions
1. Prepare the crust. Preheat your oven to 350°F (175°C). In a medium bowl, combine 1½ cups crushed graham crackers, ¼ cup sugar, and ⅓ cup melted butter. Stir until the mixture resembles wet sand. Press firmly into the bottom and up the sides of a 9‑inch pie dish. Bake for 10 minutes until lightly golden and fragrant. Let cool completely.
2. Make the filling. In a large bowl, whisk together 4 egg yolks and one 14‑oz can sweetened condensed milk until smooth. Gradually add ½ cup freshly squeezed key lime juice and 1 tablespoon lime zest. Whisk until the mixture thickens slightly – about 1 minute. The acid from the juice will begin to “cook” the yolks, so work quickly.
3. Bake the filling. Pour the filling into the cooled crust. Bake at 350°F for 15 minutes. The center should be set but still jiggle slightly when you shake the pan – it will continue to firm as it chills. Remove from oven and let cool to room temperature on a wire rack (about 45 minutes).
4. Chill completely. Transfer the pie to the refrigerator and chill uncovered for at least 4 hours, or overnight. For best texture, cover with plastic wrap after 2 hours of chilling to prevent it from absorbing fridge odors.
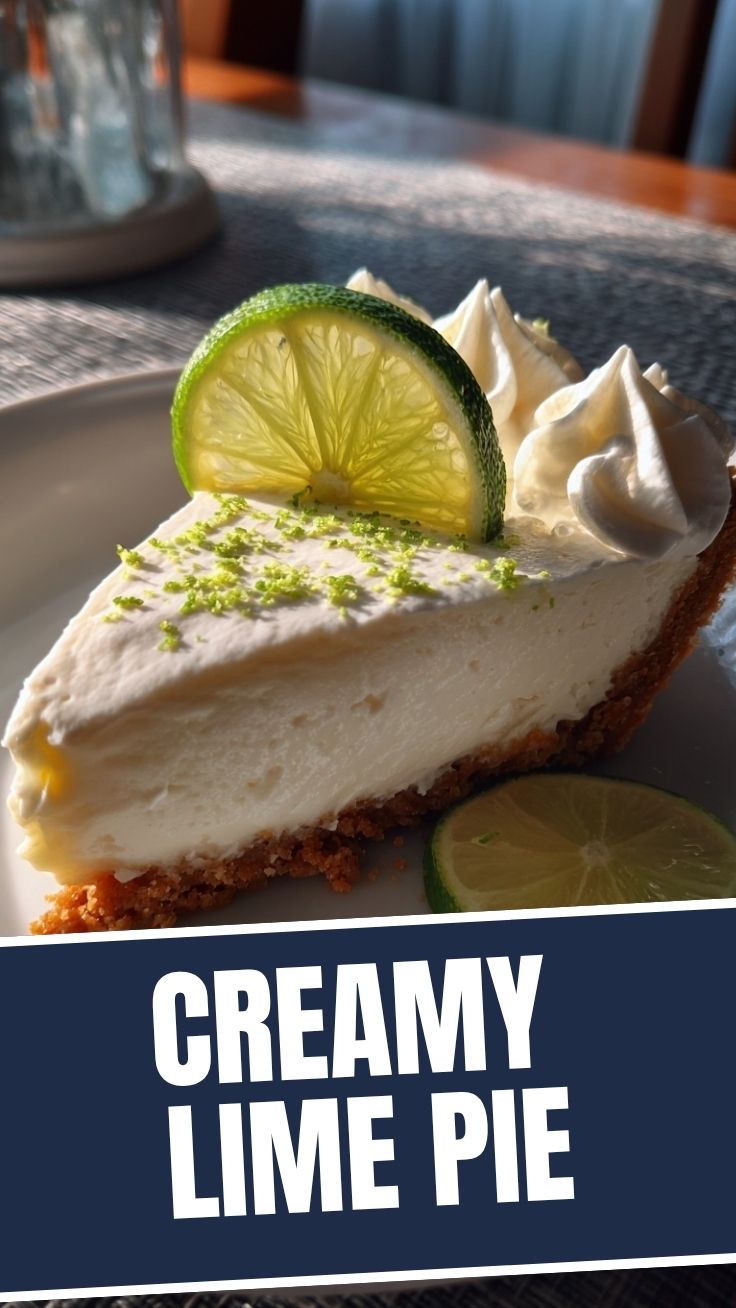
5. Add topping (optional). Whip 1 cup heavy cream with 1 tablespoon sugar and ½ teaspoon vanilla until soft peaks form. Spread or pipe over the chilled pie. Alternatively, make a classic meringue by whipping 3 egg whites with ¼ cup sugar until stiff peaks form, then broil briefly (watch closely!) until golden.
Key temperature & texture tips: When baking, avoid over‑baking – the filling should remain custard‑like, not curdled. If the filling weeps or cracks, you may have baked it too long. Always use room‑temperature eggs for even emulsification. And remember: a perfectly made Key Lime Pie relies on the natural tartness of real key lime juice, so don’t substitute with bottled Persian lime juice (which is milder) unless you adjust the sugar.
—
Nutritional Benefits & Advantages
Key lime pie isn’t exactly health food, but it does offer some redeeming qualities. Key limes are rich in vitamin C – one serving provides about 20% of the daily recommended intake – along with antioxidants that support immune function. The eggs contribute high‑quality protein and essential choline for brain health. Using real dairy provides calcium and vitamin D. If you opt for the whipped cream topping, you’ll add a touch of healthy fats (if using grass‑fed cream) and a smoother texture that reduces sugar cravings. For a lighter version, you can reduce the sugar in the crust by a tablespoon or swap the condensed milk for a lower‑sugar alternative (like a blend of evaporated milk and sugar substitute), but be warned: the texture won’t be identical. The pie’s main advantage is its ability to satisfy a sweet tooth with a tangy, refreshing finish – making it feel less heavy than many other creamy desserts.
—
Tips, Variations & Cooking Advice
– Flavor variations: Add ½ teaspoon of vanilla extract to the filling for a rounder taste. Or fold in ¼ cup of toasted coconut after baking for a tropical twist. For a boozy kick, replace 2 tablespoons of key lime juice with coconut rum.
– Dietary adaptations: To make a gluten‑free pie, use certified gluten‑free graham crackers or crushed nuts (almond meal) mixed with butter. For a dairy‑free version, use plant‑based butter and coconut condensed milk (available at health‑food stores). Vegan? Substitute egg yolks with ¾ cup silken tofu and a pinch of turmeric for color.
– Alternative cooking methods: You can skip baking the crust entirely if you use pre‑crushed graham cracker crumb crust – just freeze it for 30 minutes. Also, the filling can be set in the freezer for 2 hours if you’re short on time, but the texture will be firmer (closer to a frozen pie).
– Portion changes: For mini pies, divide the crust and filling among 4–6 ramekins; bake only 10 minutes. Or make tartlets using a muffin tin.
—
Common Mistakes to Avoid
1. Using bottled juice exclusively. Bottled key lime juice is often pasteurized and can lack brightness. Supplement with fresh zest and a splash of freshly squeezed lemon to restore acidity.
2. Overmixing the filling. Whisking too vigorously after adding the juice can incorporate air bubbles that cause the filling to soufflé and crack. Mix gently until just combined.
3. Baking the crust too long. A deeply browned crust tastes bitter. Remove it when the edges are light golden.
4. Skipping the chilling step. The pie needs time to set. Cutting it early results in a runny mess – be patient.
5. Adding the topping before the pie is fully chilled. Condensation can cause the topping to slide off. Wait until the pie is cold and set.
—
Storage & Meal Prep Tips
– Refrigeration: Store the pie (with or without topping) covered in the refrigerator for up to 5 days. If topped with whipped cream, add the cream no more than 2 hours before serving to keep it fluffy.
– Freezing: Unbaked pie freezes well for up to 3 months. Bake from frozen (add 5–10 minutes to bake time). Baked, cooled pie can also be frozen without topping – wrap tightly in plastic and then foil. Thaw in the refrigerator overnight and add topping before serving.
– Reheating: Key lime pie is typically served cold. If you prefer a warm crust, heat individual slices in a 300°F oven for 5 minutes – but the filling will soften. Not recommended for leftovers.
—
Conclusion
From its buttery graham cracker base to its tangy, silky filling, a homemade Key Lime Pie is a dessert that never fails to impress. The secret is using fresh, high‑quality ingredients – especially real key lime juice – and giving the pie enough time to chill and meld its flavors. Whether you serve it for a summer barbecue, a holiday dinner, or just a simple weeknight treat, this recipe is foolproof and endlessly adaptable. Try it once and you’ll never reach for a grocery‑store version again. Share your results in the comments below – I’d love to see your beautiful, golden‑topped pies!
—
FAQs
1. Can I use regular limes instead of key limes?
Yes, but the flavor will be less floral and more sour. Add ¼ cup of orange juice to approximate key lime’s sweetness, or increase sugar by 2 tablespoons.
2. Why did my pie crack on top?
Usually from over‑baking or too much air in the filling. Bake just until set; if using a meringue topping, the meringue hides any cracks.
3. Can I make this pie without baking?
The crust should be baked for best texture, but you can use a no‑bake crust (crushed cookies + butter, chilled). The filling, however, requires baking to set properly – unless you use a gelatin‑based version (not recommended for authentic texture).
4. How do I prevent a watery filling?
Ensure the condensed milk is full‑fat (not low‑fat), and measure the key lime juice accurately. Too much liquid thins the custard. Also, chill thoroughly before serving.
5. Can I use leftover egg whites?
Absolutely! Whip them with sugar and cream of tartar to make a meringue topping. Just broil for 1–2 minutes until golden – watch like a hawk to avoid burning.
Quick way to grow Key Lime Pie in 3 StepsKey Lime Pie
Ingredients
Equipment
Method
- First, preheat your oven to 350°F (175°C) and then pour the sweetened condensed milk into a mixing bowl; next, add the key lime juice and whisk until well combined.
- Secondly, pour the mixture into the graham cracker crust and bake for 15-20 minutes, or until the filling is set; allow it to cool completely before refrigerating for at least 2 hours.
- Finally, before serving, garnish with whipped cream and lime slices.