Table of Contents
Introduction
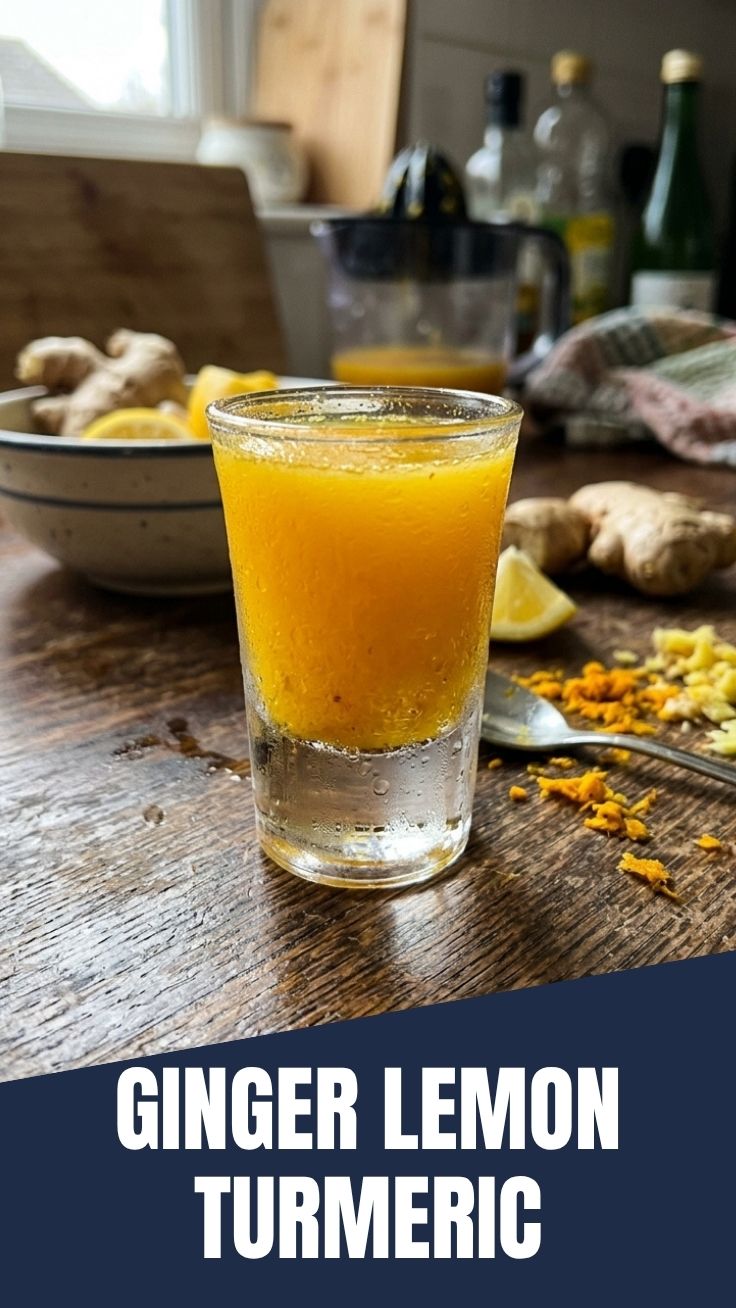
Have you ever woken up with a scratchy throat, a dull headache, or that feeling that your body needs a reset? What if a single, zesty sip could kick-start your immune system and soothe inflammation in minutes? That’s exactly what a homemade Ginger Lemon Turmeric Shot delivers—a concentrated powerhouse of fresh ginger, tangy lemon, and golden turmeric. Preparing this elixir at home is not only cost-effective but also lets you control the quality of ingredients, ensuring no preservatives, added sugars, or mysterious additives. Whether you’re fighting a cold or simply maintaining wellness, this immunity shot becomes your daily ritual. In this post, I’ll walk you through every step, from selecting the freshest roots to storing your batch, so you can enjoy a potent, vibrant shot any time.
Ingredients & Kitchen Tools
Ingredients (makes about 6 shots)
- Fresh ginger root (2-inch piece, peeled) – The peppery, warming base that stimulates circulation and digestion.
- Fresh turmeric root (1-inch piece, peeled) – Gives that brilliant golden hue and curcumin, the anti-inflammatory superstar. Substitution: ½ tsp ground turmeric if fresh is unavailable (though flavor will be milder).
- Fresh lemon juice (from 2 medium lemons) – Adds vitamin C and a bright, sour kick that balances the roots.
- Honey or maple syrup (1–2 tbsp, optional) – For sweetness and throat-coating relief. Skip for a fully sugar-free shot.
- Pinch of black pepper – A crucial cofactor; piperine boosts curcumin absorption up to 2000%.
- Filtered water (¼ cup, adjust for desired consistency) – Helps blend and dilute the concentrated paste.
Kitchen Tools
- High-speed blender or small food processor
- Fine-mesh strainer or nut milk bag
- Glass jar with airtight lid (8–12 oz capacity)
- Sharp knife and cutting board
- Measuring spoons and citrus juicer (optional but helpful)
Prep Time & Cooking Schedule
- Prep time: 10–15 minutes (peeling, chopping, juicing)
- Active blending time: 2–3 minutes
- Straining time: 2–5 minutes
- Total time: Under 20 minutes
- Resting time: None needed – enjoy immediately after straining.
This recipe is designed for quick, efficient prep. If you’re making a larger batch for the week, factor in a few extra minutes for scaling. I recommend prepping on a Sunday evening so you can grab a shot each morning without fuss.
Step-by-Step Instructions
- Prepare the roots: Wash ginger and turmeric thoroughly. Use a spoon to scrape off the thin skins (no need to peel perfectly – a little skin is fine, but it may add bitterness). Chop both into ½-inch pieces for easier blending.
- Juice the lemons: Roll each lemon firmly on the counter to release juice, then cut in half and juice by hand or with a press. Strain out seeds.
- Blend everything: Place chopped ginger, turmeric, lemon juice, honey (if using), black pepper, and water into your blender. Blend on high for 45–60 seconds until a smooth, slightly thick paste forms.
- Strain for clarity: Set your fine-mesh strainer over a bowl or large measuring cup. Pour the blended mixture through, pressing gently with the back of a spoon to extract all liquid. Discard the fibrous pulp (or save it for compost or smoothies).
- Bottle and chill: Transfer the strained liquid into your airtight jar. Store in the refrigerator. Shake well before each use, as sediment can settle.
💡 Pro tip: For a stronger Ginger Lemon Turmeric Shot, reduce water to 2 tablespoons. For a milder version, add an extra tablespoon of water or a splash of orange juice. This immunity shot can be taken as a 1-ounce shooter or diluted in warm water for a soothing tea.
Nutritional Benefits & Advantages
This shot isn’t just deliciously fiery—it’s a functional food. Ginger contains gingerol, a potent anti-inflammatory compound that can reduce muscle pain and nausea. Turmeric’s curcumin tackles oxidative stress, while black pepper boosts its absorption dramatically. Lemon delivers a hefty dose of vitamin C (about 20% of your daily need per shot) and supports a healthy gut pH. Honey adds antimicrobial properties, making this drink a triple-threat for cold and flu season.
One shot (1 oz) contains roughly 15–20 calories, 4 grams of carbs (mostly natural sugars), and zero fat. It’s vegan if you skip honey, gluten-free, and dairy-free by nature. Compared to store-bought wellness shots, you avoid preservatives, artificial colors, and high-fructose corn syrup. Plus, you save 50–70% on cost per serving.
Tips, Variations & Cooking Advice
- Spicier kick: Add a small slice of fresh jalapeño or a pinch of cayenne pepper for extra warmth and metabolic boost.
- Citrus swap: Replace half the lemon with lime or grapefruit for a different antioxidant profile.
- Herbal infusion: Steep a sprig of fresh rosemary or thyme in the blender during blending (strain out later) for added flavor and antimicrobial benefits.
- No blender? Grate ginger and turmeric finely, then muddle with lemon juice and water. Strain through cheesecloth. The texture will be slightly grittier but still effective.
- Portion control: Freeze leftover shot in ice cube trays for single-serving cubes. Thaw one cube in warm water or directly consume.
Common Mistakes to Avoid
- Skipping the pepper: Without black pepper, your body may not absorb curcumin efficiently. Always add that tiny pinch—it makes a huge difference.
- Over-blending the pulp: Blending too long can break down fibers into a sludge that’s harder to strain. Keep it to 60 seconds max.
- Using only ground spices: Ground turmeric and ginger can work in a pinch, but the shot will be more pasty and less aromatic. Fresh roots yield a brighter, peppery flavor.
- Not refrigerating quickly: The shot is perishable. Left at room temperature for over 2 hours, it can start fermenting. Always store in the fridge immediately.
- Adding too much water: A thin shot loses its concentrated punch. Stick to ¼ cup or less for a classic shooter consistency.
Storage & Meal Prep Tips
- Refrigeration: Store in a glass jar with a tight lid for up to 5 days. Shake or swirl before each serving.
- Freezing: Pour into an ice cube tray (each cube ≈ 1 ounce). Once frozen, transfer to a freezer bag for up to 2 months. Thaw a cube in the fridge overnight or pop it into hot water for a fast tea.
- Reheating: If you prefer a warm shot, gently heat the desired amount in a small saucepan over low heat for 1–2 minutes—do not boil, as heat can degrade some vitamin C and curcumin.
- Meal prep: Double the batch on Sunday and portion into small 2-oz jars for grab-and-go shots throughout the week. Label them with the date to track freshness.
Conclusion
By now, you’ve seen how simple and empowering it is to craft your own Ginger Lemon Turmeric Shot at home. With just five fresh ingredients and a blender, you can create a daily immunity shot that’s far superior (and cheaper) than store-bought versions. The freshness of the roots, the zing of lemon, and the warmth of pepper all work together to support your body’s natural defenses. I encourage you to make this recipe your own—double the garlic for extra kick, add a dash of cinnamon, or turn it into a soothing hot tonic. Try it for a week and notice how your energy and resilience shift. Share your results in the comments, and don’t forget to check out our other healing broths and elixirs!
FAQs
1. Can I use ground turmeric and ginger instead of fresh?
Yes, but the flavor will be less vibrant and the texture more pasty. Use ½ tsp ground turmeric and 1 tsp ground ginger, and increase water slightly. However, for a true Ginger Lemon Turmeric Shot with maximum anti-inflammatory compounds, fresh roots are best because they contain volatile oils that degrade during drying.
2. How long does the shot stay potent in the fridge?
It retains optimal flavor and nutritional value for 3–5 days when refrigerated in an airtight container. The ginger and turmeric will slowly lose pungency, but the shot remains safe to consume for up to a week. Discard if you see mold or an off smell.
3. Can I make this without a blender?
Absolutely. Grate the ginger and turmeric finely, then muddle them in a bowl with lemon juice and water. Let sit for 10 minutes to release juices, then strain through a cheesecloth or fine sieve. This method yields a slightly weaker liquid but works well for small batches.
4. Is it safe to take this shot every day?
Generally yes, in moderation (1–2 oz daily). Ginger and turmeric are recognized as safe, but excessive consumption may cause stomach upset or interact with blood-thinning medications. If you have gallstones or are pregnant, consult your doctor before regular use.
5. What can I do with the leftover ginger-turmeric pulp?
Don’t toss it! The pulp still contains fiber and flavor. Mix it into salad dressings, add to smoothies, stir into oatmeal, or compost it. You can also dry the pulp in a low oven and grind it into a spice blend for curries or stir-fries.
Quick way to grow Ginger Lemon Turmeric Shot at home.Ginger Lemon Turmeric Shot
Ingredients
Equipment
Method
- To plant ginger, choose a fresh ginger root, ideally one with visible "eyes" or buds, and cut it into 1-inch pieces, ensuring each piece has at least one eye.
- Allow the cut pieces to dry for a day or two to form a callus, which helps prevent rot when planted.
- Plant the ginger pieces about 6-8 inches apart and 2-4 inches deep in a pot or garden bed filled with rich, well-draining soil, with the eye facing upwards.
- Water thoroughly after planting and keep the soil consistently moist but not waterlogged, providing partial shade for optimal growth.
- Select a fresh turmeric root with several "fingers" and cut it into 1-2 inch sections, making sure each section has at least one bud.
- Let the cut pieces dry for a day to callus, similar to ginger, to prevent rot.
- Plant each piece 2-4 inches deep with the bud pointing up, spacing them 6 inches apart in a pot or garden bed with fertile, well-draining soil.
- Water regularly to maintain moist soil and place in a location that receives partial to full sun.
- Extract seeds from a fresh, organic lemon and rinse them thoroughly to remove any pulp.
- Soak the clean seeds in a bowl of water for a few hours, discarding any that float, as they are likely not viable.
- Plant each seed about half an inch deep in small pots filled with potting mix, ensuring the soil is kept moist.
- Cover the pots with plastic wrap or a clear dome to create a mini-greenhouse effect and place them in a warm spot with indirect sunlight until sprouts appear.