The Secret to Perfect Fried Rice (Classic) at Home
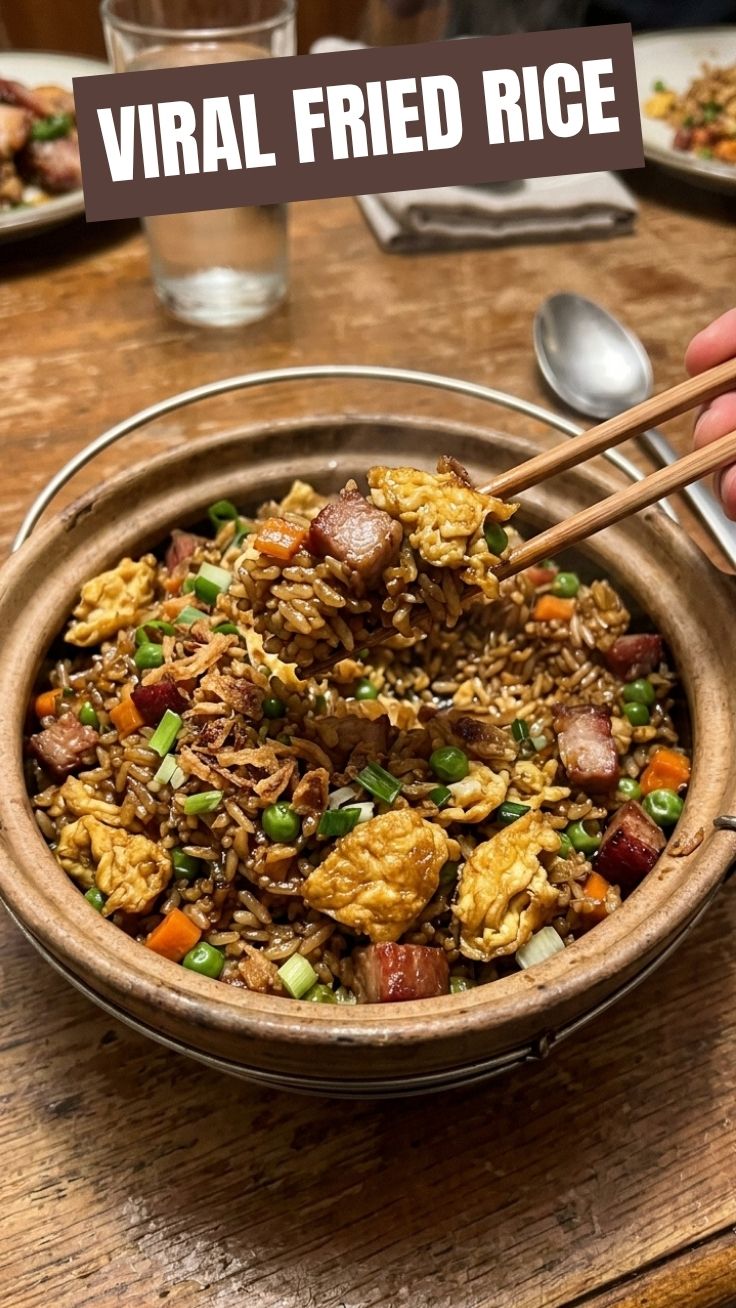
Ever wondered why your Fried Rice (Classic) doesn’t taste like the one from your favorite takeout spot? The answer is simpler than you think: technique, temperature, and timing. Making this iconic dish at home not only saves money but also lets you control every ingredient for a healthier, fresher result. Whether you’re a beginner or a seasoned cook, mastering fried rice is a game-changer for quick weeknight dinners. This guide will walk you through professional methods so you can create restaurant-quality fried rice in your own kitchen. Plus, we’ll show you how a classic fried rice recipe can become your go-to for using up leftover vegetables and proteins.
Ingredients & Kitchen Tools
Essential Ingredients
– 3 cups day-old jasmine or long-grain rice (cold, dry grains prevent clumping)
– 2 large eggs, lightly beaten
– ½ cup diced carrots (adds sweetness and crunch)
– ½ cup frozen peas (thawed; bright green pop)
– 3 green onions, sliced (for garnish and mild onion flavor)
– 2 cloves garlic, minced (aromatic base)
– 3 tablespoons soy sauce (use low-sodium for better salt control)
– 1 tablespoon sesame oil (nutty finish)
– 2 tablespoons vegetable oil (for high-heat cooking)
Optional Add-Ins
– ½ cup diced ham, chicken, shrimp, or tofu (for protein)
– ¼ teaspoon white pepper (instead of black for authentic flavor)
– 1 teaspoon grated ginger (extra warmth)
Kitchen Tools
– Wok or large non-stick skillet (wok preferred for high heat distribution)
– Wooden spatula or wok ladle (for tossing)
– Small bowl (to mix eggs)
– Knife and cutting board (prep all ingredients before cooking)
Prep Time & Cooking Schedule
– Prep Time: 15 minutes (chop vegetables, scramble eggs, measure sauces)
– Cook Time: 8–10 minutes (high heat, fast action)
– Total Time: 25 minutes (plus overnight rice chilling recommended)
– Resting Time: 2 minutes after cooking (allows flavors to meld)
Pro Tip: Cook rice at least 4 hours ahead (or overnight) and spread it on a baking sheet to cool completely. Cold rice is the #1 secret to non-mushy fried rice.
Step-by-Step Instructions
1. Prepare the wok: Heat your wok or skillet over high heat until a drop of water sizzles instantly. Add 1 tablespoon vegetable oil and swirl to coat.
2. Scramble the eggs: Pour beaten eggs into the hot oil. Stir vigorously for 15–20 seconds until just set. Transfer eggs to a clean plate.
3. Aromatics first: Add remaining 1 tablespoon oil. Sauté garlic (and ginger if using) for 10 seconds until fragrant—do not burn.
4. Cook vegetables: Add carrots and stir-fry 1 minute. Add peas and cook 30 seconds more. The carrots should remain slightly crisp.
5. Add the rice: Crumble cold rice into the wok. Spread it flat against the surface and let it sear undisturbed for 30–40 seconds. This creates the coveted smoky “wok hei” flavor. Then toss and repeat twice.
6. Season properly: Drizzle soy sauce around the edges of the wok (not directly on rice) to caramelize. Add white pepper. Toss to coat every grain.
7. Finish with eggs and sesame oil: Return scrambled eggs to the wok. Toss gently to break them into small pieces. Drizzle sesame oil, toss once more, and remove from heat.
8. Garnish and serve: Top with green onions. Serve immediately while the fried rice is piping hot. This classic fried rice method guarantees fluffy, flavorful grains every time.
Nutritional Benefits & Advantages
This dish delivers a balanced mix of carbohydrates, protein, and healthy fats. Rice provides sustained energy, while eggs add high-quality protein and choline for brain health. Carrots and peas contribute vitamin A, fiber, and antioxidants. Using less oil than takeout versions reduces unnecessary calories and saturated fat. Sesame oil offers heart-healthy unsaturated fats and anti-inflammatory properties. By making Homemade Fried Rice, you control sodium levels and avoid preservatives commonly found in restaurant dishes.
Tips Variations & Cooking Advice
– Gluten-Free: Use tamari or coconut aminos instead of soy sauce.
– Dairy-Free: Naturally dairy-free; just skip any butter additions.
– Protein Swaps: Try leftover rotisserie chicken, grilled shrimp, or cubed firm tofu.
– Flavor Variations: Add a splash of oyster sauce for depth, or a drizzle of sriracha for heat.
– Veggie-Loaded: Toss in bell peppers, corn, or shredded cabbage.
– Cooking Method: If using a skillet, cook in two batches to avoid overcrowding.
– Rice Alternatives: Cauliflower rice works for low-carb diets (reduce cook time by half).
Common Mistakes to Avoid
– Using fresh rice: It releases too much starch and turns gluey. Always use day-old cold rice.
– Overcrowding the wok: Too much food lowers temperature and steams the rice instead of frying.
– Adding soy sauce too early: It burns and turns bitter. Add it at the very end of cooking.
– Skipping high heat: Low heat will never create the signature smoky flavor.
– Stirring constantly: Let the rice sit to develop a light char—this is where the flavor lives.
– Wet vegetables: Pat veggies dry before cooking to prevent splattering and sogginess.
Storage & Meal Prep Tips
– Refrigeration: Store in an airtight container for up to 4 days. Cool completely before sealing.
– Freezing: Portion into freezer-safe bags (remove air) and freeze for up to 3 months. Thaw overnight in the fridge.
– Reheating: Use a wok or skillet over high heat with a tiny splash of water to re-steam. Microwave works but may soften texture—cover with a damp paper towel and heat in 30-second bursts.
– Meal Prep: Double the recipe and portion into lunch containers with extra veggies. Add a soft-cooked egg on top for freshness when reheating.
Conclusion
Mastering fried rice at home is one of the most rewarding kitchen skills you can develop. It transforms humble leftovers into a crave-worthy meal that rivals any takeout. The key takeaways: use cold rice, work over high heat, and season thoughtfully. This classic fried rice recipe is endlessly adaptable—swap proteins, experiment with vegetables, and make it your own. We encourage you to try this version tonight, share your results in the comments, and explore more quick Asian-inspired dishes on our site.
FAQs
1. Can I use brown rice instead of white rice?
Yes, but cook it slightly firmer than usual and cool it completely. Brown rice needs a bit more oil and a slightly longer stir-fry time to achieve the same texture.
2. Why is my fried rice always mushy?
The most common culprit is using freshly cooked rice. Always use rice that has been refrigerated for at least 4 hours. Also, make sure your wok is hot enough—steam ruins fried rice.
3. Can I make fried rice without eggs?
Absolutely. Omit the eggs and add extra protein like tofu, chicken, or shrimp. If you need binding, try a splash of rice vinegar or a drizzle of hoisin sauce.
4. How do I get the smoky “wok hei” flavor at home?
Crank your burner to maximum heat, use a carbon steel wok, and let the rice sit undisturbed for 30–40 seconds between tosses. A tiny drizzle of sesame oil at the end also mimics that smoky aroma.
5. What’s the best soy sauce for fried rice?
Light or regular soy sauce works best. Dark soy sauce adds color but less salt—use a mix of both for depth. Avoid sweet soy sauce (kecap manis) unless you want a sweeter profile.
Proven way to grow 5-Star Fried Rice (Classic)
Ingredients
Equipment
Method
- Prepare your ingredients by mincing garlic, grating ginger, dicing carrots, and slicing green onions.
- In a small bowl, whisk the eggs and set aside.
- In another small bowl, combine the soy sauce and sesame oil.
- Heat vegetable oil in a large wok or skillet over medium-high heat.
- Add the whisked eggs and scramble them until cooked through, then remove from the wok and set aside.
- Add a bit more oil to the wok if needed, then add the minced garlic, grated ginger, and diced carrots; stir-fry for 2-3 minutes until fragrant and slightly tender.
- Add the cold rice to the wok, breaking up any clumps with your spatula, and stir-fry for 3-5 minutes until heated through and slightly toasted.
- Pour the soy sauce mixture over the rice, add the peas and scrambled eggs back into the wok, and stir well to combine.
- Continue to stir-fry for another 1-2 minutes until everything is evenly heated and coated.
- Garnish with sliced green onions and serve hot.