The Ultimate Creamy Cheesecake Recipe: A Foolproof Guide to Perfect Every Slice
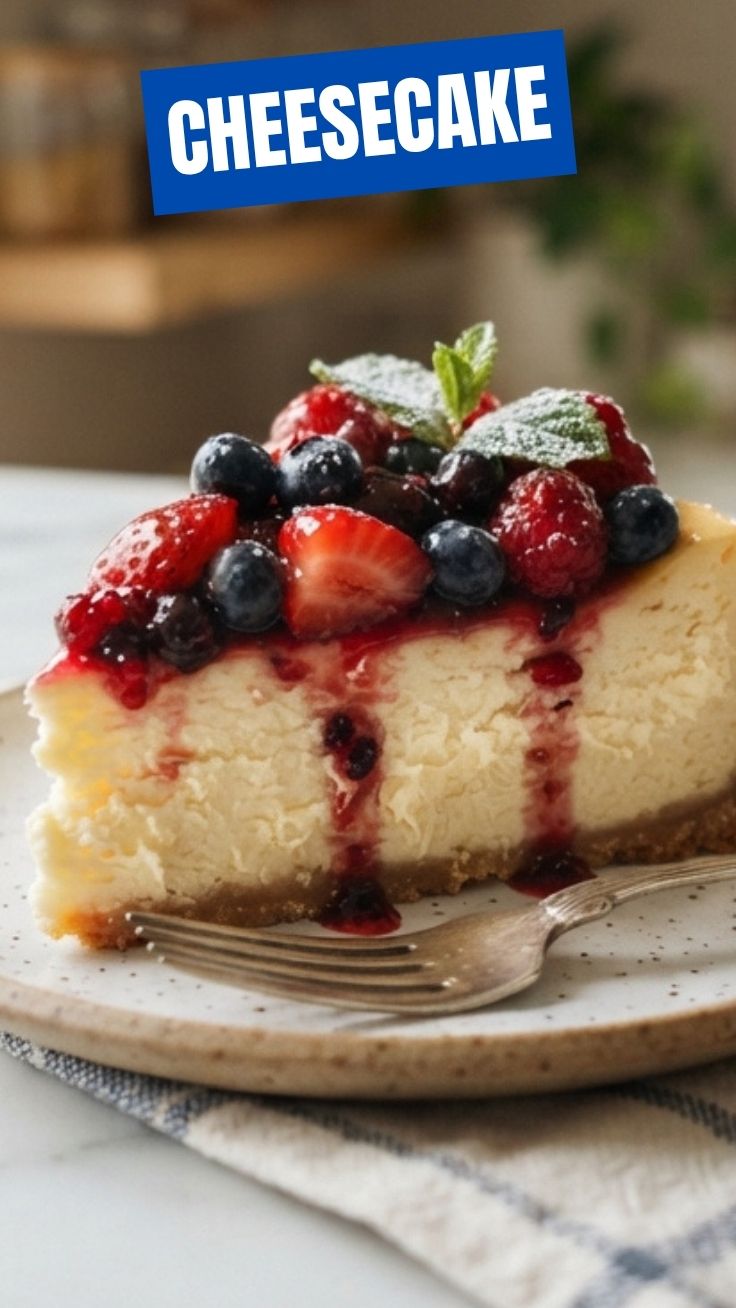
Have you ever wondered why some homemade cheesecakes turn out dense and cracked while others are silky smooth and flawless? The secret lies in mastering the ingredient ratios and baking technique. Preparing a classic cheesecake at home isn’t just about saving money—it gives you full control over flavor, texture, and freshness. Whether you’re celebrating a special occasion or simply craving a rich dessert, this comprehensive guide will help you create a restaurant-quality Cheesecake every time. The foundation of this recipe relies on high-quality Cream Cheese, which provides that velvety mouthfeel we all love.
Ingredients & Kitchen Tools
For the Crust:
– 1 ½ cups graham cracker crumbs (or digestive biscuits for a British twist): Provides stability and buttery flavor.
– ¼ cup granulated sugar: Sweetens the crust without overpowering.
– ½ cup unsalted butter, melted: Binds crumbs together; use salted butter if you reduce salt elsewhere.
For the Filling:
– 32 oz (4 blocks) full-fat cream cheese, softened: The star ingredient—use block-style, not spreadable.
– 1 cup granulated sugar: Balances tanginess.
– 1 teaspoon vanilla extract: Enhances flavor depth.
– 4 large eggs, room temperature: Ensures smooth incorporation.
– ⅔ cup sour cream (or Greek yogurt): Adds moisture and slight tang.
– 2 tablespoons all-purpose flour (optional): Helps prevent cracking; omit for gluten-free.
Kitchen Tools:
– 9-inch springform pan
– Electric hand mixer or stand mixer
– Large mixing bowls
– Rubber spatula
– Aluminum foil (for water bath)
– Roasting pan (larger than springform)
Optional Substitutions:
– Dairy-free: Use vegan cream cheese and coconut cream instead of sour cream.
– Gluten-free: Use almond flour crust with melted butter.
Prep Time & Cooking Schedule
| Phase | Time | Notes |
|——-|——|——-|
| Prep Time | 25 minutes | Let cream cheese sit at room temp for 1 hour before beginning |
| Crust Bake | 10 minutes at 325°F | Par-bake to prevent soggy bottom |
| Main Bake | 55–65 minutes at 325°F | Edges set, center jiggles like Jell-O |
| Cooling (oven off) | 1 hour | Leave door cracked to avoid shock cracks |
| Chilling | Minimum 4 hours (overnight ideal) | Allows flavors to meld and firm up |
Plan ahead: Cheesecake tastes better the next day. Bake it a day before serving.
Step-by-Step Instructions
1. Prepare the crust: Preheat oven to 325°F. Combine graham cracker crumbs, sugar, and melted butter. Press firmly into the bottom of a greased springform pan. Bake for 10 minutes, then cool completely.
2. Beat the cream cheese: In a large bowl, beat softened cream cheese on medium speed until smooth (about 2 minutes). Scrape bowl often. Pro tip: Overbeating incorporates too much air, causing cracks.
3. Add sugar and vanilla: Gradually beat in sugar and vanilla until combined—don’t rush.
4. Add eggs one at a time: Beat each egg on low speed just until yolk disappears. Overmixing leads to a puffy, cracked cheesecake.
5. Fold in sour cream and flour: Use a spatula to gently incorporate sour cream and flour (if using). Stop as soon as no streaks remain.
6. Prepare water bath: Wrap the springform pan’s bottom and sides tightly with two layers of aluminum foil. Place it in a roasting pan and pour hot water halfway up the sides. This gentle heat ensures even baking and prevents cracking.
7. Bake: Pour filling into cooled crust. Bake at 325°F for 55–65 minutes. The center should still wobble when shaken. Turn off oven and crack door open for 1 hour.
8. Chill completely: Remove from water bath, cool to room temp, then refrigerate uncovered for 1 hour. Cover and chill at least 4 hours (overnight best).
Temperature cue: A knife inserted 1 inch from edge should come out clean; the center will look wet but not liquid. This classic cheesecake bakes slowly for silky results, and the cream cheese must be fully softened to avoid lumps.
Nutritional Benefits & Advantages
Each serving (1/12 of cake) provides:
– Calories: ~380 kcal
– Protein: 7g (from eggs and cream cheese)
– Calcium: 10% DV (supports bone health)
– Vitamin A: 15% DV (from cream cheese)
Why homemade wins: You control sugar levels (reduce to ¾ cup for less sweetness), use real ingredients without preservatives, and avoid artificial thickeners. Cream cheese offers probiotics when cultured, though pasteurization reduces live cultures—still, it’s a source of healthy fats and protein.
Tips Variations & Cooking Advice
Flavor Variations:
– Pumpkin: Add ½ cup pumpkin puree + 1 tsp pumpkin pie spice to filling (reduce sour cream to ⅓ cup).
– Lemon: Add 2 tbsp lemon zest + 1 tbsp lemon juice.
– Chocolate: Melt 4 oz dark chocolate and swirl into batter before baking.
Cooking Methods:
– No-water-bath method: Bake at 300°F for 70–80 minutes with a pan of hot water on the rack below.
– Instant Pot: Pour batter into 7-inch pan, pressure cook on high for 35 minutes, natural release 10 minutes.
Dietary Adaptations:
– Dairy-free: Use vegan cream cheese + coconut cream + aquafaba instead of eggs.
– Keto: Swap sugar with erythritol + monk fruit blend; use almond flour crust.
Common Mistakes to Avoid
| Mistake | Why it happens | Fix |
|———|—————|—–|
| Cracked top | Overmixing, baking too long, or rapid temp change | Use low speed, pull cheesecake when center jiggles, cool gradually |
| Dense/gluey texture | Overmixing after adding eggs | Fold egg-by-low-speed; stop as soon as combined |
| Soggy crust | Underbaked crust or excess butter | Par-bake crust 10 minutes; press crumbs firmly |
| Lumpy filling | Cold cream cheese | Let cream cheese sit at room temp for 1 hour before mixing |
Storage & Meal Prep Tips
– Refrigeration: Store in airtight container for up to 5 days. Cover with plastic wrap directly on surface to prevent skin formation.
– Freezing: Wrap whole or slices tightly in plastic wrap + foil. Freeze up to 3 months. Thaw overnight in fridge (never microwave).
– Reheating: Serve cold or let sit at room temp 15 minutes. For warm slices, heat at 250°F for 10 minutes (not microwave—turns rubbery).
– Meal prep: Bake, chill completely, then slice and freeze individual portions for quick desserts.
Conclusion
Mastering a homemade cheesecake is all about patience and technique—gently mixing, using a water bath, and allowing ample chilling time. This recipe delivers the perfect balance of tangy, sweet, and creamy flavors. Whether you’re making a holiday centerpiece or a weekday indulgence, this foolproof method guarantees a luscious cheesecake that rivals any bakery. Remember, quality cream cheese makes all the difference—opt for full-fat blocks for the best texture. We’d love to see your results! Share a photo on social media with the hashtag #PerfectCheesecake and tag us. For more dessert inspiration, check out our no-bake tart recipes or decadent chocolate mousse.
FAQs
Q1: Can I use low-fat cream cheese?
A: Yes, but expect a slightly less creamy texture and possible cracking. Add 1 extra tablespoon of flour for stability.
Q2: Why did my cheesecake crack despite using a water bath?
A: Crack-proof by: (1) Not overmixing eggs, (2) Removing from oven while center still jiggles, (3) Cooling gradually with oven door cracked.
Q3: How do I know when my cheesecake is done without a water bath?
A: Edges will be set and puffed slightly, but center will still wobble when shaken. Internal temp should reach 150°F for creamy texture.
Q4: Can I substitute sour cream with something else?
A: Yes—full-fat Greek yogurt, mascarpone, or crème fraîche work well. Avoid low-fat versions as they add water.
Q5: My cheesecake tastes too tangy—how to balance?
A: Increase sugar by 2 tablespoons, or add 1 oz melted white chocolate to the batter. A berry compote topping also balances acidity.
Best way to grow Cheesecake
Ingredients
Equipment
Method
- To begin cultivating your cheesecake, mix the graham cracker crumbs with melted butter and granulated sugar.
- Press this crumb mixture firmly into the bottom of a 9-inch springform pan to create your fertile crust bed.
- In a large bowl, beat the softened cream cheese with granulated sugar until it is smooth and creamy.
- Gently whisk in the eggs one at a time, then fold in the sour cream and vanilla extract until just combined.
- Pour the nurtured filling over the prepared crust in the springform pan.
- Bake in a preheated oven at 325°F (160°C) for 50-60 minutes, or until the edges are set and the center jiggles slightly.
- Allow the cheesecake to cool completely at room temperature, then transfer it to the refrigerator to chill for at least 4 hours, or preferably overnight, for optimal maturation.
- This chilling period is crucial for the "growth" and setting of your cheesecake.
- Once fully matured, carefully remove the springform pan sides.
- Top with fresh berries and whipped cream if desired, then slice and enjoy the fruits of your "growth" endeavor!