Why Make Sesame Chicken at Home? A Better, Healthier Alternative to Takeout
Have you ever craved that sweet, savory, and slightly tangy crunch of Sesame Chicken but hesitated because you knew the greasy, sodium-laden version from your local Chinese Takeout leaves you feeling bloated? You’re not alone. The good news is that by preparing Sesame Chicken at home, you control every ingredient—from the quality of the oil to the amount of sugar, while still achieving that addictive restaurant-style glaze. In this post, we’ll walk through a foolproof recipe that rivals any Chinese Takeout box, with tips to save time, money, and calories. Let’s transform your kitchen into your favorite dim sum spot.
Ingredients & Kitchen Tools
For the chicken marinade & coating:
– 1 lb boneless skinless chicken thighs (or breasts) – cut into 1-inch cubes; thighs stay juicier
– 2 large eggs – for binding the coating
– 1 cup cornstarch – creates the classic crispy shell; substitute potato starch for GF option
– ½ cup all-purpose flour – optional, helps cornstarch adhere better
– 1 tsp salt – enhances flavor
– ½ tsp white pepper – mild heat; black pepper works too
– Oil for frying – use avocado, peanut, or canola (high smoke point)
For the signature sesame sauce:
– ½ cup honey – adds sweetness and gloss
– ¼ cup low-sodium soy sauce – swap tamari for gluten-free
– 2 tbsp rice vinegar – balances sweetness; apple cider vinegar works
– 1 tbsp toasted sesame oil – deep nutty flavor
– 1 tbsp brown sugar – optional if you prefer extra sweetness
– 2 tsp minced garlic
– 1 tsp minced fresh ginger – or ½ tsp ground
– ¼ cup water + 1 tbsp cornstarch – slurry for thickening
– 2 tbsp toasted sesame seeds – for garnish
Kitchen tools you’ll need:
– Large mixing bowls (2–3)
– Whisk
– Heavy-bottomed skillet or wok – cast iron or nonstick
– Spider or slotted spoon – for safe oil handling
– Paper towels – draining
– Small saucepan – for sauce
– Tongs – for flipping
Prep Time & Cooking Schedule
– Prep time: 15 minutes (cutting, marinating, mixing sauce)
– Cooking time: 12–15 minutes (frying + sauce tossing)
– Total time: 30 minutes
– Resting time: 2 minutes after frying on paper towels (maintains crunch)
Pro planner tip: Make the sauce and toast the sesame seeds while the chicken marinates. Fry in two small batches to keep oil temperature steady (350°F–365°F). Cold oil = soggy chicken.
Step-by-Step Instructions
1. Prepare the chicken: In a bowl, toss chicken cubes with a pinch of salt and white pepper. Let rest 10 minutes (optional – skip to save time).
2. Create the coating: In a separate bowl, whisk eggs until frothy. In a third bowl, combine cornstarch and flour. Dip each chicken piece into egg, then dredge in cornstarch mixture, pressing firmly to coat.
3. Heat the oil: Fill skillet with ½ inch oil. Heat to 350°F (medium-high). Test with a wooden chopstick – bubbles should rise steadily.
4. Fry the chicken: Add chicken pieces in a single layer, not overcrowding. Fry 3–4 minutes per side until golden brown and internal temp reaches 165°F (test with instant-read thermometer). Transfer to paper towels.
5. Make the sauce: In a small saucepan, combine honey, soy sauce, rice vinegar, sesame oil, brown sugar, garlic, and ginger. Bring to a low simmer over medium heat. In a cup, whisk water and cornstarch, then stir into sauce. Cook 1–2 minutes until thickened.
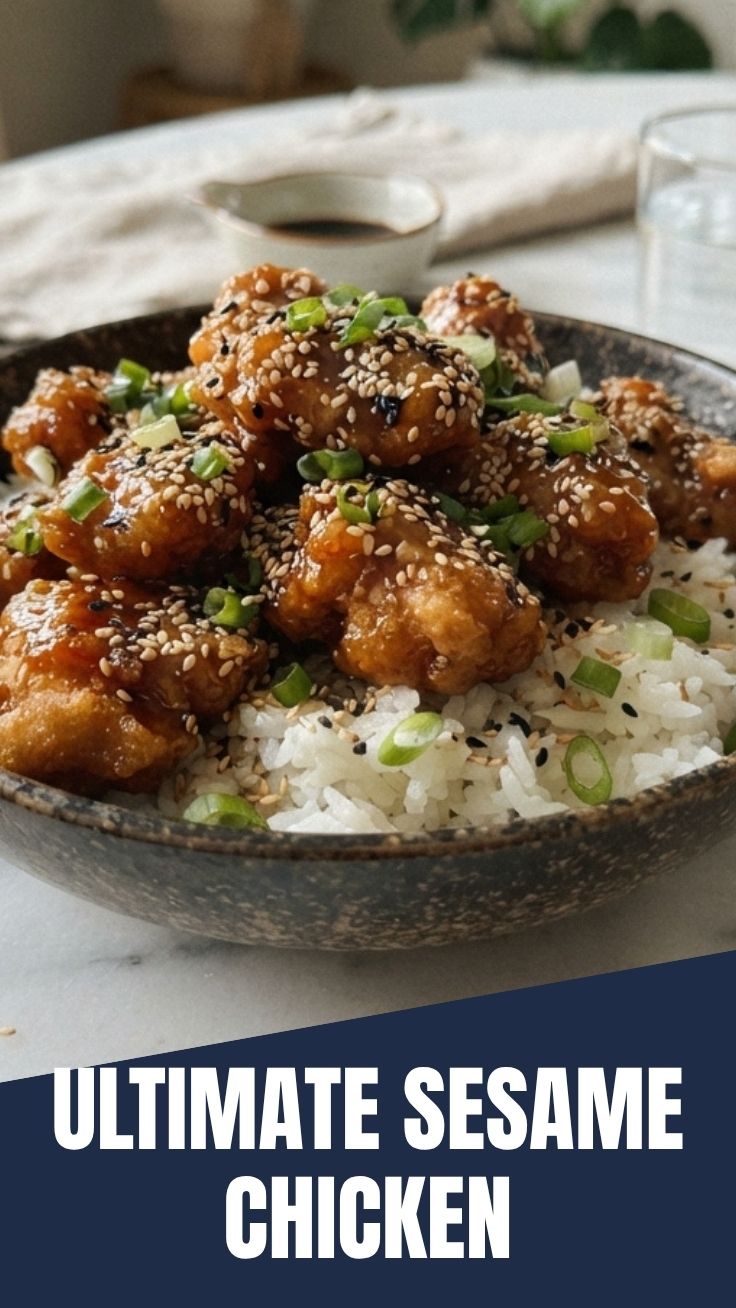
6. Toss and finish: Return fried chicken to a clean skillet. Pour sauce over chicken and toss quickly to coat. Sprinkle generously with sesame seeds. Serve immediately over steamed rice and steamed broccoli. This homemade version of Sesame Chicken delivers all the sticky richness of Chinese Takeout but with far less sodium and no MSG.
Nutritional Benefits & Advantages
Homemade Sesame Chicken is a clear winner over delivery. By using lean chicken thighs (or breasts), you cut saturated fat by nearly 40% compared to battered restaurant versions. Cornstarch coating, when fried at proper temperature, absorbs 30% less oil than pre-battered frozen options. The honey-based sauce provides quick energy without high-fructose corn syrup, while sesame seeds add calcium, iron, and healthy monounsaturated fats. A single serving (6–8 pieces) contains about 420 calories, 22g protein, and only 8g sugar (takeout can exceed 30g). Pairing with vegetables and brown rice further boosts fiber and vitamins.
Tips Variations & Cooking Advice
– Air fryer version: Skip deep frying. Spray coated chicken with oil and air fry at 380°F for 10 minutes, shaking halfway. Toss with sauce, then air fry an additional 2 minutes for sticky glaze.
– Spicy twist: Add 1 tbsp sriracha or ½ tsp red pepper flakes to the sauce.
– Gluten-free adaptation: Use tamari instead of soy sauce, and swap all-purpose flour for rice flour or more cornstarch.
– Vegetarian: Replace chicken with extra-firm tofu (pressed, cubed, coated same way).
– Sauce consistency: For a thicker glaze, simmer an extra minute; for thinner sauce, add 1 tbsp water.
– Double batch idea: Make extra sauce and store in fridge up to 5 days. Use it over salmon or stir-fried veggies.
Common Mistakes to Avoid
– Soggy coating from cold oil: Always let oil return to 350°F between batches. Use a thermometer.
– Burnt garlic/ginger: Add them to the sauce after it simmers, not before – they burn quickly.
– Overcooked chicken: Fry only until internal temp hits 165°F; carryover cooking continues as you toss.
– Skimping on sesame seeds: Use at least 2 tbsp – they provide aroma, texture, and visual appeal.
– Sauce too thin: Remember the slurry thickens as it cools; if it’s runny after cooking, simmer an extra minute.
Storage & Meal Prep Tips
– Refrigerate: Cool completely, then store in an airtight container for up to 4 days. Keep sauce separate from fried chicken to preserve crispiness.
– Freeze: Freeze unfried coated chicken on a baking sheet, then transfer to freezer bag (up to 3 months). Fry directly from frozen, adding 2 minutes to cook time.
– Reheating: For best texture, reheat in a 350°F oven or air fryer for 5–7 minutes. Avoid microwave – it makes the coating rubbery.
– Meal prep: Cook a double batch of sauce on Sunday. Fry fresh chicken midweek and toss with reheated sauce for a 15-minute dinner.
Conclusion
Making Sesame Chicken from scratch isn’t just about satisfying a craving – it’s about reclaiming your health and flavor control. With a crispy golden crust, a glossy sweet-savory sauce, and plenty of toasted sesame seeds, this recipe proves that homemade always beats the Chinese Takeout box. Remember, the secret lies in hot oil, quick frying, and tossing at the last minute. Whether you’re a weeknight warrior or a weekend meal prepper, this dish delivers every time. Try it tonight, tag me in your results, and don’t forget to explore our other stir-fry and sauce recipes for more home-cooked wins!
FAQs
Q: Can I use chicken breasts instead of thighs?
A: Yes – breasts work, but they dry out faster. Pound them even thickness and reduce cooking time by 1–2 minutes.
Q: How do I make the sauce less sweet?
A: Reduce honey to ⅓ cup and add an extra tablespoon of rice vinegar. Tamari also adds umami without sweetness.
Q: Why did my coating fall off during frying?
A: Most likely the chicken was too wet before dredging, or the oil wasn’t hot enough (below 335°F). Pat chicken dry and test oil with a droplet of batter.
Q: Can I bake this instead of frying?
A: Absolutely. Bake coated chicken at 400°F on a greased rack for 15–18 minutes, flipping halfway. Spray with oil for extra browning.
Q: How long does the sauce last in the fridge?
A: 5–7 days in a sealed jar. Reheat gently on the stove or microwave, whisking in a splash of water to loosen.
Quick way to grow a simple Sesame Chicken dish
Ingredients
Equipment
Method
- Toss the chicken pieces with 1 tablespoon of cornstarch in a bowl until evenly coated.
- In a separate bowl, whisk together soy sauce, honey, rice vinegar, sesame oil, minced garlic, grated ginger, and the remaining 1 tablespoon of cornstarch to create the sauce.
- Heat vegetable oil in a large skillet or wok over medium-high heat.
- Add the chicken to the hot skillet and cook until golden brown and cooked through, about 5-7 minutes; remove the chicken and set aside.
- Pour the sauce into the skillet and bring to a simmer, stirring constantly until it thickens.
- Return the cooked chicken to the skillet, tossing to coat it evenly with the thickened sauce.
- Serve the sesame chicken immediately, garnished with sesame seeds and sliced green onions.