The Ultimate Guide to Perfectly Chewy {Rice Krispie Treats} Every Time
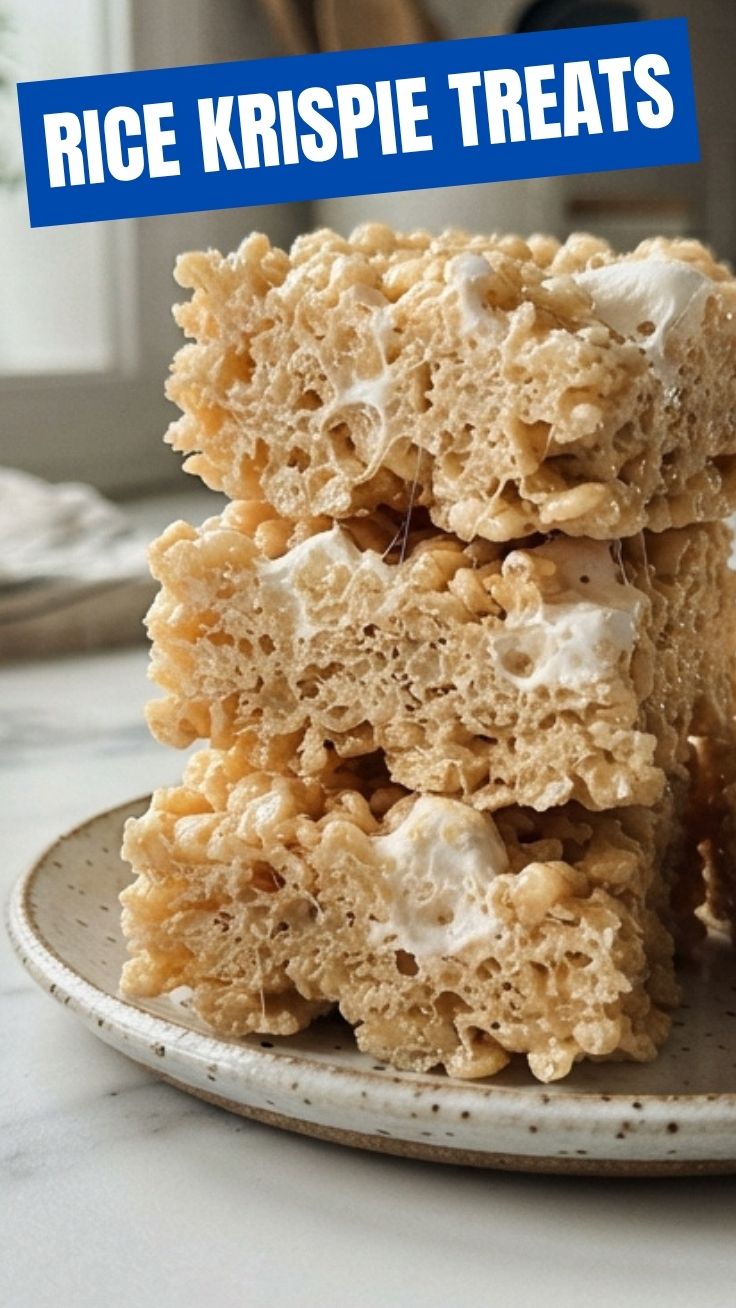
Have you ever bitten into a store-bought Rice Krispie Treat only to find it disappointingly hard and stale? The magic of a homemade version lies in its melt-in-your-mouth texture and fresh, buttery flavor. Whether you call them classic squares or simply can’t resist a gooey marshmallow bite, learning to make Rice Krispie Treats from scratch transforms a simple snack into a nostalgic indulgence. This guide will take you from sticky fingers to perfect squares, ensuring every batch is a triumph of crispy-chewy bliss. With the right technique, mastering these no-bake treats becomes effortless.
Ingredients & Kitchen Tools (H2)
Essential Ingredients
– 6 cups Rice Krispies cereal – The star ingredient; use fresh cereal for maximum crunch.
– 4 tablespoons unsalted butter – Adds richness; salted butter works if you reduce added salt.
– 10 oz (1 bag) mini marshmallows – Standard size melts evenly; avoid stale marshmallows.
– ½ teaspoon vanilla extract – Optional but enhances flavor.
– ¼ teaspoon salt – Balances sweetness; omit if using salted butter.
Kitchen Tools
– 9×13-inch baking dish – For thin treats; an 8×8 dish yields thicker squares.
– Large non-stick pot – Prevents marshmallow scorching.
– Silicone spatula – Essential for easy stirring and pressing.
– Parchment paper – Lines the dish for mess-free removal.
– Sharp knife – Cuts clean squares without squishing.
Optional Substitutions
– Gluten-free – Use certified gluten-free rice cereal.
– Dairy-free – Swap butter for coconut oil or vegan butter.
– Flavor twist – Add ½ cup chocolate chips or peanut butter.
Prep Time & Cooking Schedule (H2)
Prep Time: 5 minutes
Cook Time: 3–4 minutes (stovetop)
Cooling Time: 30 minutes (room temperature)
Total Time: Approximately 40 minutes
Plan ahead: The mixture sets quickly, so have your dish lined and cereal measured before you start. For best texture, serve within 4 hours of making. If you’re preparing for an event, make them the same day—freshness is key.
Step-by-Step Instructions (H2)
1. Prepare the pan – Line a 9×13-inch baking dish with parchment paper, leaving overhang on two sides. Lightly grease the paper with butter or non-stick spray.
2. Melt the butter – In a large, heavy-bottomed pot over low heat, melt 4 tablespoons of unsalted butter. Stir occasionally until completely liquefied.
3. Add marshmallows – Pour in the entire bag of mini marshmallows. Stir constantly with a silicone spatula over low heat until 90% melted. Remove from heat immediately to avoid hardening.
4. Incorporate extras – Stir in vanilla extract and salt. If adding mix-ins (e.g., chocolate chips), fold them in now.
5. Combine with cereal – Pour the melted marshmallow mixture over the 6 cups of cereal. Fold gently using a folding motion—do not crush the cereal. Stop as soon as the cereal is evenly coated.
6. Press into pan – Transfer the mixture to the prepared dish. Using a second piece of parchment paper or a greased spatula, press firmly into an even layer. Pro tip: Lightly wet your hands to prevent sticking when pressing.
7. Cool and cut – Let the treats cool at room temperature for 30 minutes. Use the parchment overhang to lift the block onto a cutting board, then slice into squares with a sharp knife.
Temperature control: Always keep heat low; high heat makes marshmallows tough. For perfectly chewy Rice Krispie Treats, avoid over-melting—stop when a few small lumps remain. Similarly, when making Rice Krispie squares, press gently to preserve airy crunch.
Nutritional Benefits & Advantages (H2)
While these treats are an indulgence, they offer surprising perks. Rice Krispies provide quick energy from carbohydrates, making them a great pre-activity snack. The butter contains fat-soluble vitamins A and D, while marshmallows contribute negligible protein. Made at home, you control the sugar and avoid preservatives. For a balanced approach, pair with a protein source like nuts or yogurt.
Tips Variations & Cooking Advice (H2)
– Flavor variations: Swap vanilla for almond extract, or stir in cinnamon and dried fruit.
– Chocolate lovers: Drizzle melted dark chocolate on top after cooling.
– Dietary adaptations: Use vegan marshmallows and coconut oil for dairy-free, or gluten-free cereal for celiac-safe versions.
– Texture tweaks: Add 2 tablespoons brown sugar to the marshmallow mixture for deeper flavor.
– Portion changes: Use an 8×8 pan for thicker, gooey squares—increase cook time by 1 minute.
Common Mistakes to Avoid (H2)
1. Overheating the marshmallows – This creates rock-hard treats. Always remove from heat when 90% melted.
2. Crushing the cereal – Overmixing leads to dense, chewy squares. Fold gently until just coated.
3. Skipping the parchment – Unlined pans cause sticking and broken treats.
4. Using stale cereal – Fresh cereal ensures maximal crunch; check expiration dates.
5. Pressing too hard – Compressed ingredients lose airiness. Use light, even pressure.
Storage & Meal Prep Tips (H2)
Store leftover treats in an airtight container at room temperature for up to 3 days. Add a slice of bread to the container to absorb excess moisture and maintain chewiness. For longer storage, freeze squares individually wrapped in plastic wrap and placed in a freezer bag for up to 6 weeks. To reheat, microwave a single square for 10–15 seconds or room temperature thaw. Avoid refrigeration, which dries out the texture.
Conclusion (H2)
Homemade Rice Krispie Treats outshine any packaged version with their fresh, buttery taste and customizable texture. By following this guide, you’ll consistently achieve perfectly chewy squares that stay soft for days. Whether you’re making classic Rice Krispie squares for a party or a quick family snack, the secret lies in gentle heat and minimal handling. Now it’s your turn—grab your ingredients, involve the kids, and share your golden batch on social media with #HomemadeCrunch. For more no-bake dessert ideas, explore our other recipes!
FAQs (H2)
1. Can I use large marshmallows instead of mini?
Yes, but mini marshmallows melt faster and more evenly. If using large, chop them into smaller pieces and increase melt time by 30 seconds.
2. How do I fix treats that are too hard?
If already made, reheat in the microwave for 10 seconds to soften slightly. For future batches, reduce cook time and avoid over-pressing.
3. Can I add peanut butter or chocolate?
Absolutely! Stir ½ cup creamy peanut butter into the melted marshmallow mixture. For chocolate, add ½ cup chocolate chips after removing from heat.
4. Why did my treats turn out sticky?
High humidity or over-wet marshmallows cause stickiness. Use fresh marshmallows, and avoid working on rainy days.
5. How long can I keep them in the freezer?
Properly wrapped, they stay fresh for up to 6 weeks. Thaw at room temperature for 30 minutes before serving.
Quick way to grow a perfect batch of Rice Krispie Treats
Ingredients
Equipment
Method
- Melt the butter in a large saucepan over low heat.
- Add the marshmallows and stir until completely melted and smooth.
- Remove from heat and quickly stir in the Rice Krispies cereal until well coated.
- Press the mixture evenly into a buttered 9x13 inch pan.
- Let cool completely before cutting into squares and serving.