From Pan Drippings to Perfection: Your Ultimate Guide to Mastering Homemade Turkey Gravy
Have you ever pulled a perfectly golden, crispy-skinned bird from the oven, only to realize the store-bought gravy in your pantry is about to ruin the entire Thanksgiving dinner? If you’ve nodded yes, you are not alone. The secret to a memorable holiday feast isn’t just the bird—it’s the rich, velvety sauce that ties every bite together. Learning how to craft a flawless Turkey Gravy from scratch is one of the most valuable skills you can bring to your kitchen. Not only does it elevate the flavor profile of your meal, but it also allows you to control the seasoning, texture, and depth of flavor. By using the natural juices and drippings from your roast, you create a condiment that is deeply savory, uniquely yours, and infinitely superior to anything from a packet.
The beauty of homemade gravy lies in its simplicity: a few basic ingredients, a little patience, and the willingness to whisk. Whether you are a seasoned cook or a first-time host, mastering this sauce ensures your holiday table is memorable for all the right reasons.
—
Ingredients & Kitchen Tools
Essential Ingredients
– Turkey drippings (about 2 cups): The gold standard. Skim excess fat but keep the flavorful brown bits.
– 4 tablespoons unsalted butter: Adds richness and helps form the roux.
– ¼ cup all-purpose flour: The thickening agent. For a gluten-free version, substitute rice flour or cornstarch slurry.
– 2 cups chicken or turkey broth (low-sodium): Enhances volume without making it too salty.
– ½ cup dry white wine (optional): Adds acidity to balance richness.
– Salt and black pepper: To taste. Start small; drippings are often salty.
– Fresh thyme or sage (optional): A few sprigs add aromatic depth.
Kitchen Tools & Utensils
– Fat separator or large measuring cup: Essential for separating drippings from fat.
– Medium heavy-bottomed saucepan: Prevents scorching.
– Wooden spoon or heat-resistant whisk: Crucial for a lump-free roux.
– Fine-mesh strainer: Optional but recommended for the silkiest texture.
– Measuring cups and spoons: Precision is key.
Optional Substitutions
– Wine: Replace with additional broth or apple cider for a non-alcoholic version.
– Flour: Gluten-free all-purpose blend or arrowroot powder works well.
—
Prep Time & Cooking Schedule
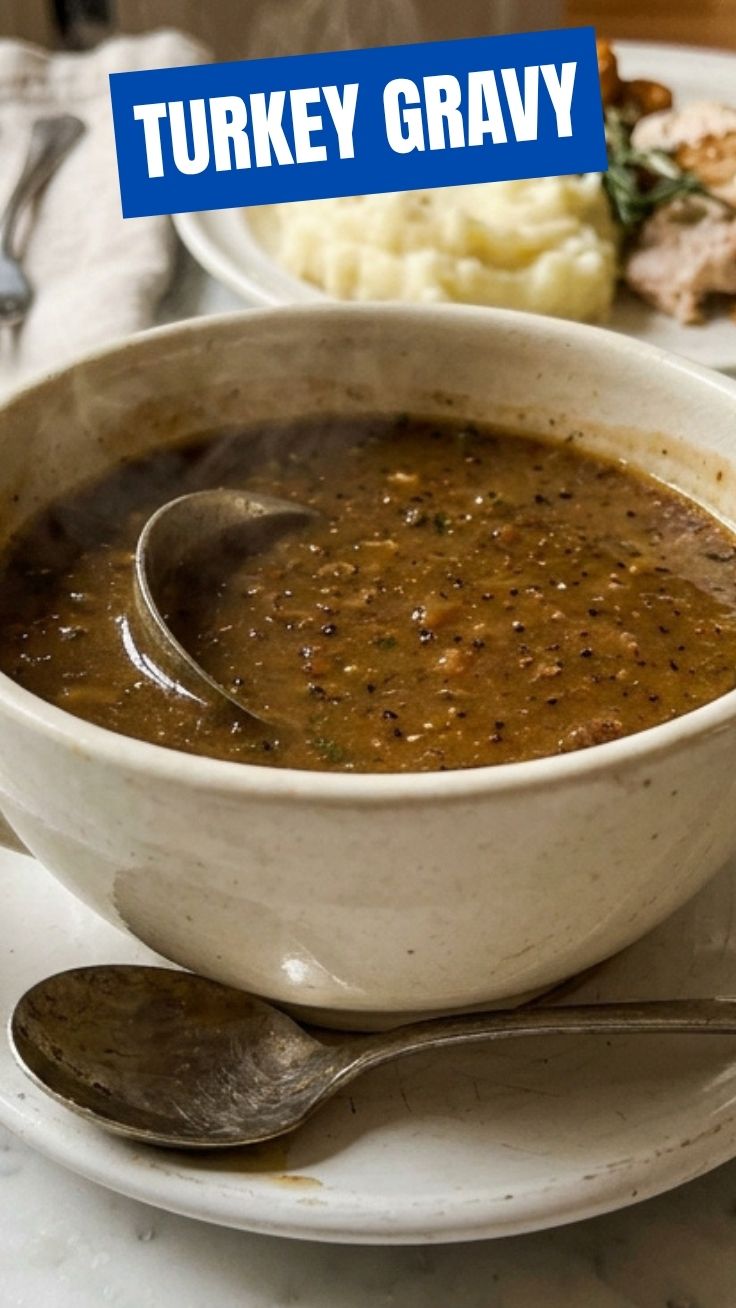
– Total Prep Time: 10 minutes
– Total Cooking Time: 20–25 minutes
– Resting Time (for bird): 30 minutes (you need drippings after the turkey rests)
Planning Tip: Prepare your broth and measure out your flour and butter before the turkey is done. As soon as you’ve transferred the rested bird to a carving board, begin making the gravy. This ensures it’s piping hot when you serve.
—
Step-by-Step Instructions
1. Deglaze the Roasting Pan: After removing the turkey, place the pan over two burners on medium heat. Pour in 1 cup of broth or white wine and scrape up the browned bits (fond) with a wooden spoon. These bits are pure umami.
2. Strain and Separate: Pour the deglazed liquid through a fine-mesh strainer into a fat separator. Let it sit for 2 minutes, then pour the juices (leaving the fat behind) into a measuring cup. You should have about 2 to 2.5 cups of liquid.
3. Make the Roux: In a saucepan, melt butter over medium heat. Whisk in the flour and cook for 2 minutes, stirring constantly. You want it to turn a pale golden color—this raw flour taste is what kills good Turkey Gravy.
4. Add the Liquid Slowly: Gradually whisk in the reserved turkey juices and remaining broth. Raise the heat to medium-high and bring to a gentle simmer. The sauce will thicken in about 3–4 minutes.
5. Season and Finish: Stir in salt, pepper, and fresh herbs. Taste and adjust. For an extra silky finish, whisk in a tablespoon of cold butter off the heat.
6. Serve Immediately: Pour into a warm gravy boat. This completes the essential role of Thanksgiving dinner—the unifying sauce that brings every dish together.
—
Nutritional Benefits & Advantages
Homemade gravy offers significant nutritional advantages over store-bought versions. First, you control the sodium content. Many pre-made gravies contain over 600mg of sodium per serving, whereas a scratch version can be kept under 200mg. Second, you retain trace minerals from the turkey bones and drippings, including calcium and magnesium derived from the roasting process. Finally, using high-quality butter and fresh herbs adds monounsaturated fats and antioxidants. The moderate amount of flour provides quick energy, but the dish is surprisingly low in sugar—unlike commercial varieties that often use corn syrup.
—
Tips, Variations & Cooking Advice
– Flavor Variation: Add a splash of balsamic vinegar or a pinch of smoked paprika for depth.
– Dietary Adaptation (Dairy-Free): Use olive oil or vegan butter instead of butter. The roux will still come together beautifully.
– Texture Adjustments: For a thicker gravy, mix 1 tablespoon cornstarch with 2 tablespoons cold water and whisk it in at the end.
– Herb Swaps: Try rosemary and garlic for a Tuscan twist, or tarragon for a French nuance.
– Dietary Adaptation (Gluten-Free): Replace all-purpose flour with sorghum flour or potato starch. Cook the roux for an extra minute.
—
Common Mistakes to Avoid
– Lumpy Gravy: This happens when you add liquid too quickly to the roux. Whisk constantly and add liquid in a thin stream.
– Gluey Texture: Overcooking the roux or using too much flour. Stick to a 1:1 butter-to-flour ratio (4 tablespoons each for 2 cups liquid).
– Grainy Mouthfeel: This occurs when you don’t strain the deglazed liquid. Always pass through a fine-mesh sieve.
– Greasy Gravy: You didn’t separate the fat properly. Use a separator or spoon off visible oil.
– Weak Flavor: Start with drippings that are deeply browned. If your bird was under-roasted, add a teaspoon of low-sodium soy sauce or Marmite for umami.
—
Storage & Meal Prep Tips
– Refrigeration: Store leftover gravy in a sealed container for up to 4 days. The fat will solidify on top—simply reheat and whisk it back in.
– Freezing: Pour cooled gravy into heavy-duty freezer bags or small containers. It keeps for 3 months. Thaw overnight in the refrigerator.
– Reheating: Warm in a saucepan over low heat, whisking constantly. Add a splash of broth if it thickened too much. You can also microwave in 30-second bursts, stirring between intervals.
Pro Tip: Make a double batch and freeze half. You’ll thank yourself when hosting a weeknight roast chicken dinner.
—
Conclusion
Mastering this sauce transforms a simple roast into a celebration. The process is straightforward, yet the results are profoundly satisfying. Now that you have a reliable method, you can approach any holiday with confidence. Remember that a great Turkey Gravy is the linchpin of any memorable Thanksgiving dinner, turning good food into a great meal. Give this recipe a try, and don’t be shy about adjusting the herbs and seasoning to suit your palate. We’d love to hear how your final sauce turned out—share your tips or questions in the comments below!
—
FAQs
1. Can I make turkey gravy ahead of time?
Absolutely. Prepare it up to 2 days in advance. Cool completely, refrigerate, and reheat gently before serving. Add a splash of broth if needed to adjust consistency.
2. How do I fix gravy that is too salty?
Add a peeled, raw potato slice to the simmering gravy for 10 minutes. The potato will absorb some salt. Remove the slice before serving.
3. Can I use cornstarch instead of flour?
Yes, but the method changes. Mix 2 tablespoons cornstarch with ¼ cup cold water. Stir into hot liquid and cook for 1 minute until thickened. The texture will be glossier and more translucent.
4. What if I don’t have turkey drippings?
Use high-quality chicken broth and brown 2 tablespoons of butter with 1 tablespoon of tomato paste before adding liquid. This creates a pseudo-fond for depth.
5. Why did my gravy turn out thin?
You likely did not simmer it long enough or used too much liquid. Continue simmering uncovered until it reduces. Alternatively, whisk in a teaspoon of instant flour or a cornstarch slurry.
Best way to grow a rich Turkey Gravy in 3 steps
Ingredients
Equipment
Method
- Begin by pouring the turkey drippings into a saucepan, ensuring to scrape up any flavorful bits from the roasting pan.
- Whisk in the flour to form a smooth roux, cooking for 1-2 minutes until lightly golden.
- Gradually add the turkey or chicken broth, whisking constantly to prevent lumps, and bring the gravy to a simmer, cooking until it thickens.