The Ultimate Homemade Blackberry Jam Recipe for Perfect Preserves
Have you ever tasted a spoonful of summer that bursts with the deep, sun-ripened sweetness of wild berries? Homemade blackberry jam transforms simple fruit into a pantry treasure, far surpassing anything you’ll find on grocery store shelves. When you make your own Blackberry Jam (Homemade), you control every ingredient—no artificial pectin, no high-fructose corn syrup, just pure fruit goodness. This homemade blackberry jam recipe delivers that perfect balance of sweet-tart flavor with a natural, spreadable texture. Along the way, you’ll also discover an excellent Blackberry preserves recipe that captures whole berries in a luscious syrup. Preparing preserves at home not only saves money but also creates personalized gifts that showcase your culinary skills. Whether you’re a novice canner or experienced cook, this guide ensures foolproof results every time.
Ingredients & Kitchen Tools
Ingredients
– Fresh blackberries (4 cups) – Ripe but firm; frozen berries work if thawed and drained
– Granulated sugar (3 cups) – Adjust to taste; organic sugar dissolves cleaner
– Lemon juice (2 tablespoons) – Fresh-squeezed provides natural pectin and acidity
– Pectin (1 packet, optional) – For quicker set; use low-sugar pectin if reducing sugar
– Butter (½ teaspoon) – Reduces foam; unsalted preferred
Kitchen Tools
– Heavy-bottomed pot (6-8 quart) – Distributes heat evenly to prevent scorching
– Wooden spoon – Long-handled for safe stirring of hot jam
– Canning jars (4 half-pint) – Sterilized; check for chips or cracks
– Water bath canner – Large pot with rack for processing
– Jar lifter – Safety essential for handling hot jars
– Wide-mouth funnel – Prevents mess during jar filling
– Thermometer – Candy or instant-read for precise temperature
Prep Time & Cooking Schedule
– Prep time: 15 minutes – Washing berries, sterilizing jars, measuring ingredients
– Cook time: 25–35 minutes – From boiling to gel point (220°F / 104°C at sea level)
– Cooling time: 12–24 hours – Jars must cool undisturbed for proper seal
– Total active time: Approximately 1 hour
Planning tip: Start early in the day when you have uninterrupted time. Morning light helps you see the jam’s clarity and color development. Prepare all ingredients before turning on the heat—once berries hit the pot, you won’t want to step away.
Step-by-Step Instructions
1. Prepare your blackberries: Gently wash berries in cold water, removing stems and any soft or moldy fruit. Pat dry with paper towels; excess water dilutes the jam. Crush berries lightly with a potato masher or fork, leaving some chunks for texture. This batch yields a chunky homemade blackberry jam with visible fruit pieces.
2 Combine and macerate: In your heavy pot, mix crushed berries with sugar and lemon juice. Let stand 10-15 minutes—the sugar draws out natural juices, starting the flavor melding process. Stir occasionally to dissolve sugar crystals.
3. Bring to a rolling boil: Place pot over medium-high heat. Stir constantly until sugar fully dissolves, then bring to a vigorous boil that cannot be stirred down. This is critical—a true rolling boil ensures proper gel formation. Add butter to reduce foaming.
4. Cook to gel point: Insert your candy thermometer. Continue boiling without stirring (you can gently swirl the pot) until mixture reaches 220°F (104°C). This takes 15-25 minutes depending on berry moisture. For a reliable blackberry preserves recipe, cook until a dollop on a cold plate wrinkles when pushed (the “wrinkle test”).
5. Test for doneness: Remove pot from heat. Scoop a small amount onto a chilled plate. Return to freezer for 30 seconds. If it wrinkles when pushed with your finger, it’s ready. If it remains liquid, boil 2-3 more minutes and retest.
6. Fill and process jars: Ladle hot jam into sterilized jars, leaving ¼-inch headspace. Wipe rims clean, apply lids and bands fingertip-tight. Process in boiling water bath for 10 minutes (adjust for altitude). Remove and let cool undisturbed 12-24 hours.
Nutritional Benefits & Advantages
Blackberries rank among the highest antioxidant fruits, packed with vitamin C, vitamin K, and manganese. One tablespoon of this homemade blackberry jam delivers fiber from crushed seeds and natural fruit pectin, which supports digestive health. Compared to commercial jams, homemade versions contain 40-50% less added sugar while retaining more heat-sensitive nutrients. The cooking process actually increases the bioavailability of certain antioxidants, making this preserve both delicious and functional. Additionally, the lemon juice provides a boost of ascorbic acid, which enhances iron absorption from the berries themselves.
Tips Variations & Cooking Advice
Flavor Variations
– Spiced blackberry jam: Add 1 cinnamon stick and 3 whole cloves during cooking; remove before jarring
– Herb-infused preserves: Stir in 1 tablespoon fresh thyme or rosemary leaves in the final 5 minutes
– Boozy blackberry: Replace 2 tablespoons water with bourbon or dark rum for depth
Dietary Adaptations
– Low-sugar version: Use 1½ cups sugar with low-sugar pectin; expect softer set
– Honey-sweetened: Substitute honey for 50% of sugar; reduce cook time slightly as honey darkens faster
– Seed-free option: Press cooked mixture through a fine-mesh sieve before returning to boil for 2 minutes
Alternative Methods
– Freezer jam: Skip water bath processing; use freezer-safe containers and store up to 1 year
– Stovetop quick version: Use liquid pectin (check package directions); cook only 1-2 minutes after adding
– Slow cooker approach: Cook on low 4-6 hours, stirring occasionally; may need longer for gel
Common Mistakes to Avoid
– Skipping the maceration step: Sugar needs time to dissolve before heat; rushing causes gritty texture
– Boiling too gently: A simmmer won’t activate pectin; maintain that vigorous rolling boil
– Overcooking: Jam continues setting as it cools; remove from heat as soon as gel test passes
– Skimping on sterilization: Dirty jars lead to mold; boil jars and lids for 10 minutes minimum
– Filling jars too full: Headspace is non-negotiable for proper sealing; leave ¼ inch exactly
– Moving jars during cooling: Disturbing hot jars breaks their seal; let them sit completely untouched
Storage & Meal Prep Tips
Refrigeration: Once opened, store jam in the refrigerator for up to 3 weeks. Always use clean, dry utensils to prevent contamination.
Freezing: Pour cooled jam into freezer-safe containers, leaving ½-inch headspace. Thaws perfectly in 24 hours; texture remains spreadable. Frozen jam keeps up to 1 year.
Water bath sealed jars: Store unopened jars in a cool, dark place (50-70°F). Properly sealed jam lasts 18-24 months. Check seals before using—the lid should not flex when pressed.
Reheating: If your jam crystallizes in storage, place sealed jar in a pot of simmering water for 10-15 minutes. Stir gently to redistribute.
Meal prep idea: Make triple batches during berry season. These preserves become instant gifts, pancake toppers, or yogurt swirls throughout the year.
Conclusion
This homemade blackberry jam captures summer’s essence in every jar, offering superior flavor and nutrition compared to store-bought alternatives. By following these steps, you’ve created a versatile preserve that elevates everything from morning toast to evening cheese boards. The accompanying blackberry preserves recipe technique ensures you can make both jam and whole-berry preserves with confidence. We encourage you to experiment with spices, share jars with neighbors, and explore our other fruit preserve guides. Your kitchen is now equipped to produce condiments that rival artisanal brands at a fraction of the cost. Drop a comment below sharing your favorite variation or any tips you discovered along the way!
FAQs
Can I use frozen blackberries instead of fresh?
Absolutely. Thaw berries completely and drain excess liquid before measuring. Frozen berries often have more juice, which may require 5-10 additional minutes of cooking to reach gel point.
Why didn’t my jam set properly?
Several factors: undercooking (didn’t reach 220°F), too much water in berries, or aging fruit with low natural pectin. Next time, add 2 tablespoons commercial pectin or cook 5 minutes longer before testing.
Can I reduce the sugar significantly?
Yes, but expect changes. Sugar preserves texture and prevents spoilage. For low-sugar versions, use low-sugar pectin, add ¼ cup lemon juice, or process jars in a pressure canner for shelf-stable safety.
How do I know if my jars sealed properly?
Remove metal bands and gently press down on lid center. If it doesn’t flex or pop, it’s sealed. You may also hear a satisfying “ping” sound as jars cool. Refrigerate any unsealed jars and use within 3 weeks.
What causes my jam to have a cloudy appearance?
Possible causes: using fruit with high natural starch, undercooked pectin, or hard water. To fix, use filtered water, thoroughly crush berries before cooking, and always bring to a full rolling boil for at least 1 minute.
—
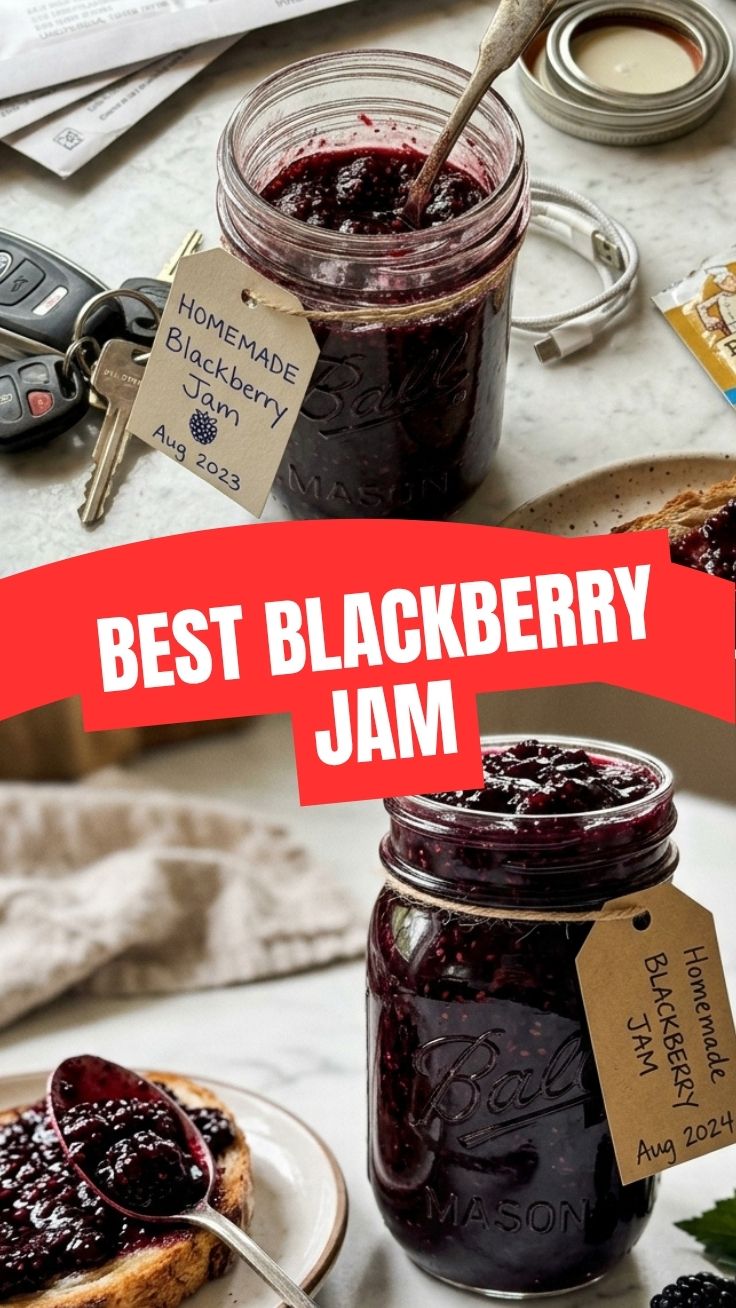
Pro tip: Label your jars with date and variety. Homemade jam often develops deeper flavor after 2-3 weeks of aging.
Blackberry Jam (Homemade)
Ingredients
Equipment
Method
- Wash blackberries thoroughly and remove any stems or leaves.
- In a large pot, combine the blackberries, sugar, and lemon juice. Bring the mixture to a boil over medium-high heat, stirring constantly until the sugar dissolves.
- Reduce heat to medium-low and simmer, stirring occasionally, for about 20-25 minutes, or until the jam thickens to your desired consistency.
- To test for doneness, place a small amount of jam on a chilled plate and refrigerate for a few minutes. It should wrinkle when pushed with a spoon.
- Carefully ladle the hot jam into sterilized jars, leaving about 1/4 inch of headspace. Wipe the rims clean and seal tightly with lids.
- Process the jars in a boiling water bath for 10 minutes to ensure a proper seal. Let the jars cool completely before storing.