The Ultimate Three Bean Salad: A Simple, Flavorful Side Dish You Need to Try
Have you ever opened your fridge after a long day, craving something fresh, filling, and healthy—only to stare at wilted lettuce and leftover takeout? If that sounds familiar, it’s time to meet your new best friend in the kitchen. Homemade version of Three Bean Salad transforms humble pantry staples into a vibrant, protein-packed dish that satisfies every time. Preparing it yourself means controlling the ingredients and avoiding preservatives, all while saving money. Whether you grew up on the nostalgic Classic Three Bean Salad or are discovering it for the first time, this recipe delivers balance—sweet, tangy, and crunchy—in every bite.
—
Ingredients & Kitchen Tools
Before you start, gather everything you need. This recipe relies on common ingredients you may already have in your pantry and fridge.
For the salad:
– 1 can (15 oz) green beans – drained and rinsed; look for low-sodium if possible.
– 1 can (15 oz) wax beans – drained and rinsed; substitute with additional green beans if unavailable.
– 1 can (15 oz) kidney beans – drained and rinsed; light or dark red work equally well.
– 1/2 medium red onion – thinly sliced into half-rings; soak in cold water for 10 minutes to mellow the bite.
– 1/2 cup fresh parsley – chopped; flat-leaf parsley adds a peppery note, but curly works too.
– 1/3 cup red bell pepper – diced small for color and crunch.
For the vinaigrette:
– 1/4 cup apple cider vinegar – white wine vinegar or red wine vinegar are fine substitutes.
– 2 tablespoons olive oil – extra virgin for best flavor.
– 2 tablespoons sugar – or honey, maple syrup, or agave for a natural sweetener.
– 1/2 teaspoon salt – adjust to taste.
– 1/4 teaspoon black pepper
– 1/2 teaspoon garlic powder – not garlic salt, as the dressing already contains salt.
Kitchen tools:
– Can opener
– Colander for rinsing beans
– Medium mixing bowl
– Small bowl or jar for the dressing
– Whisk or fork
– Sharp knife and cutting board
– Airtight container for marinating and storing
—
Prep Time & Cooking Schedule
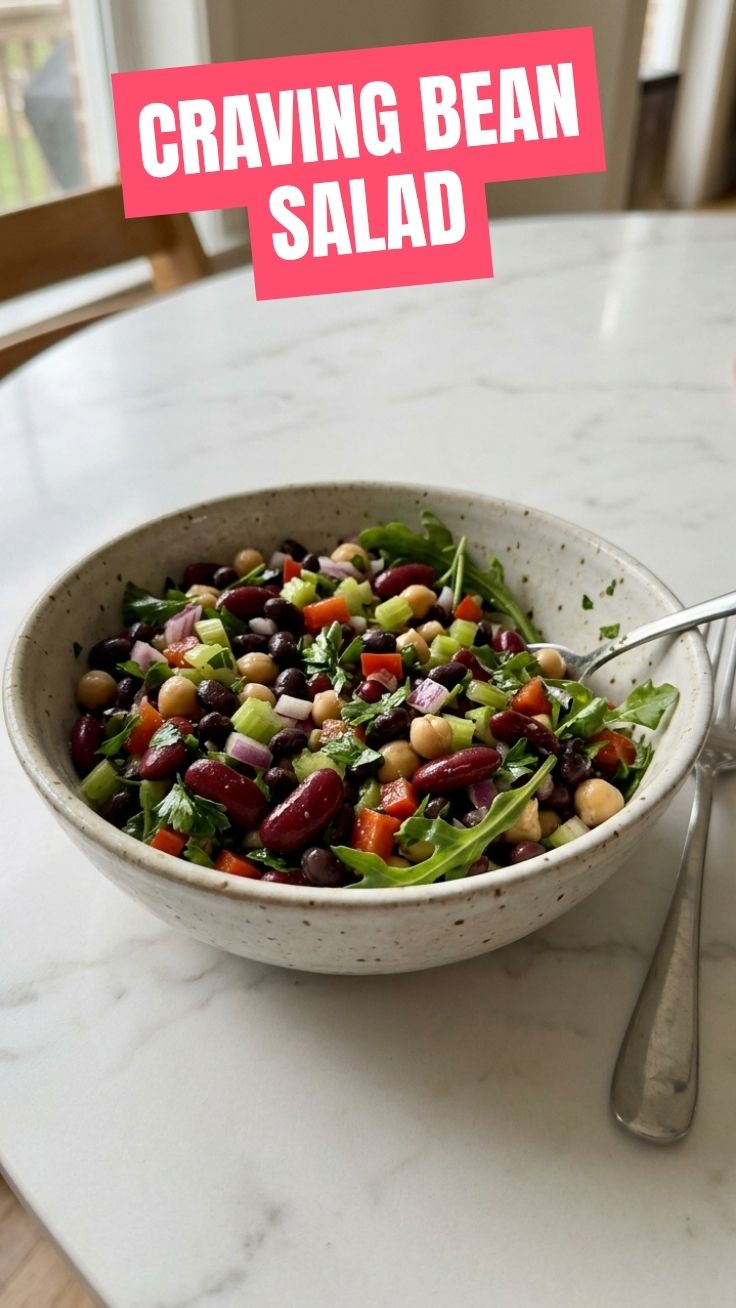
This recipe requires no cooking at all. Total active preparation takes only 10 to 15 minutes. After mixing, the salad needs at least 1 hour to marinate in the refrigerator—overnight is even better for deeper flavor. Plan ahead if serving at a gathering: make it the night before and simply stir before serving. The longer it sits, the more the beans absorb the sweet-tangy dressing.
—
Step-by-Step Instructions
Follow these clear steps to build a perfectly balanced bean salad every time.
1. Prepare the beans: Open all three cans, pour the contents into a colander, and rinse thoroughly with cold water. Let drain for a minute. Rinsing removes excess sodium and the metallic taste of canned liquid. Transfer beans to a large mixing bowl.
2. Prep the vegetables: Slice the red onion into thin half-rings. Dice the red bell pepper into small, uniform pieces. Chop the parsley finely—include tender stems for extra flavor. Add everything to the bowl with the beans.
3. Make the dressing: In a small bowl or a jar with a tight lid, combine apple cider vinegar, olive oil, sugar, salt, pepper, and garlic powder. Whisk until sugar dissolves or shake vigorously if using a jar.
4. Combine and marinate: Pour the dressing over the bean mixture. Stir gently with a large spoon until every bean and vegetable is coated. Taste and adjust seasoning—add a pinch more salt or a splash more vinegar if needed.
5. Let it rest: Cover the bowl with plastic wrap or transfer to an airtight container. Refrigerate for at least 1 hour. Stir once halfway through if possible. This resting period is where the magic happens—the flavors meld and the onions soften slightly.
Why this technique matters: Unlike a Three Bean Salad that can taste flat when served immediately, this method ensures every bite is infused with the dressing. The Classic Three Bean Salad style relies on this simple principle—patience pays off with a more cohesive, flavorful dish. For best texture, serve chilled or at cool room temperature.
—
Nutritional Benefits & Advantages
This vibrant legume medley is a nutritional powerhouse. The combination of green beans, wax beans, and kidney beans delivers a solid dose of plant-based protein (about 8 grams per serving) and fiber (roughly 7 grams), which supports digestion and helps keep you full longer. Red bell pepper adds vitamin C—over 30% of your daily needs in one serving—while parsley contributes vitamin K and antioxidants.
The dressing uses olive oil, a heart-healthy source of monounsaturated fats, and apple cider vinegar, which may help moderate blood sugar spikes when consumed with meals. This dish is naturally vegan, gluten-free, and dairy-free. If you reduce the sugar to 1 tablespoon, it becomes low-glycemic friendly. Compared to creamy coleslaws or mayonnaise-based pasta salads, this bean-based option is significantly lower in saturated fat and calories, making it an excellent choice for weight management or simply adding more vegetables to your week.
—
Tips Variations & Cooking Advice
The beauty of this simple bean salad lies in its adaptability. Here are practical ways to customize it to your taste.
Flavor variations:
– Mediterranean twist: Add 1/4 cup chopped sun-dried tomatoes, 1/2 cup crumbled feta cheese, and a teaspoon of dried oregano. Replace apple cider vinegar with lemon juice.
– Southwest style: Swap parsley for fresh cilantro, add 1/2 cup corn kernels (canned or frozen, thawed), 1/4 cup diced jalapeño, and a pinch of cumin.
– Herb explosion: Use a mix of fresh basil, mint, and chives instead of parsley alone.
Ingredient swaps:
– Substitute sugar with honey, agave, or monk fruit sweetener for a different sweetness profile.
– Use chickpeas or black beans in place of one of the beans listed.
– If you dislike raw onion, try finely chopped shallots or green onions instead.
Dietary adaptations:
– Gluten-free: This recipe is naturally gluten-free.
– Dairy-free: The base recipe contains no dairy.
– Low-FODMAP: Use only green beans and a small amount of canned chickpeas (rinsed) instead of kidney beans, and replace onion with green tops of scallions.
Portion changes: For a larger crowd, double the recipe. For a single serving, halve the quantities and dress just before eating. The salad keeps well for up to 5 days in the refrigerator.
—
Common Mistakes to Avoid
Even a simple recipe has pitfalls. Here’s what to watch for.
– Skipping the rinse: Canned beans are packed with salt and a starchy liquid. Failing to rinse them results in a cloudy dressing and a saltier final dish. Always drain and rinse thoroughly.
– Serving too soon: This salad needs time to marinate. Eating it immediately will taste flat and vinegary. Plan for at least 1 hour of chilling.
– Overdressing: The beans absorb liquid as they sit. If you add too much dressing initially, the salad can become watery. Use the amounts given; if you prefer more dressing, add extra in small increments after marinating.
– Using warm beans: If beans are not cooled after rinsing, they can cause the dressing to separate and vegetables to wilt. Ensure the drained beans are at room temperature before mixing.
– Ignoring texture: Overcooked or mushy canned beans can ruin the crunch. Look for brands that hold their shape well. If using dried beans, cook them until tender but not falling apart.
—
Storage & Meal Prep Tips
This recipe is ideal for meal prepping because it actually improves with time.
Refrigeration: Store in an airtight container for up to 5 days. Stir before each serving to redistribute the dressing. The flavors will continue to develop, becoming mellower and more integrated.
Freezing: Not recommended. The texture of green beans and wax beans becomes mushy after thawing. If you must freeze, do so without the dressing and add fresh dressing after thawing.
Reheating: This salad is served cold or at room temperature. If you prefer a warm side, microwave individual portions for 20 seconds, but note that the texture will soften slightly.
Transport: For picnics or potlucks, pack the salad in a sealed container and keep cool with an ice pack. Dress just before serving if you’re concerned about sogginess, though this salad handles travel well thanks to the sturdy beans.
—
Conclusion
This vibrant, tangy, and protein-rich dish proves that the best meals often come from the simplest ingredients. By making your own, you gain control over flavor, freshness, and nutrition. Whether you serve it alongside grilled chicken, pack it for a work lunch, or bring it to a summer barbecue, this Three Bean Salad delivers reliable satisfaction. For those who treasure the original version passed down through generations, the Classic Three Bean Salad style is timeless for a reason. Now it’s your turn—head to the kitchen, open a few cans, and see how effortless a delicious, healthful side dish can be. Share your results in the comments or tag a friend who loves easy recipes.
—
FAQs
1. Can I use fresh green beans instead of canned?
Yes. Blanch fresh green beans in boiling salted water for 2–3 minutes, then plunge into an ice bath to stop cooking. Drain well and chop into 1-inch pieces before using. This adds a brighter color and firmer texture.
2. How can I make this salad less tangy?
Reduce the apple cider vinegar to 2 tablespoons and add 1 tablespoon of water or extra olive oil. You can also increase the sugar slightly to balance acidity.
3. Is this salad suitable for a diabetic diet?
Yes, with modification. Use a sugar substitute like monk fruit or stevia, or reduce the sugar to 1 tablespoon. The beans provide fiber that helps stabilize blood sugar.
4. Can I add more protein to make it a main dish?
Absolutely. Add 1 cup of cooked quinoa, cubes of grilled chicken, or canned tuna. Cooked edamame or chickpeas also boost protein while keeping the recipe vegetarian.
5. Why did my salad become watery after a day in the fridge?
This happens when the dressing separates or onions release moisture. Stir well before serving. To avoid excess liquid, pat the beans and vegetables dry with a paper towel before dressing. If it still seems watery, drain off extra liquid before serving.
Proven way to grow Three Bean Salad
Ingredients
Equipment
Method
- Choose a sunny spot in your garden and prepare the soil by mixing two bags of compost and one bag of garden soil to create a rich, fertile bed for your beans.
- Plant the green bean, wax bean, and kidney bean seeds according to package directions, ensuring proper spacing for optimal growth.
- Install garden stakes near each type of bean plant to provide support as they grow and climb.
- Water the plants regularly, especially during dry periods, to keep the soil consistently moist but not waterlogged.
- Once the beans reach a suitable size and tenderness, harvest them carefully for your three-bean salad.