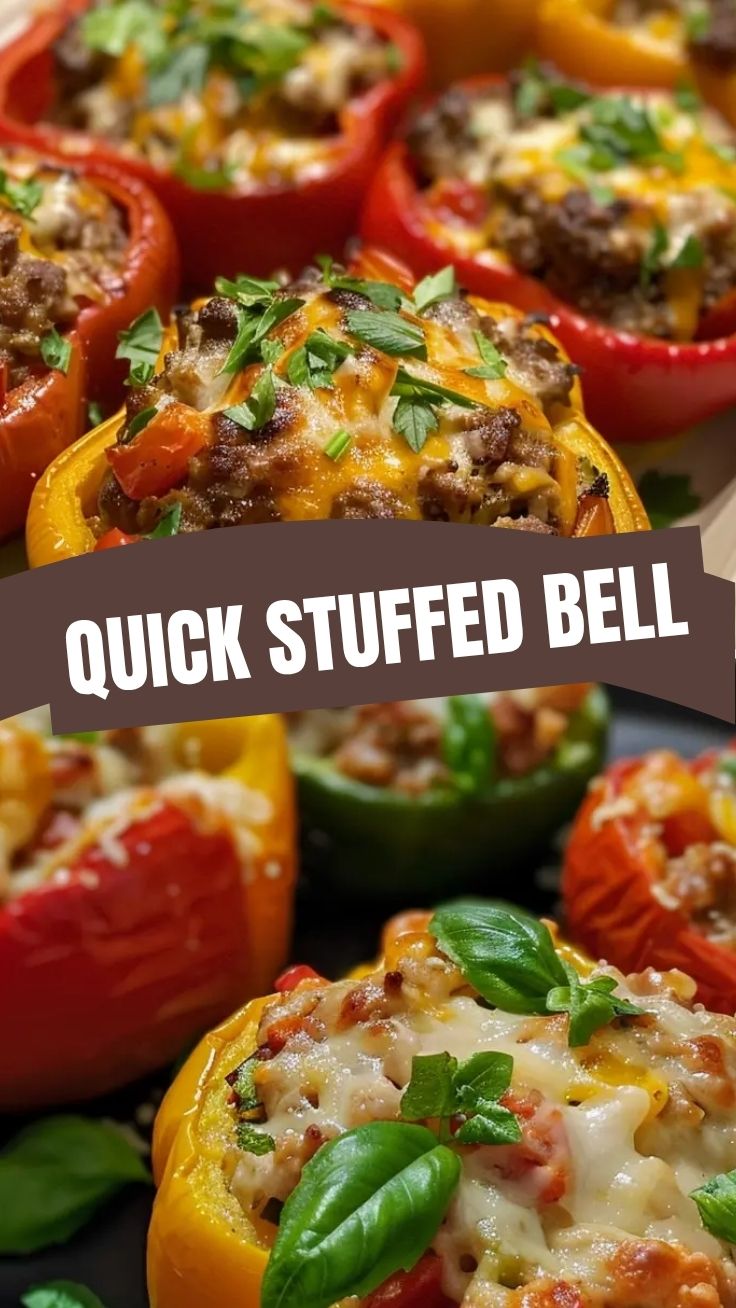
Savory Stuffed Bell Peppers: A Complete Guide to Flavor and Nutrition
Have you ever stared into your refrigerator, wondering how to transform humble ingredients into a dinner that feels both comforting and impressive? That’s exactly the magic of this recipe. Preparing classic Stuffed Bell Peppers at home turns a simple vegetable into a hearty, protein-packed main course that satisfies every craving. The beauty lies in how the natural sweetness of the peppers melds with a savory filling of seasoned meat, rice, and melted cheese—creating a balanced meal in a single, colorful package. Beyond the incredible taste, cooking from home allows you to control every ingredient, adjust flavors to your preference, and save money compared to restaurant versions. In this guide, we’ll walk through each step, from selecting the best bell peppers to mastering the perfect bake, ensuring your dish turns out flawless every time.
Ingredients & Kitchen Tools
For the Filling:
– 1 lb ground beef (or ground turkey for a leaner option) – provides rich, savory protein
– 1 cup cooked long-grain rice – binds the filling and adds texture
– 1 small onion, finely diced – aromatic base for flavor
– 2 cloves garlic, minced – essential for depth
– 1 can (15 oz) diced tomatoes, drained – acidity cuts through richness
– 1 tsp dried oregano – earthy Mediterranean note
– 1/2 tsp smoked paprika – adds subtle smoky warmth
– Salt and pepper to taste
– 1 cup shredded mozzarella or cheddar – divided; half goes inside, half on top
For the Peppers & Sauce:
– 4 large bell peppers (red, yellow, or orange) – these varieties are sweeter than green
– 1 can (8 oz) tomato sauce (optional, for extra moisture)
– Fresh parsley or basil for garnish
Kitchen Tools:
– Large pot for boiling peppers
– Skillet for sautéing filling
– 9×13-inch baking dish
– Sharp knife and cutting board
– Mixing bowl
– Aluminum foil
Optional Substitutions: Use quinoa instead of rice for a protein boost; swap ground beef with lentils and mushrooms for a vegan version; replace cheese with vegan shreds if dairy-free.
Prep Time & Cooking Schedule
– Prep Time: 15 minutes
– Cook Time: 35 minutes (plus 5 minutes resting)
– Total Time: About 55 minutes
– Resting Time: 5 minutes after baking
Plan to start cooking about 1 hour before you want to eat. If you’re meal-prepping, you can boil the peppers and prepare the filling the night before—just assemble and bake when ready. The peppers need parboiling for 3–4 minutes to soften slightly, ensuring even cooking without becoming mushy. While they boil, you can sauté the filling mixture simultaneously, making this an efficient one-pot-ish workflow.
Step-by-Step Instructions
1. Preheat & Prep – Set your oven to 375°F (190°C). Wash the 4 bell peppers, then slice off the tops (about 1/2 inch from the stem) and remove seeds and white membranes. Dice the tops finely to add to the filling—this reduces waste and boosts flavor.
2. Parboil the Peppers – Bring a large pot of salted water to a boil. Submerge the hollowed peppers and boil for 3–4 minutes. Drain carefully and let them cool slightly. Pro tip: Boiling prevents undercooked pepper crunch while keeping them sturdy enough to hold the filling.
3. Cook the Filling – In a skillet over medium heat, brown the ground beef until no longer pink (about 5 minutes). Drain excess fat, then add diced onion and garlic, cooking 2 more minutes until softened. Stir in the cooked rice, drained diced tomatoes, oregano, smoked paprika, salt, pepper, and half the shredded cheese. Mix well and taste—adjust seasoning here.
4. Stuff the Peppers – Place the parboiled peppers upright in an oiled 9×13-inch baking dish. Spoon the filling into each pepper, packing gently but not compressing too tightly. Top each pepper with remaining cheese.
5. Bake to Perfection – Pour tomato sauce around the base of the peppers (optional, creates steam and keeps them moist). Cover dish with foil and bake 25 minutes. Remove foil and bake another 10 minutes until cheese is bubbly and golden. Let rest 5 minutes before serving—this helps the filling set.
At this stage, you’ll see how the Stuffed Bell Peppers transform in the oven, with the cheese melting into a savory crust. The key texture cue: the peppers should be tender but still hold their shape when pierced with a fork.
Nutritional Benefits & Advantages
One serving (one stuffed pepper) provides approximately 380 calories, 22g protein, 18g fat, and 30g carbs, making it a balanced meal. Bell peppers are an excellent source of vitamin C—one red pepper contains over 150% of your daily needs, supporting immune health and collagen production. The capsaicin in peppers may boost metabolism, while the antioxidant carotenoids, like beta-carotene and lutein, support eye health. Using lean ground beef or turkey with brown rice adds fiber and complex carbohydrates for sustained energy. This dish is naturally gluten-free (verify grain choice) and can be made dairy-free by omitting cheese or using plant-based alternatives.
Tips Variations & Cooking Advice
– Flavor Swaps: Add 1/2 cup black beans and corn to the filling for a Tex-Mex twist. Use Italian seasoning instead of oregano, and top with Parmesan.
– Cooking Methods: Instead of baking, you can stuff peppers and air-fry at 375°F for 12–15 minutes for a faster, crispier top. Slow-cooker option: place stuffed peppers in the crockpot with 1/2 cup broth, cook on low 4–5 hours.
– Portion Changes: For bite-sized appetizers, use mini sweet peppers instead of large bell peppers—reduce bake time to 15–20 minutes.
– Dietary Adaptations: For gluten-free, ensure rice is certified GF; for vegan, use lentils, mushrooms, and dairy-free cheese.
– Seasonal Ingredient Swaps: Use fresh tomatoes in summer instead of canned; add grated zucchini to the filling for extra vegetables.
Common Mistakes to Avoid
1. Overcooking Peppers – Parboiling longer than 4–5 minutes makes peppers mushy after baking. Stick to 3–4 minutes in rolling boil.
2. Skipping the Drain – Not draining diced tomatoes makes the filling watery. Always drain them well.
3. Underseasoning – Rice and peppers absorb flavor; taste and adjust salt before stuffing. Add a pinch of red pepper flakes if you like heat.
4. Overstuffing – Filling too tightly causes peppers to split during baking. Leave 1/4 inch of space at the top.
5. Forgetting to Score – For very large peppers, lightly score the inner flesh before boiling to allow steam to escape and prevent bursting.
Storage & Meal Prep Tips
– Refrigeration: Store cooled stuffed peppers in an airtight container for up to 4 days. Reheat in a 350°F oven for 10–12 minutes (or microwave at 70% power for 2 minutes) to preserve texture.
– Freezing: Wrap each pepper tightly in plastic wrap, then foil, or use a freezer-safe container. Freeze for up to 3 months. Thaw overnight in the refrigerator before reheating in the oven.
– Make-Ahead Prep: Prepare filling up to 2 days ahead; store separately. Boil peppers and refrigerate. Assemble and bake when ready.
– Reheating Tip: To avoid soggy peppers, reheat uncovered on a baking sheet in the oven—this dries the surface slightly and revives the cheese crispness.
Conclusion
Mastering this recipe gives you a versatile, crowd-pleasing dinner that’s equally suitable for busy weeknights or Sunday meal prep. The combination of tender Stuffed Bell Peppers with a savory, well-seasoned filling is both nostalgic and nutritionally sound. Remember, you can play with the spices, swap proteins, and adjust cooking methods to make it your own. The key is using fresh bell peppers for that satisfying sweetness and sturdy structure. We encourage you to try this version and share your results—tag a friend or leave a comment below with your twist. For more comfort food classics with a healthy spin, explore our other recipes.
FAQs
Q1: Can I use uncooked rice in the filling?
No, do not use uncooked rice—it won’t cook properly in the 35-minute bake. Always use pre-cooked rice (leftover rice works great). If you prefer raw rice, you’ll need to extend baking time to about 50 minutes and add 1/4 cup extra liquid to the dish.
Q2: Why are my stuffed peppers watery?
This usually happens because the tomatoes aren’t drained well, or the peppers were boiled too long. Also, avoid using green bell peppers that have thick, watery flesh—opt for red, yellow, or orange varieties.
Q3: Can I make this without meat?
Absolutely! Substitute ground beef with 1 cup cooked lentils (or 8 oz crumbled firm tofu) and add 1/2 cup finely chopped mushrooms. Use vegetable broth instead of beef. Adjust seasoning as needed.
Q4: How do I know when the peppers are fully cooked?
The peppers should be fork-tender but still hold their shape. If you’re unsure, insert a knife tip through the side—it should slide in with little resistance. Internal temperature of the filling should reach 165°F for meat versions.
Q5: Can I freeze unbaked stuffed peppers?
Yes! Assemble peppers completely (including cheese), but don’t bake. Wrap each in plastic wrap and freeze. To cook from frozen, bake covered at 375°F for 45 minutes, then uncover for 10 minutes. Add 5–10 extra minutes to ensure thorough heating.
Best way to grow Stuffed Bell Peppers with 7 secrets
Ingredients
Equipment
Method
- Start bell pepper seeds indoors 8-10 weeks before the last frost date to give them a head start.
- Ensure seedlings receive at least 6-8 hours of sunlight daily, using grow lights if natural light is insufficient.
- Once outdoor temperatures consistently stay above 60°F (15°C) and frost danger has passed, harden off seedlings by gradually exposing them to outdoor conditions.
- Transplant seedlings into a well-draining garden bed or large containers enriched with compost, spacing them 18-24 inches apart.
- Water plants deeply and consistently, especially during flowering and fruiting, avoiding overwatering which can lead to root rot.
- Fertilize every 2-4 weeks with a balanced NPK fertilizer once fruits begin to set.
- Provide support with stakes or cages as plants grow to prevent branches from breaking under the weight of ripening peppers.
- Prune lower leaves and unproductive branches to improve air circulation and direct energy to fruit production.
- Regularly inspect plants for pests like aphids and spider mites, treating with organic insecticides or neem oil if necessary.
- Ensure proper spacing and air circulation to prevent fungal diseases, removing any affected leaves promptly.
- Harvest bell peppers once they reach their full size and desired color, typically 60-90 days after transplanting.
- Use sharp pruning shears to cut the peppers from the plant, leaving a small stem attached to encourage longer storage.