The Ultimate Guide to Perfectly Soft Dinner Rolls: A Baker’s Secret to Restaurant-Quality Bread
Have you ever pulled a basket of golden, pillowy Dinner Rolls from the oven, only to watch them turn hard and dry within an hour? If so, you understand the frustration of spending hours kneading and proofing only to end up with subpar results. The secret to achieving that cloud-like interior and glossy crust isn’t magic—it’s understanding the science of yeast and fat. Preparing [Dinner Rolls](https://homecookedrecipe.com/dinner-rolls-soft/) (target=”_blank”) at home gives you total control over ingredients, allowing you to avoid preservatives while customizing the flavor profile to match any main course. Whether you’re hosting a holiday feast or simply craving a warm bread basket, this guide will walk you through every critical step to ensure your rolls are consistently soft, buttery, and irresistible.
Ingredients & Kitchen Tools
Required Ingredients
– Bread flour (3 ½ cups) – Higher protein content creates the gluten structure needed for softness.
– Instant yeast (2 ¼ teaspoons) – Faster rising time and no need to activate in water first.
– Whole milk (1 cup, warm) – Adds fat and tenderness; 2% milk works but reduces richness.
– Unsalted butter (4 tablespoons, softened) – Provides moisture and flavor; salted butter can be used if you reduce additional salt.
– Large egg (1) – Enriches the dough and helps with browning.
– Granulated sugar (3 tablespoons) – Feeds the yeast and adds a subtle sweetness.
– Salt (1 ½ teaspoons) – Controls yeast activity and enhances flavor.
Optional Substitutions
– Swap bread flour with all-purpose flour for slightly less chewiness.
– Use dairy-free butter and oat milk for a vegan adaptation.
– Replace whole milk with buttermilk for a tangier flavor profile.
Kitchen Tools
– Stand mixer with dough hook (or large mixing bowl and wooden spoon)
– 9×13 baking dish or two 9-inch round cake pans
– Digital kitchen scale (for precision)
– Instant-read thermometer
– Plastic wrap or clean kitchen towel
– Pastry brush (for butter wash)
Prep Time & Cooking Schedule
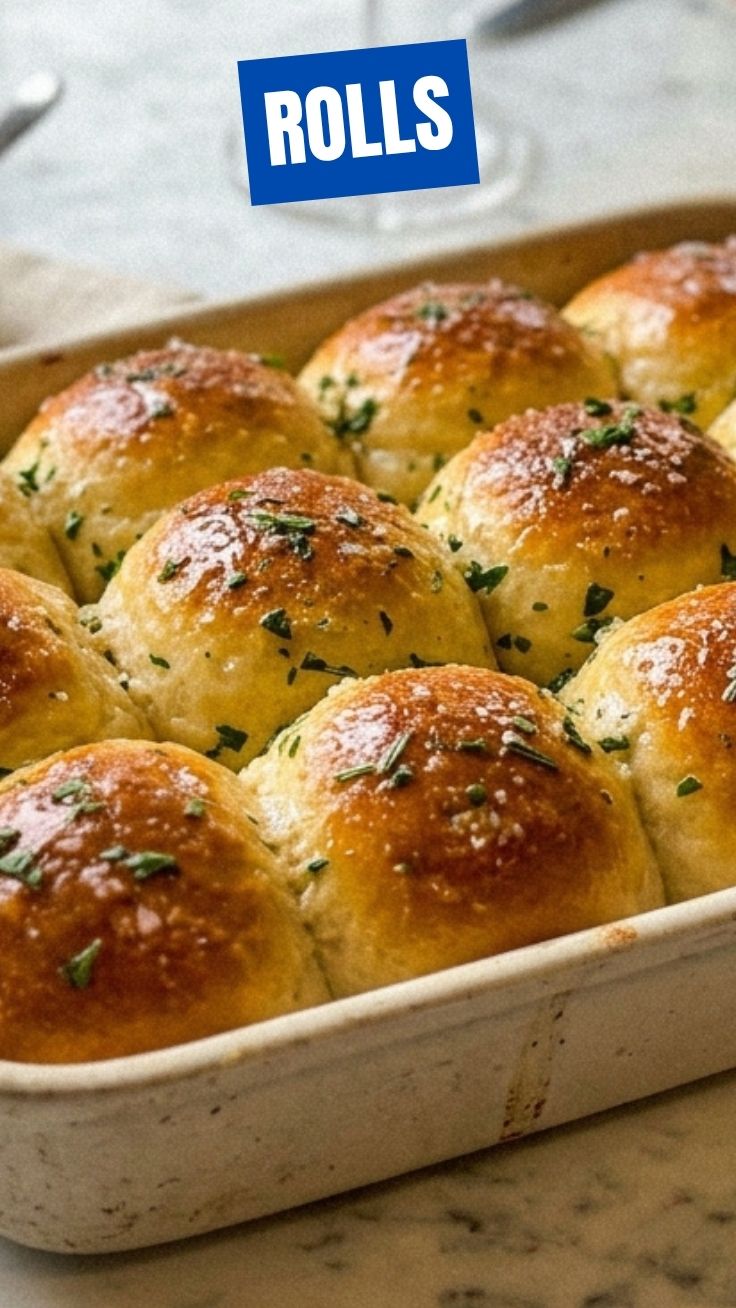
To achieve that iconic golden-brown exterior while keeping the interior ethereally light, you need to plan your timing carefully. The prep time is 20 minutes, but the total time from start to finish is approximately 2 hours and 45 minutes because of the required resting phases.
– Mixing and kneading – 10 minutes in a stand mixer, or 12–15 minutes by hand.
– First rise (bulk fermentation) – 1 to 1.5 hours in a warm, draft-free spot (ideally 75–80°F).
– Shaping the rolls – 15 minutes (rolling 12–15 uniform balls).
– Second rise (proofing) – 45 minutes to 1 hour, until doubled in size.
– Baking – 18–22 minutes at 375°F, rotating the pan halfway through.
– Cooling – 10 minutes in the pan, then transfer to a wire rack.
Pro tip for busy schedules: After the first rise, you can punch down the dough, cover tightly, and refrigerate overnight for up to 16 hours. The next day, shape and proceed with the second rise—this actually deepens the flavor.
Step-by-Step Instructions
1. Activate the fat-system – In a small saucepan, warm the whole milk to 110–115°F (use a thermometer to avoid killing the yeast). Add 1 tablespoon of sugar and sprinkle the instant yeast on top. Let sit for 5 minutes until foamy. Temperature control is crucial here: too hot kills yeast, too cold stalls it.
2. Build the dough structure – In the bowl of a stand mixer fitted with a dough hook, combine the bread flour, remaining sugar, and salt. Add the milk-yeast mixture, softened butter, and egg. Mix on low for 2 minutes until the dough comes together, then increase to medium speed and knead for 8 minutes. The dough should feel slightly tacky but not sticky. The windowpane test is your best friend: stretch a small piece of dough—if it forms a thin membrane without tearing, the gluten is adequately developed.
3. First rise – Transfer the dough to a lightly oiled bowl, cover with plastic wrap, and let rise in a warm spot for 60–90 minutes, until doubled. You’ll know it’s ready when you poke it gently with two fingers and the indentation remains.
4. Shape uniformly – Punch down the dough to release gas. Divide into 12 equal pieces (use a kitchen scale for accuracy—each piece should weigh about 55–60 grams). Roll each piece into a tight ball by cupping your hand and rotating it against the counter. Place the balls into a greased 9×13 baking dish, spacing them evenly.
5. Second rise – Cover the dish with greased plastic wrap and let the rolls proof until they have doubled in size and are touching each other (45–60 minutes). The final Dinner Rolls should look puffy and almost filled the pan.
6. Bake to perfection – Preheat oven to 375°F. Brush the tops with melted butter or an egg wash (1 egg beaten with 1 tablespoon milk). Bake for 18–22 minutes until deep golden brown. For ultra-soft homemade dinner rolls as described on [homemade dinner rolls](https://rapidorecetas.com/korean-bbq-meatballs-with-spicy-mayo/) (target=”_blank”), brush with additional melted butter immediately after removing from the oven.
7. Cool and serve – Let cool in the pan for 10 minutes, then transfer to a wire rack. Serve warm to maximize the melty butter experience.
Nutritional Benefits & Advantages
Beyond their irresistible taste, properly crafted rolls offer surprising nutritional advantages. Because you control the ingredients at home, you can avoid the hydrogenated oils and high-fructose corn syrup often found in store-bought versions. Each roll (based on this recipe) provides approximately:
– Calories: 215
– Protein: 6.3g – The bread flour and milk contribute structural amino acids.
– Fiber: 0.8g – Though modest, whole-grain substitutions can double this.
– Calcium: 45mg – From milk and butter.
– Iron: 1.8mg – Enriched flour provides a significant portion.
The fermentation process also reduces phytic acid in the flour, making minerals like zinc and magnesium more bioavailable. For those following a balanced diet, these rolls serve as an excellent vehicle for healthy fats (try brushing with olive oil instead of butter) and can be portioned to fit macro goals.
Tips, Variations & Cooking Advice
– Flavor twists: Add 1 teaspoon of garlic powder and ½ cup of shredded Parmesan to the dough for garlic-herb rolls. Or fold in ½ cup of chopped fresh rosemary and flaky sea salt before the second rise.
– Texture adjustments: For a lighter crumb, substitute ½ cup of all-purpose flour with bread flour, or add 2 tablespoons of potato flour. For denser, chewier rolls, reduce milk by 2 tablespoons and knead for 2 additional minutes.
– Alternative cooking methods: Try baking in a cast-iron skillet for a crispier bottom crust. For a convection oven, reduce temperature by 25°F and check for doneness 2 minutes earlier.
– Dietary adaptations: To make gluten-free, use a 1:1 gluten-free flour blend with xanthan gum (add ½ teaspoon extra) and increase liquid by 2 tablespoons. For a dairy-free version, swap butter for coconut oil and milk for almond milk.
– Portion changes: For pull-apart sliders, shape into smaller 25g balls and bake for 14–16 minutes.
Common Mistakes to Avoid
1. Overproofing – If the rolls rise too long, they collapse during baking. Solution: Check after 45 minutes of the second rise; the dough should feel airy but still hold a fingerprint when gently poked.
2. Under-kneading – Weak gluten results in dense, hockey-puck rolls. Solution: Always perform the windowpane test; if the dough tears, knead 2–3 minutes more.
3. Cold oven placement – Placing rolls on bottom rack leads to burnt bottoms and pale tops. Solution: Position the oven rack in the middle and preheat fully for 20 minutes.
4. Skipping the butter wash – The fat in the wash promotes browning and keeps the crust soft. Solution: Apply butter both before and immediately after baking for a glossy, tender finish.
5. Using cold milk directly – Cool milk stalls yeast growth. Solution: Always warm milk to at least 95°F before adding yeast.
Storage & Meal Prep Tips
Refrigeration is not recommended for freshly baked rolls—the cool air accelerates staling. Instead:
– Short-term: Store at room temperature in a paper bag (not plastic) for up to 2 days. Reheat in a 300°F oven for 5–7 minutes wrapped in foil to restore moisture.
– Freezing: Cool completely, wrap individually in plastic wrap, then place in a freezer-safe bag. Squeeze out air and freeze for up to 3 months. To thaw, let sit at room temperature for 1 hour, then reheat as above.
– Meal prep hack: Bake and freeze immediately after cooling, then reheat from frozen at 325°F for 12 minutes—ideal for surprise guests.
Conclusion
Mastering the art of soft, buttery bread at home transforms your cooking confidence and elevates any meal from simple to spectacular. The key takeaway? Patience with the rising process and precision with ingredient ratios are non-negotiable for achieving that coveted pillowy texture. Whether you’re serving them alongside a hearty stew or using them to soak up the last remnants of marinara sauce, these Dinner Rolls deliver consistent excellence. If you’re seeking the ultimate guide to creating homemade dinner rolls that rival bakery quality, this recipe is your starting point. Try it this weekend, share your golden-baked results on social media, and explore our collection of artisan bread recipes for even more rewarding baking challenges.
FAQs
Why did my rolls turn out dense and heavy?
Most likely under-kneaded or under-proofed. Ensure you knead until the dough passes the windowpane test (8–10 minutes with a stand mixer) and let it double in size during the first rise. Check your yeast is fresh—expired yeast can also cause density.
Can I use bread flour instead of all-purpose flour?
Yes, and it’s actually recommended for this recipe. Bread flour’s higher protein (12–14%) produces a stronger gluten network, resulting in softer, taller rolls. If you only have all-purpose flour, increase the kneading time by 2–3 minutes.
How do I make these rolls dairy-free and vegan?
Use full-fat oat milk (room temperature) instead of whole milk, replace the egg with one flax egg (1 tablespoon ground flaxseed + 3 tablespoons water), and swap butter for coconut oil (solid, not melted). The texture will be slightly denser but still delicious.
What if my dough is too sticky after kneading?
Sprinkle 1 tablespoon of flour at a time and knead for 30 seconds before checking consistency. Avoid over-flouring—sticky dough often indicates you’ve added too much milk or the humidity is high. A slightly tacky dough is normal and yields softer rolls.
Can I prep these rolls the night before and bake them in the morning?
Absolutely. After shaping the rolls, place them in the pan, cover tightly, and refrigerate for up to 14 hours. The next morning, remove from the fridge, let them come to room temp (30–45 minutes), and bake as directed. The cold fermentation deepens the flavor.
Quick Dinner Rolls
Ingredients
Equipment
Method
- In a large bowl, combine the all-purpose flour, instant yeast, granulated sugar, and salt, mixing them thoroughly.
- Stir in the warm milk, melted butter, and one large egg until the ingredients come together to form a shaggy dough.
- Turn the dough out onto a lightly floured surface and knead it for 5-7 minutes until it becomes smooth and elastic.
- Divide the dough into four equal pieces and gently shape each piece into a smooth, round roll.
- Place the shaped rolls on a baking sheet, cover them, and allow them to rise in a warm spot for 10-15 minutes, or until they appear slightly puffed.
- Preheat your oven to 375°F (190°C), then bake the rolls for 12-15 minutes, or until they turn golden brown.
- Allow the rolls to cool slightly on the baking sheet before serving them warm.