Why Make Homemade Chocolate Peanut Butter Cups? A Foolproof Guide
Have you ever bitten into a store-bought peanut butter cup and wished the chocolate was richer, the filling creamier, and the sweetness exactly to your liking? You’re not alone. Homemade Chocolate Peanut Butter Cups deliver that perfect balance—and they’re surprisingly simple to make with just a few ingredients. Preparing this treat at home not only lets you control the quality of every component but also saves money compared to premium brands like Reese’s Peanut Butter Cups. In this data-driven guide, you’ll learn the science behind a glossy, tempered chocolate shell and a smooth, no-cook peanut butter filling, plus expert tips to avoid common pitfalls.
—
Ingredients & Kitchen Tools
Required Ingredients
– High-quality dark or milk chocolate (200 g/7 oz) – Use couverture or chocolate chips with at least 60% cocoa for best snap and flavor.
– Creamy peanut butter (½ cup / 120 g) – Avoid natural separation; use standard processed peanut butter for a stable filling.
– Unsalted butter (2 tbsp / 28 g) – Adds richness and helps the filling set firmly.
– Powdered sugar (1 cup / 120 g) – Provides sweetness and structure; sift to avoid lumps.
– Vanilla extract (1 tsp) – Enhances flavor; optional but recommended.
– Salt (a pinch) – Balances sweetness and deepens chocolate notes.
Kitchen Tools
– Mini muffin tin (24 cups) – Silicone or metal; silicone eases release.
– 12–16 paper or silicone candy liners – Standard mini muffin liners work perfectly.
– Double boiler or microwave-safe bowl – For gentle chocolate melting.
– Rubber spatula – For stirring and spreading.
– Small cookie scoop or piping bag – For portioning filling evenly.
– Refrigerator or freezer – To speed up setting.
Optional Substitutions
– Dairy-free – Use vegan butter and dairy-free chocolate (check cacao content).
– Sugar-free – Substitute powdered erythritol or monk fruit blend.
– Crunchy texture – Replace creamy peanut butter with chunky style.
– Flavor twist – Add ¼ tsp cinnamon or a drop of peppermint extract to the filling.
—
Prep Time & Cooking Schedule
| Stage | Time | Notes |
|——-|——|——-|
| Prep | 15 minutes | Line muffin tin, measure ingredients, melt chocolate. |
| Assembly | 20 minutes | Layer chocolate, filling, top chocolate. |
| Chilling | 2 hours (or 30 min in freezer) | Needed for firm set before serving. |
| Total | ~2 hours 35 min | Active time only ~35 minutes. |
Plan ahead: these cups need uninterrupted chilling, so start at least 2.5 hours before you want to serve them. If you’re in a rush, the freezer method cuts chilling time to 30 minutes—just watch for condensation when thawing.
—
Step-by-Step Instructions
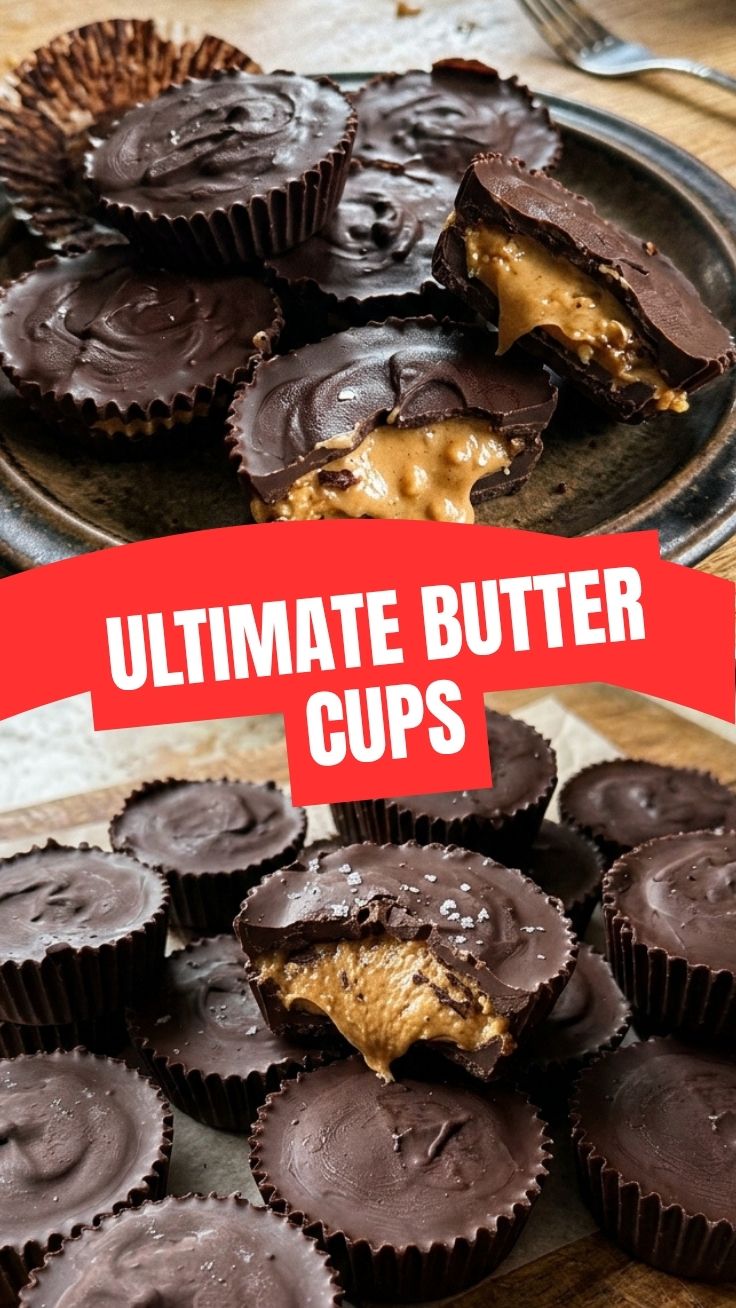
1. Melt the chocolate – Chop chocolate finely and melt in a double boiler (or microwave in 30-second bursts), stirring until smooth. Avoid water contamination—even a drop will seize the chocolate. Let it cool to 88–90°F (31–32°C) for proper tempering.
2. Coat the liners – Spoon ½ teaspoon of melted chocolate into each liner. Use the back of a spoon or a small brush to coat the bottom and sides evenly. Place the tin in the refrigerator for 10 minutes to set.
3. Make the filling – In a bowl, combine peanut butter, softened butter, powdered sugar, vanilla, and salt. Beat until smooth and pliable. The mixture should hold its shape when pressed; if too dry, add 1 tsp of milk or oil.
4. Fill the cups – Roll the peanut butter mixture into ¾-inch balls (about 2 teaspoons each). Flatten slightly and press into the chilled chocolate cups, leaving a gap for the top layer.
5. Seal with chocolate – Spoon another ½ teaspoon of melted chocolate over each filling. Gently tap the tin to level. Refrigerate for at least 2 hours (or freeze for 30 minutes) until fully set.
Pro tip: For perfectly smooth tops, warm the remaining chocolate slightly and pour a thin layer over each cup. This is where homemade Chocolate Peanut Butter Cups truly shine compared to mass-produced Reese’s Peanut Butter Cups—you control the thickness and gloss.
—
Nutritional Benefits & Advantages
Making these cups at home offers clear nutritional control. Dark chocolate (70% cacao) delivers antioxidants like flavonoids, which support heart health. Peanut butter provides plant-based protein (7 g per serving) and healthy monounsaturated fats. By using unsweetened peanut butter and reducing powdered sugar, you can cut added sugar by up to 40% compared to store-bought versions. Additionally, you avoid preservatives, palm oil, and artificial flavors often found in commercial candies.
—
Tips Variations & Cooking Advice
– Flavor variations – Swap peanut butter for almond, cashew, or sunflower seed butter (for nut-free). Add a pinch of sea salt on top for salted caramel effect.
– Chocolate options – Use white chocolate for a sweeter treat, but note it’s more prone to overheating. For vegan cups, use vegan chocolate and coconut oil instead of butter.
– Portion changes – Use regular muffin tins for giant cups (double all quantities). For mini bites, use a mini tart pan or chocolate mold.
– Dietary adaptations – Gluten-free as written; verify powdered sugar is gluten-free (some contain wheat starch). For keto, use sugar-free chocolate and powdered allulose.
– Texture tip – For a softer filling, add 1 tbsp of heavy cream (or coconut cream for dairy-free). For a firmer bite, omit butter and increase powdered sugar.
—
Common Mistakes to Avoid
| Mistake | Cause | Solution |
|———|——-|———-|
| Chocolate seizes | Water or steam | Keep all utensils bone-dry; melt over low heat. |
| Filling too sticky | Too much moisture | Add more powdered sugar, 1 tbsp at a time. |
| Cups stick to liners | Liners not coated fully | Brush chocolate up the sides; use foil liners if peeling is an issue. |
| White streaks on chocolate | Improper tempering | Cool chocolate to 88°F before coating; reheat gently if needed. |
| Crumbly filling | Too much powdered sugar | Add 1 tsp of milk or coconut oil to bind. |
—
Storage & Meal Prep Tips
– Refrigeration – Store in an airtight container for up to 2 weeks. Layer with wax paper to prevent sticking. Let sit at room temperature 5 minutes before serving for best texture.
– Freezing – Place in a single layer in a freezer-safe bag or container for up to 3 months. Thaw in the fridge overnight. Do not refreeze after thawing.
– Reheating – Not recommended; these cups are meant to be enjoyed cold or room temp. If chocolate blooms (white spots) after freezing, it’s still safe—just cosmetic.
– Meal prep – Make a double batch and freeze half. Perfect for last-minute party desserts or gifting.
—
Conclusion
Crafting your own Chocolate Peanut Butter Cups at home is rewarding, cost-effective, and endlessly customizable. You now have the data-backed techniques to achieve a glossy shell and silky filling every time—far superior to even premium Reese’s Peanut Butter Cups. Try this recipe this weekend, snap a photo, and share your results on social media. For more indulgent yet wholesome desserts, explore our collection of no-bake chocolate treats and nut butter fudge variations.
—
FAQs
1. Can I use natural peanut butter?
Yes, but stir well and expect a grainier texture. Add 1–2 tbsp of coconut oil to stabilize the filling; otherwise, it may separate.
2. How do I prevent the chocolate from cracking when removing from liners?
Let the cups sit at room temperature for 5 minutes before peeling. If using silicone liners, flex gently from the bottom.
3. My filling is too crumbly—how do I fix it?
Add 1 tsp of melted butter or milk, then mix. If it’s already in the cups, top with extra chocolate and chill; they’ll hold together once set.
4. Can I use milk chocolate instead of dark?
Absolutely. Milk chocolate is sweeter and less sharp. Reduce powdered sugar in the filling by 2 tbsp to balance.
5. How long do these last at room temperature?
Up to 3 days if below 70°F and low humidity. For longer storage, keep refrigerated or frozen.
Chocolate Peanut Butter Cups
Ingredients
Equipment
Method
- Line a 12-cup muffin tin with paper liners; set aside for assembly.
- In a microwave-safe bowl, combine chocolate chips and coconut oil, then microwave in 30-second intervals until melted and smooth, stirring well after each interval.
- In a medium bowl, beat peanut butter, powdered sugar, softened butter, vanilla extract, and salt with an electric mixer until fully combined and creamy.
- Spoon about a tablespoon of melted chocolate into the bottom of each paper liner, then lightly tilt each cup to spread an even layer.
- Roll the peanut butter mixture into 1-inch balls and flatten each into a disk; center one disk on top of the chocolate layer in each cup.
- Cover each peanut butter disk with the remaining melted chocolate, ensuring the filling is completely encased.
- Refrigerate the peanut butter cups for at least 2 hours, or until fully set, then peel off the paper liners and serve.