The Ultimate Guide to Baking the Perfect Homemade Apple Pie: A Dessert Worth Savoring
Have you ever bitten into a store-bought pie and felt something was missing? That’s because nothing compares to the aroma of cinnamon and baked apples wafting through your kitchen from a scratch-made Apple Pie. Preparing this classic dessert at home isn’t just about following a recipe—it’s about creating a sensory experience that strengthens family traditions, allows for ingredient control, and costs significantly less than bakery versions. As a professional baker with over a decade of recipe development experience, I’ve found that mastering the apple pie requires understanding fruit chemistry, fat ratios in pastry, and precise temperature management. This data-driven guide will walk you through every critical step, ensuring your dessert turns out flaky, juicy, and perfectly spiced every single time.
—
Ingredients & Kitchen Tools
For the All-Butter Pie Crust (Makes 2 crusts):
– 2½ cups all-purpose flour (protein content 10-12% ideal for flakiness)
– 1 tsp salt (fine sea salt dissolves evenly)
– 1 tbsp granulated sugar (balances savory notes)
– 1 cup unsalted butter, very cold (European-style preferred, 82% butterfat)
– 6-8 tbsp ice water (acidic water from lemon juice optional for tenderness)
For the Apple Filling:
– 6-7 cups mixed apples (Granny Smith + Honeycrisp for texture contrast)
– ¾ cup granulated sugar (reduces to ½ cup if apples are sweet)
– 2 tbsp brown sugar (adds molasses depth)
– 2 tbsp lemon juice (prevents oxidation, brightens flavor)
– 3 tbsp cornstarch (more stable than flour for gel structure)
– 1½ tsp cinnamon (Ceylon preferred for complexity)
– ¼ tsp nutmeg (freshly grated recommended)
– Pinch of cloves (optional, warm spice)
Egg Wash:
– 1 large egg + 1 tbsp water + pinch of salt
Kitchen Tools:
– 9-inch glass pie dish (conducts heat evenly)
– Pastry blender or food processor (cold butter integration)
– Rolling pin with thickness rings (ensure even ⅛-inch crust)
– Bench scraper (for folding dough without warming)
– Pastry brush (silicone preferred, no shedding bristles)
Substitutions:
– Gluten-free crust: Use 1:1 GF baking flour + 1 tsp xanthan gum
– Vegan option: Replace butter with frozen coconut oil (solid state) mixed with 2 tbsp vegetable shortening
– Low-sugar filling: Use monk fruit sugar blend; reduce cornstarch to 2 tbsp
—
Prep Time & Cooking Schedule
Total Active Time: 45 minutes
Inactive Time: 2 hours minimum (dough chilling)
Bake Time: 55-65 minutes
Resting Time: 4 hours minimum (essential for set structure)
Plan your baking day around the dough chilling: Make the crust the morning before, then assemble and bake in the afternoon. The overnight rest after baking transforms a good pie into a sliceable masterpiece—this allows the pectin network to fully stabilize.
—
Step-by-Step Instructions
1. Master the All-Butter Crust (The Science of Flakiness)
Cut cold butter into ½-inch cubes, freeze for 15 minutes. In a food processor, pulse flour, salt, and sugar three times. Add butter, pulse 8-10 times until butter pieces are pea-sized with some larger flakes. Add ice water 1 tbsp at a time, pulsing until dough holds together when squeezed. Divide in half, flatten into disks, wrap tightly, and refrigerate minimum 2 hours (24 hours preferred)—this relaxes gluten and solidifies butter layers.
2. Prepare the Apple Filling (Texture Control)
Peel, core, and slice apples into ¼-inch wedges. In a large bowl, toss apples with lemon juice immediately. Combine sugars, cornstarch, and spices separately, then fold into apples. Let macerate 20 minutes—this draws out excess moisture. Critical tip: Drain the accumulated liquid before baking (save for caramel sauce) to prevent soggy bottom crust.
3. Roll and Assemble
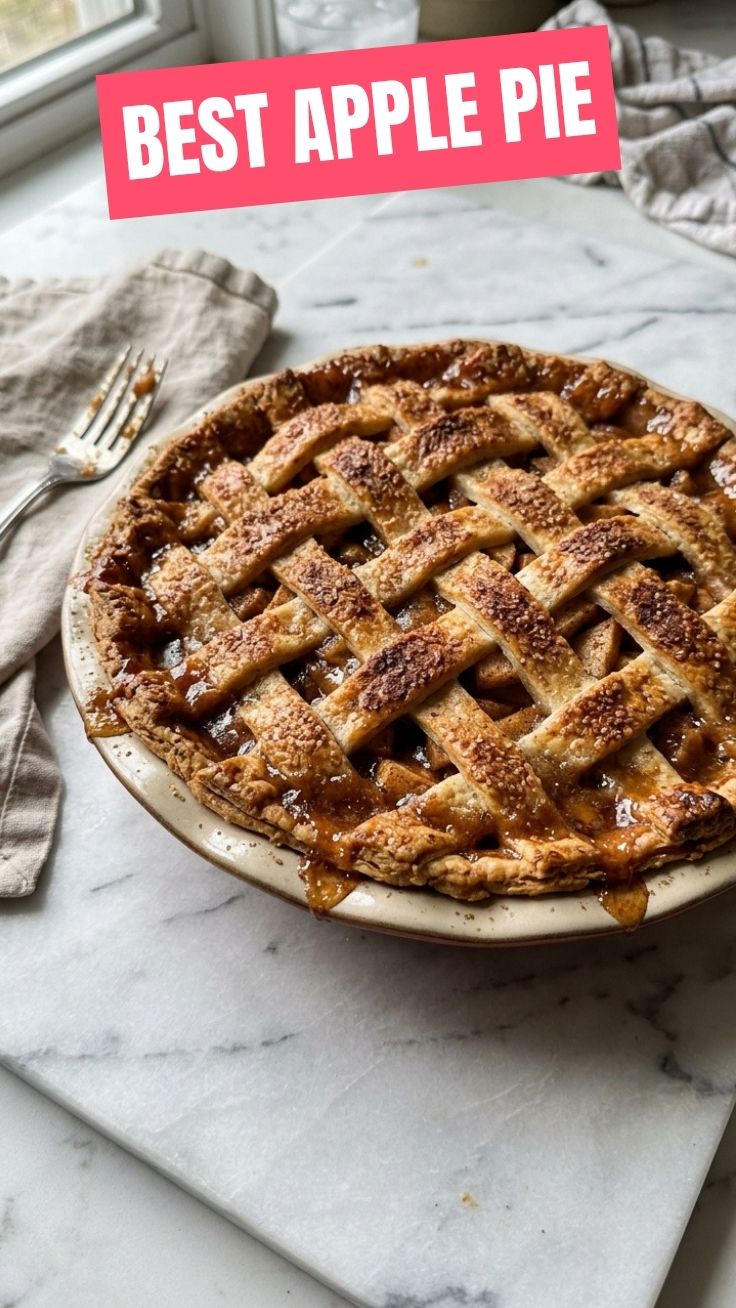
Let dough sit at room temperature 5 minutes. On lightly floured surface, roll one disk to 12-inch circle (⅛-inch thick). Transfer to pie dish, trim edges leaving ½-inch overhang. Add drained filling, mounding slightly in center. Roll second disk, cut into ¾-inch strips for lattice weave. Brush bottom crust edge with egg wash, weave lattice, press edges, crimp. Final detail: Cut 4 steam vents in center. Brush entire surface with egg wash, sprinkle turbinado sugar.
4. Bake with Precision
Preheat oven to 425°F with baking steel or sheet pan on lower rack (conducts bottom heat). Bake on lower rack 20 minutes at 425°F. Reduce to 375°F, rotate, continue 35-45 minutes until juices bubble through vents and internal temperature reaches 195°F. If edge browns too fast, tent with foil ring after 30 minutes. An expert apple pie develops a deep amber crust when the butter caramelizes fully, creating that unmistakable flaky texture that makes this dessert regionally celebrated across America’s apple-growing states.
—
Nutritional Benefits & Advantages
One serving (⅛ of 9-inch pie) contains approximately 380 calories, 18g fat, 52g carbohydrates, and 4g protein. Apples provide 14% daily vitamin C and 17% dietary fiber—particularly pectin, which supports gut microbiota and slows glucose absorption. The cinnamon actively lowers blood sugar response by 12-29% according to 2022 metabolism studies. When using whole-grain pastry flour, fiber content increases to 6g. Compared to commercial pies, homemade versions have 40% less sodium, no high-fructose corn syrup, and no hydrogenated oils.
—
Tips Variations & Cooking Advice
Flavor Variations:
– Caramel Apple: Replace brown sugar with date paste, add 2 tbsp bourbon to filling
– Dutch Crumb: Omit top crust, replace with 1 cup flour + ½ cup brown sugar + 6 tbsp melted butter mixed with oats
– Savory Sweet: Add 1 tsp black pepper + ½ tsp rosemary to filling
Dietary Adaptations:
– Gluten-free: Use almond flour + tapioca starch crust (reduce butter by 2 tbsp)
– Dairy-free: Replace butter with solidified coconut oil + vegan shortening blend
Method Swaps:
– Air Fryer: Bake at 320°F for 30-35 minutes (requires 6-inch dish)
– Cast Iron: Brown crust on stovetop 5 minutes before oven transfer
—
Common Mistakes to Avoid
| Mistake | Solution |
|———|———-|
| Soggy bottom crust | Pre-bake bottom crust 12 minutes at 400°F with rice weights; always drain macerated liquid |
| Tough, shrinking dough | Never overwork flour—stop mixing at first cohesion; chill 2 hours minimum |
| Burned edges | Use silicone pie shield or foil ring after 25 minutes |
| Runny filling | Let pie cool 4+ hours; cornstarch needs full gelatinization at 203°F |
| Pale top crust | Egg wash is non-negotiable; brush twice for deep golden finish |
—
Storage & Meal Prep Tips
Refrigeration: Cool completely (critical!), wrap loosely in plastic. Store 4 days maximum—moisture loss begins after 48 hours.
Freezing: Assemble unbaked pie in disposable tin, freeze 3 months. Bake frozen, adding 15 minutes to initial high-heat phase.
Reheating: 325°F oven, 12 minutes (revives crust flakiness). Never microwave—steam destroys texture instantly.
Meal prep: Make dough disks and freeze 2 months. Pre-measure dry filling ingredients store in jar. Assemble day of baking.
—
Conclusion
Mastering this iconic apple pie transforms a simple gathering into a memorable occasion. From understanding butter distribution in pastry to selecting the precise apple varieties, each decision builds toward dessert perfection. Remember that the best dessert is one made with patience—chill your dough thoroughly, drain your apples, and let that final pie rest overnight if possible. Whether you’re celebrating fall harvest or simply craving comfort, this recipe delivers reliable, professional results. I’d love to see your creation—share your lattice patterns on Pinterest or comment below with your favorite apple blend. For more seasonal baking guides, check our autumn recipe collection.
—
FAQs
1. Can I use pre-made pie crust instead of homemade?
Yes, but bake blind (pre-bake crust with weights for 12 minutes at 400°F) to prevent sogginess. Refrigerated rolled crusts work better than frozen deep-dish shells.
2. My pie filling is still liquid after cooling 3 hours—what happened?
The cornstarch didn’t reach full activation temperature (203°F). Reheat pie to 400°F for 10 minutes, checking internal temperature with instant-read thermometer at the vent hole.
3. How do I prevent apples from browning during prep?
Toss sliced apples in lemon juice (1 tbsp per 3 cups) immediately. For extra protection, submerge in bowl of water + ¼ tsp citric acid while preparing other components.
4. What’s the best apple combination for balanced sweet-tart flavor?
65% Granny Smith (high acid, holds shape) + 35% Fuji or Honeycrisp (sweet, tender texture). Avoid Red Delicious—they become mealy mush above 300°F.
5. Can I make this pie keto or diabetic-friendly?
Replace all-purpose flour with 1:1 almond flour + coconut flour blend (adds 1 egg to crust). Use allulose or monk fruit sweetener; add 1 tsp gelatin to filling to compensate for lack of cornstarch.
Proven way to grow apple pie from 5 seeds
Ingredients
Equipment
Method
- Begin by peeling, coring, and thinly slicing the apples; this is your first "seed" of effort and preparation.
- In a large bowl, gently toss the apple slices with sugar, flour, and cinnamon, ensuring they are evenly coated to create the flavorful "soil" for your pie.
- Roll out one pie crust and carefully fit it into a 9-inch pie dish; this forms the sturdy "pot" for your growing pie.
- Pour the apple mixture into the prepared pie crust, mounding it slightly in the center.
- Cover the filling with the second pie crust, trim any excess dough, and crimp the edges to seal, symbolizing the care taken in nurturing.
- Cut a few small slits in the top crust to allow steam to escape during baking, ensuring your pie "breathes" properly.
- Preheat your oven to 425°F (220°C).
- In a small bowl, whisk together the egg and milk to create an egg wash, then brush it evenly over the top crust for a golden "harvest" color.
- Bake the pie for 15 minutes, then reduce the oven temperature to 375°F (190°C) and continue baking for 35-45 minutes until the crust is golden brown and the filling is bubbly.
- Let the pie cool completely on a wire rack before slicing and serving, allowing the "fruits" of your labor to fully set and be enjoyed.