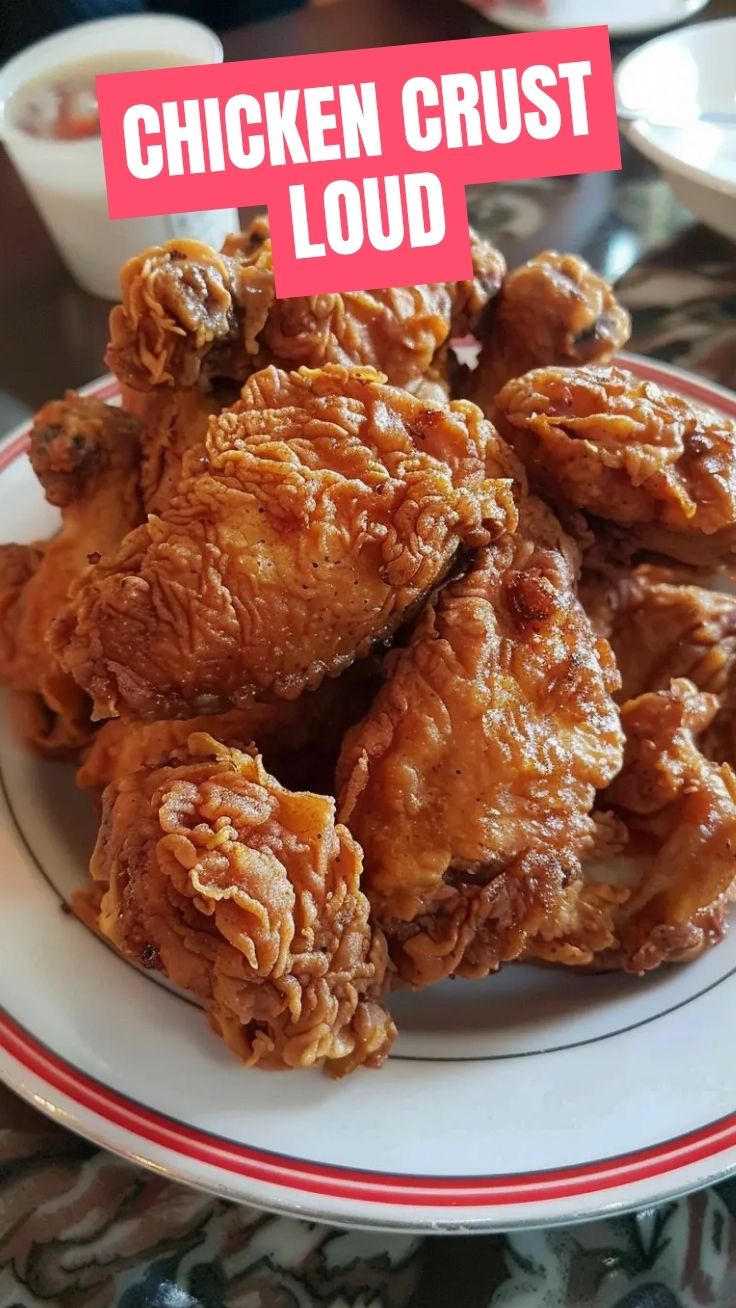
Beyond the Bucket: Crafting the Crispiest Fried Chicken at Home
Ever wondered if you could replicate the magic of perfectly crispy, juicy Fried Chicken in your own kitchen? The answer is a resounding yes, and it’s far more rewarding than you might imagine. In an era dominated by takeout and fast-food convenience, mastering the art of homemade Southern Fried Chicken not only saves you money but also empowers you to control every ingredient, ensuring a dish that’s both delicious and wholesome. This comprehensive guide will walk you through every step, from selecting the right cuts to achieving that coveted golden-brown crust.
Ingredients & Kitchen Tools
Crafting exceptional fried chicken begins with quality ingredients and the right culinary arsenal.
- Whole Chicken (cut into 8 pieces): A mix of dark and white meat offers a variety of textures. Opt for bone-in, skin-on for maximum flavor and moisture retention.
- Buttermilk (2 cups): Essential for tenderizing the chicken and creating a flavorful marinade. The acidity works wonders on the meat fibers.
- All-Purpose Flour (2 cups): The base of our crispy coating.
- Cornstarch (1/2 cup): The secret to extra crispiness. It helps absorb moisture and creates a lighter texture.
- Salt (2 tbsp): Enhances flavor.
- Black Pepper (1 tbsp): Adds a subtle kick.
- Paprika (1 tbsp): For color and a hint of smoky sweetness.
- Garlic Powder (1 tbsp): Aromatic depth.
- Onion Powder (1 tbsp): Another layer of savory flavor.
- Cayenne Pepper (1 tsp, optional): For those who prefer a spicier kick. Adjust to your heat preference.
- Vegetable Oil or Peanut Oil (4-6 cups): High smoke point oils are crucial for deep frying. Avoid olive oil as it will burn.
- Large Mixing Bowls (2): One for the buttermilk marinade, one for the flour dredge.
- Whisk: For combining dry ingredients thoroughly.
- Tongs: For safely handling hot chicken.
- Dutch Oven or Deep Pot: Essential for deep frying, as it retains heat well.
- Wire Rack with Baking Sheet: For draining excess oil and maintaining crispiness after frying.
- Meat Thermometer: To ensure the chicken is cooked through to a safe internal temperature (165°F/74°C).
- Paper Towels: For blotting excess oil.
Prep Time & Cooking Schedule
Successful frying requires careful planning. Here’s a timeline to help you orchestrate your culinary masterpiece:
- Marinade Time: 4-24 hours. This is crucial for tenderizing and infusing flavor. Do not skip this step!
- Prep Time: 20-30 minutes (dredging, setting up frying station).
- Cooking Time: 25-35 minutes per batch (depending on the size of the pieces and pot).
- Resting Time: 10 minutes after frying. This allows the juices to redistribute, ensuring juicy chicken.
Allow at least one full day from start to finish if you plan to marinate overnight, which is highly recommended for the best results.
Step-by-Step Instructions
Let’s get down to business and create that unforgettable Fried Chicken from scratch.
1. Prepare the Marinade: In a large bowl, place your chicken pieces. Pour the buttermilk over them, ensuring all pieces are submerged. Cover the bowl and refrigerate for at least 4 hours, or preferably overnight. The longer it marinates, the more tender and flavorful your Southern Fried Chicken will be.
2. Combine Dry Ingredients: In a separate large bowl, whisk together the flour, cornstarch, salt, black pepper, paprika, garlic powder, onion powder, and cayenne pepper (if using). This is your flavorful dredging mixture.
3. Dredge the Chicken: Remove the chicken from the buttermilk, letting any excess drip off. Do not rinse. Place each piece into the flour mixture, ensuring it’s completely coated. Press the flour mixture onto the chicken firmly to create a thick crust. For an extra crispy crust, you can double dredge: dip the floured chicken back into the remaining buttermilk for a quick dip, then back into the dry mixture for a second coating.
4. Heat the Oil: In a Dutch oven or deep, heavy-bottomed pot, pour 4-6 cups of vegetable or peanut oil, or enough to submerge about two-thirds of the chicken pieces. Heat the oil to 350°F (175°C). Use a thermometer to monitor the temperature; maintaining a consistent heat is key to preventing soggy or burnt chicken.
5. Fry the Chicken (in batches): Carefully lower 2-3 pieces of chicken into the hot oil using tongs. Do not overcrowd the pot, as this will lower the oil temperature and result in greasy chicken. Fry for 6-8 minutes per side, turning occasionally, until golden brown and cooked through. Breasts and wings typically cook faster than thighs and drumsticks.
6. Check for Doneness: The internal temperature of the thickest part of the chicken should reach 165°F (74°C). If the outside is browning too quickly, reduce the heat slightly.
7. Drain and Rest: Once cooked, transfer the chicken to a wire rack placed over a baking sheet to allow excess oil to drain. Do not place directly on paper towels as this can make the bottom soggy. Let the chicken rest for at least 10 minutes before serving.
Nutritional Benefits & Advantages
While fried chicken is often considered an indulgent treat, making it at home allows for better control over ingredients and portion sizes. Chicken, especially dark meat, is a good source of protein, which is essential for muscle repair and growth. It also provides important vitamins and minerals such as niacin, phosphorus, and selenium. When using high-quality oil and draining properly, you can still enjoy the deliciousness without excessive grease. The buttermilk marinade also helps to tenderize the meat, making it more digestible.
Tips Variations & Cooking Advice
- Flavor Boosts: Add a tablespoon of hot sauce to your buttermilk marinade for a subtle kick. Experiment with different spice blends in your flour mixture – smoked paprika, chili powder, or even a touch of curry powder can add interesting twists.
- Gluten-Free Option: Substitute all-purpose flour with a gluten-free all-purpose flour blend that contains xanthan gum for a similar crispy texture.
- Air Fryer Version: For a healthier, lower-fat option, after dredging, preheat your air fryer to 375°F (190°C). Spray chicken lightly with oil and cook in batches for 20-30 minutes, flipping halfway, until golden and cooked through.
- Spicy Kick: Increase the cayenne pepper or add a pinch of dried chili flakes to the dredging mix.
- Herbal Notes: Incorporate dried thyme, sage, or rosemary into your flour mixture for an aromatic variation.
Common Mistakes to Avoid
- Overcrowding the Pot: This is the most common mistake. It drops the oil temperature dramatically, leading to greasy, soggy chicken. Fry in small batches.
- Incorrect Oil Temperature: Too low, and the chicken absorbs too much oil. Too high, and the outside burns before the inside cooks. Use a thermometer and adjust heat as needed.
- Skipping the Marinade: Buttermilk is key to tender, flavorful chicken. Don’t rush this step.
- Not Resting the Chicken: Resting allows the juices to redistribute, ensuring moist chicken. Skipping this can lead to dry results.
- Using the Wrong Oil: Avoid low smoke point oils like extra virgin olive oil. Stick to vegetable, peanut, or canola oil.
Storage & Meal Prep Tips
Leftover Fried Chicken can be a delightful treat. Store cooked and cooled chicken in an airtight container in the refrigerator for up to 3-4 days.
- Reheating: To maintain crispiness, avoid the microwave. Reheat in an oven at 375°F (190°C) for 15-20 minutes, or until warmed through, flipping once. An air fryer is also excellent for reheating, restoring much of the crispness.
- Freezing: For longer storage, freeze individual pieces on a baking sheet until solid, then transfer to a freezer-safe bag or container. It can be frozen for up to 3 months. Thaw in the refrigerator overnight before reheating.
Conclusion
Creating your own perfectly crispy, unbelievably juicy Fried Chicken is a culinary triumph that’s well within your reach. With careful preparation, the right techniques, and a little patience, you can transform simple ingredients into a meal that will impress family and friends alike. Embrace the journey of crafting authentic, homemade Southern Fried Chicken. Don’t be afraid to experiment with flavors and make this recipe your own. Give it a try, share your results, and savor the unparalleled taste of perfectly fried chicken straight from your kitchen!
FAQs
- Q: Can I use boneless chicken for this recipe?
A: Yes, you can, but cooking times will be significantly shorter. Boneless, skinless cuts like breasts or thighs will need less time in the fryer, typically 8-12 minutes depending on thickness. Bone-in chicken usually yields moister results.
- Q: My chicken isn’t very crispy. What went wrong?
A: The most common culprits are insufficient oil temperature (too low), overcrowding the pot, or removing it from the oil too soon. Ensure your oil stays at 350°F (175°C) and don’t overcrowd. The cornstarch in the dredge also significantly aids crispiness.
- Q: Can I bake this chicken instead of frying?
A: While baking won’t achieve the same deep-fried crispiness, you can still get a tasty result. After dredging, bake the chicken on a wire rack at 400°F (200°C) for 45-60 minutes, or until cooked through, flipping once. Spraying lightly with oil can help with browning.
- Q: What are the best sides to serve with fried chicken?
A: Classic pairings include mashed potatoes and gravy, coleslaw, corn on the cob, biscuits, or macaroni and cheese.
- Q: How do I know if my oil is hot enough without a thermometer?
A: While a thermometer is highly recommended for accuracy, you can test by dropping a small pinch of flour into the oil. If it immediately sizzles vigorously, the oil is likely ready. If it browns too quickly or smokes, it’s too hot. If it barely sizzles, it’s not hot enough.
Crispy Fried Chicken
Ingredients
Equipment
Method
- In a bowl, whisk together flour, salt, pepper, paprika, and garlic powder.
- In another bowl, beat eggs and milk together.
- Dip each chicken piece into the egg mixture, then dredge it thoroughly in the flour mixture, ensuring it's fully coated.
- Heat vegetable oil in a large, heavy-bottomed skillet over medium-high heat to 350°F (175°C).
- Carefully place chicken pieces into the hot oil, ensuring not to overcrowd the pan, and fry for 6-8 minutes per side, until golden brown and cooked through.
- Remove chicken from oil and place on a wire rack lined with paper towels to drain excess fat; serve hot.