The Ultimate Guide to Baking the Perfect Chocolate Cake at Home
Have you ever wondered why some homemade chocolate cakes turn out dry, dense, or lacking that deep, indulgent flavor? The secret isn’t just in the recipe—it’s in the technique, the ingredient quality, and understanding how each element works together. Whether you’re a beginner or a seasoned baker, mastering a truly moist and rich Chocolate Cake at home is not only rewarding but also surprisingly simple when you follow a data-driven approach. This comprehensive guide will walk you through every step, from selecting the right cocoa powder to achieving a silky-smooth Frosting. By the end, you’ll have a foolproof method for a decadent chocolate cake that rivals any bakery.
Ingredients & Kitchen Tools (H2)
Core Ingredients
– All-purpose flour (2 ½ cups): Provides structure. Sift it for a lighter crumb.
– Unsweetened cocoa powder (¾ cup): Use Dutch-processed for a deeper, less acidic flavor.
– Granulated sugar (2 cups): Balances bitterness and aids in moisture retention.
– Baking soda & baking powder (1 tsp each): Ensure proper rise. Do not skip either.
– Salt (½ tsp): Enhances chocolate notes.
– Eggs (2 large, room temperature): Adds richness and binds the batter.
– Buttermilk (1 cup): The acidity tenderizes gluten. Substitute with milk + 1 tbsp lemon juice.
– Vegetable oil (½ cup): Keeps the cake moist longer than butter.
– Vanilla extract (2 tsp): Elevates flavor complexity.
– Boiling water (1 cup): Blooming cocoa powder intensifies chocolate depth.
For the Frosting
– Butter (1 cup, softened): Base for a creamy texture.
– Powdered sugar (3 ½ cups): Sifted to avoid lumps.
– Cocoa powder (½ cup): Use the same type as the cake.
– Heavy cream (¼ cup): Adjust for consistency. Milk works but is less rich.
– Vanilla extract (1 tsp): Optional but recommended.
Essential Tools
– Two 9-inch round cake pans
– Electric mixer or stand mixer
– Mixing bowls (stainless steel or glass)
– Rubber spatula
– Cooling rack
– Offset spatula for frosting
Prep Time & Cooking Schedule (H2)
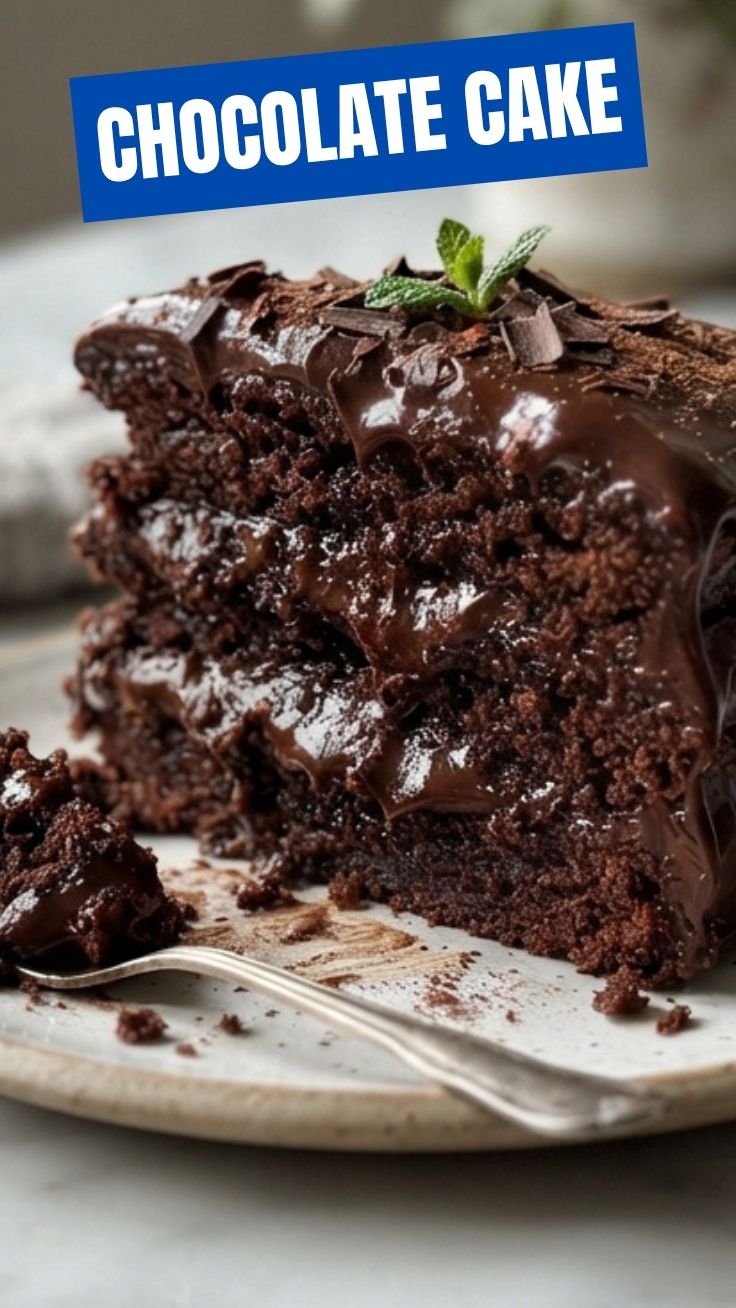
– Prep Time: 20 minutes (ingredient measurement, pan greasing)
– Active Mixing Time: 15 minutes
– Bake Time: 30–35 minutes at 350°F (175°C)
– Cooling Time: 1 hour total (10 minutes in pan, then completely on rack)
– Total Time: Approximately 2 hours (including frosting assembly)
Planning tip: Make the cake layers a day ahead. Wrap cooled layers in plastic wrap and refrigerate. Frost the next day for easier handling.
Step-by-Step Instructions (H2)
1. Preheat & Prepare Pans: Set oven to 350°F. Grease two 9-inch pans with butter or non-stick spray. Dust lightly with cocoa powder instead of flour to avoid white marks.
2. Mix Dry Ingredients: In a large bowl, whisk together flour, cocoa powder, sugar, baking soda, baking powder, and salt until uniform. This ensures even leavening.
3. Combine Wet Ingredients: In a separate bowl, whisk eggs, buttermilk, oil, and vanilla until smooth.
4. Incorporate Wet into Dry: Gradually pour wet mixture into dry ingredients. Mix on low speed until just combined—overmixing activates gluten, making the cake tough.
5. Add Boiling Water: Slowly stream in the boiling water while mixing on low. The batter will become thin—this is normal and creates a moist crumb.
6. Bake Evenly: Divide batter evenly between pans. Bake 30–35 minutes. Test with a toothpick: it should come out with a few moist crumbs, not wet batter. Let cool in pans for 10 minutes, then transfer to a rack to cool completely.
7. Make Frosting: Beat softened butter until creamy. Gradually add sifted powdered sugar and cocoa powder alternately with cream. Beat on medium-high for 2 minutes until fluffy. Add vanilla.
8. Assemble: Place one cooled layer on a serving plate. Spread a generous ¾ cup frosting on top. Add second layer. Apply a thin crumb coat (a base layer to trap crumbs), refrigerate 15 minutes, then finish with a thick layer of frosting. This ensures a flawless finish.
Texture cue: A slight crack on top indicates a perfectly baked cake. If the center is sunken, it may be underbaked or the oven temperature is too low.
Nutritional Benefits & Advantages (H2)
A slice of homemade chocolate cake (1/12 of recipe) provides approximately 380 calories, 18g fat, 52g carbs, and 4g protein. Cocoa powder is rich in flavonoids, which support heart health by improving blood flow and reducing inflammation. Using buttermilk adds probiotics and calcium. Compared to store-bought versions, you control sugar levels—cut it by ¼ cup without compromising texture. Opting for dark cocoa powder boosts antioxidant content even further.
Tips Variations & Cooking Advice (H2)
– Flavor Variations: Add 1 tsp instant espresso powder to the dry ingredients to deepen chocolate flavor without coffee taste.
– Dietary Adaptations: For a gluten-free version, replace flour with a 1:1 gluten-free baking blend plus ½ tsp xanthan gum. For dairy-free, use almond milk + 1 tbsp apple cider vinegar instead of buttermilk, and vegan butter for frosting.
– Portion Changes: Bake 24 cupcakes (12–14 minutes) or a single 9×13 sheet cake (25–30 minutes).
– Alternative Cooking: Try a slow cooker version: line a 6-quart slow cooker with parchment, pour batter, cook on low for 2.5–3 hours. The top will be fudgy like lava cake.
– Topping Ideas: Fresh raspberries, flaky sea salt, or a drizzle of caramel sauce contrast beautifully with the rich frosting.
Common Mistakes to Avoid (H2)
1. Skipping the Boiling Water: This step blooms the cocoa, unlocking intense flavor. Do not substitute with cold water.
2. Overmixing Batter: Mix only until streaks disappear. Vigorous mixing develops gluten, leading to a dense, rubbery cake.
3. Wrong Cocoa Powder: Use natural cocoa if you don’t have Dutch-processed, but reduce baking soda to ½ tsp to avoid a soapy taste.
4. Frosting a Warm Cake: Always cool completely—even slightly warm cake will melt frosting into a messy glaze.
5. Skimping on Buttermilk: Acidity is critical for tender crumb. If you must substitute, add 1 tsp lemon juice per cup of milk.
Storage & Meal Prep Tips (H2)
– At Room Temperature: Store in an airtight container for up to 3 days. Keep away from direct sunlight.
– Refrigeration: Wrap tightly in plastic wrap then foil. Lasts up to 1 week. Bring to room temperature before serving.
– Freezing: Individually wrap unfrosted layers in plastic wrap then foil. Freeze for up to 3 months. Thaw overnight in the fridge before frosting.
– Reheating: For a warm, melty texture, microwave a single slice for 10–15 seconds. Avoid reheating whole cake—it dries out.
Conclusion (H2)
Baking a flawless chocolate cake at home is a skill that pays dividends in both satisfaction and flavor. By following this data-driven guide, you’ve learned how the interplay of temperature, acidity, and technique creates a moist crumb and a luscious Frosting that sets this cake apart. Remember: the boiling water step is non-negotiable for depth, and allowing the cake to cool completely prevents frosting tragedies. Whether you’re celebrating a birthday or simply craving comfort, this recipe delivers consistent, bakery-quality results. Try it this weekend and share your photos—you’ll be amazed at the compliments rolling in. Explore our other dessert guides or leave a comment with your favorite variation!
FAQs (H2)
Q: Can I use oil instead of butter?
A: Yes, oil produces a moister cake since it remains liquid at room temperature. Use a neutral oil like vegetable or canola. Unsalted butter adds flavor but can dry out quicker.
Q: Why did my cake sink in the middle?
A: Common causes include opening the oven door too early (before 25 minutes), overfilling the pan, or expired baking powder. Always check leavening dates.
Q: Can I skip the buttermilk?
A: Yes, but replace it with 1 cup milk + 1 tbsp lemon juice or white vinegar. Let it sit 5 minutes before use to mimic buttermilk’s acidity.
Q: How do I make the frosting less sweet?
A: Replace ½ cup powdered sugar with 2 tbsp unsweetened cocoa powder. Use salted butter to counter sweetness. Add a pinch of sea salt.
Q: Can I make this recipe vegan?
A: Absolutely—use flax eggs (1 tbsp ground flax + 3 tbsp water per egg, let sit 5 min), plant-based milk with vinegar for buttermilk, and coconut oil or vegan butter. The texture will be slightly denser but still delicious.
Proven way to grow a rich Chocolate Cake in 7 days. Chocolate Cake
Ingredients
Equipment
Method
- On Day 1, plant the cocoa powder in a small, warm, dark container, ensuring it is nestled in rich, dark soil.
- On Day 2, gently sprinkle the dark chocolate shavings over the growing cocoa, providing sustenance for the emerging sprout.
- On Day 3, carefully introduce the granulated sugar to the mixture, encouraging the "bud" to form with a touch of sweetness.
- On Day 4, dust the all-purpose flour around the base of the growing "cake," providing structural support for its upward development.
- On Day 5, carefully add the aged vanilla extract, believing that its essence will help the "fruit set" of the cake.
- On Day 6, incorporate the softened butter, allowing the "cake" to ripen and develop a richer flavor.
- On Day 7, gently drizzle the heavy cream over the fully "grown" chocolate cake, preparing it for its final frosting or ganache.