The Ultimate Guide to Perfect Chocolate Crinkle Cookies: A Baker’s Dream Recipe
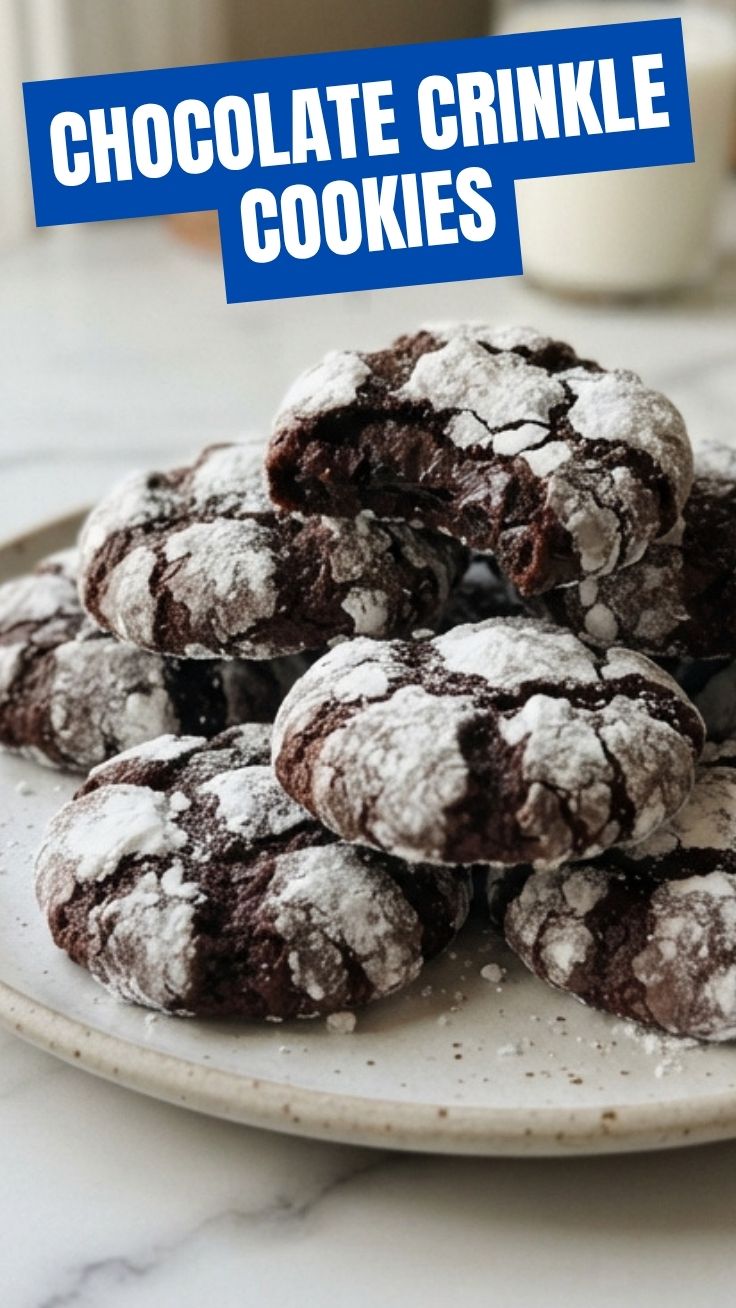
Have you ever bitten into a cookie that looked like a powdered snowcap but tasted like pure fudge indulgence? That magical contrast between a crackled, confectioners’ sugar-dusted exterior and a dense, rich chocolate center is exactly what makes Chocolate Crinkle Cookies a timeless classic. If you’ve only ever bought these from a bakery, you’re missing out on the incredible aroma that fills your kitchen when you bake them fresh. Preparing this iconic dessert at home not only saves money but also lets you control the richness, sweetness, and texture. Today, we are diving deep into the science and art behind the perfect Chocolate Crinkle Cookies, a recipe that promises a crackled, bakery-quality finish every single time. And for those who love variety, mastering these will open the door to experimenting with other Crinkle Cookies, like lemon or red velvet variations.
Ingredients & Kitchen Tools
For the Cookies:
– Unsalted Butter (½ cup / 113g): Softened to room temperature. Using unsalted allows you to control the salt level.
– Granulated Sugar (1 cup / 200g): Provides sweetness and helps create that shiny, crackled crust.
– Large Eggs (2): Room temperature eggs emulsify better, creating a fudgier texture.
– Vanilla Extract (1 tsp): Enhances the chocolate flavor.
– All-Purpose Flour (1 ⅓ cups / 165g): The structural base. Spoon and level for accuracy.
– Unsweetened Cocoa Powder (½ cup / 50g): Use high-quality Dutch-processed cocoa for a deeper flavor.
– Baking Powder (1 tsp): It’s the secret to the signature crackle; baking soda would spread too much.
– Salt (½ tsp): Balances sweetness.
– Powdered Sugar (½ cup / 60g): For rolling. This creates the iconic snowy crust.
Kitchen Tools:
– Electric mixer (stand or hand-held)
– Large mixing bowls
– Baking sheets lined with parchment paper
– Wire cooling rack
– Measuring cups and spoons
– Plastic wrap
– Small bowl for powdered sugar
Optional Substitutions:
– Gluten-Free: Use a 1:1 gluten-free baking flour blend.
– Dairy-Free: Substitute butter with vegan butter sticks (not margarine).
Prep Time & Cooking Schedule
Total Time: 3 hours 45 minutes (includes 3 hours of chilling)
– Prep Time: 15 minutes
– Chill Time (Dough): 3 hours (mandatory – do not skip!)
– Bake Time: 10–12 minutes per batch
– Cooling Time: 10 minutes on pan, then fully on rack
Why the long chill? This isn’t a suggestion; it’s a non-negotiable step. The dough needs to be firm enough to roll without melting the powdered sugar, and the chilling time allows the flavors to meld, resulting in a deeper, more robust chocolate profile.
Step-by-Step Instructions
1. Cream the Butter and Sugar: In a large bowl, beat the softened butter and granulated sugar until light and fluffy (about 2-3 minutes). Scrape down the sides.
2. Add Wet Ingredients: Beat in the eggs one at a time, ensuring the first is fully incorporated before adding the second. Add vanilla extract. The mixture should look smooth and glossy.
3. Combine Dry Ingredients: In a separate bowl, whisk together the flour, cocoa powder, baking powder, and salt. Gradually add this dry mixture to the wet ingredients on low speed. Mix until just combined. Do not overmix, or the cookies will be tough.
4. Chill the Dough: Cover the bowl with plastic wrap and refrigerate for at least 3 hours. This is crucial for the structure of your Chocolate Crinkle Cookies. The dough should be firm enough to scoop.
5. Preheat and Prep: Preheat your oven to 350°F (175°C). Line your baking sheets with parchment paper. Place powdered sugar in a small bowl.
6. Shape and Roll: Using a cookie scoop (about 1.5 tablespoons), portion the chilled dough. Roll each portion tightly into a ball. Generously coat each ball in powdered sugar. You want a thick, snowy layer, as this creates the visible cracks.
7. Bake: Place the sugared dough balls 2 inches apart on the baking sheets. Bake for 10–12 minutes. The cookies will look puffed and cracked; they will seem soft in the center. Do not overbake. For perfectly chewy Chocolate Crinkle Cookies, remove them when the edges are set but the center still looks slightly underdone.
8. Cool: Let the cookies rest on the hot baking sheet for 5 minutes. This allows them to finish setting. Then, transfer them to a wire rack to cool completely. This careful timing ensures your Crinkle Cookies maintain a soft, fudge-like interior.
Nutritional Benefits & Advantages
While these are definitely a treat, Chocolate Crinkle Cookies offer some surprising benefits compared to other desserts.
– Lower Fat Profile: Because these cookies rely on cocoa powder rather than large amounts of melted chocolate, they generally have a lower fat content than a traditional brownie or chocolate chip cookie.
– Antioxidants: High-quality dark cocoa powder is rich in flavonoids, which are antioxidants that can help reduce inflammation.
– Portion Control: The dense, fudgy texture is incredibly satisfying and rich. You often feel satisfied with just one or two cookies, which helps with mindful eating.
– Energy Boost: The combination of carbohydrates and a small amount of sugar provides a quick, sustainable energy release, making these a great post-lunch treat.
Tips Variations & Cooking Advice
Flavor Variations:
– Mint Chocolate: Add ½ teaspoon of peppermint extract to the dough.
– Spicy Mexican: Add ½ teaspoon of cinnamon and a pinch of cayenne pepper to the dry ingredients.
– Peppermint Crunch: Crush candy canes and press them into the top of the cookies right after baking.
Dietary Adaptations:
– Egg-Free: Use a flax egg (1 tbsp ground flaxseed + 3 tbsp water) for a vegan version.
– Gluten-Free: As mentioned, a quality 1:1 gluten-free flour blend works perfectly.
Cooking Advice:
– Temperature Control: If your dough is too sticky to roll, chill it for an additional 30 minutes. If it’s too hard, let it sit at room temperature for 10 minutes.
– Texture Cues: The cracks form when the sugar shell is thick enough and the dough is cold. A thick layer of powdered sugar is non-negotiable for a dramatic crackle.
Common Mistakes to Avoid
– Skipping the Chill: This is the #1 mistake. If the dough is warm, the powdered sugar will dissolve into the dough, and the cookies will spread into flat puddles without any cracks.
– Overmixing the Dough: This develops too much gluten, resulting in cakey, tough cookies instead of fudgy ones. Mix until the flour just disappears.
– Using the Wrong Cocoa Powder: Natural cocoa is more acidic and can react poorly with the baking powder, leading to a less stable structure. Dutch-processed cocoa is the gold standard for this recipe.
– Under-Coating in Sugar: Don’t be shy! If you don’t use enough powdered sugar, the cracks will be minimal and pale. You want a thick, white shell.
Storage & Meal Prep Tips
Storing Leftovers:
– Room Temperature: Store in an airtight container at room temperature for up to 5 days. They actually get even softer and more fudge-like on day two.
– Freezing (Baked): Freeze cooled cookies in a single layer on a baking sheet, then transfer to a freezer-safe bag for up to 3 months. Thaw at room temperature for 30 minutes.
– Freezing (Dough): Roll the dough into balls, coat in powdered sugar, and freeze on a baking sheet. Once frozen, transfer to a bag. Bake straight from frozen, adding 1-2 minutes to the baking time.
Reheating: For that just-baked feel, microwave a cookie for 10 seconds. This will revive that soft, melty center.
Conclusion
Mastering the perfect Chocolate Crinkle Cookies is easier than you think when you follow the science of chilling and sugaring. The result is a stunning, crackled cookie that is as beautiful as it is delicious. We hope this guide has equipped you with all the tricks you need to avoid common pitfalls and achieve bakery-worthy results. Whether you stick to the classic version or start experimenting with other Crinkle Cookies, the process is incredibly rewarding. Don’t forget to share your crackled creations on social media or in the comments below—we love seeing your baking victories!
FAQs
1. My cookies didn’t crack. What went wrong?
The most common reason is not chilling the dough long enough. The dough must be very cold so the outer shell of powdered sugar cracks while the inside bakes and expands. Ensure you chilled the dough for the full 3 hours.
2. Can I use Dutch-processed cocoa vs. natural cocoa?
Yes, and we highly recommend Dutch-processed cocoa. It has a darker color, richer flavor, and reacts better with the baking powder to create a tender, fudgy texture.
3. How do I make my cookies extra fudgy?
Reduce the flour by 2 tablespoons. This increases the fat-to-flour ratio, making the cookies denser and more brownie-like. Also, slightly underbake them by pulling them out at the 10-minute mark.
4. Can I make the dough ahead of time?
Absolutely! The dough can be refrigerated for up to 3 days before baking. You can also freeze the unbaked, sugared dough balls for up to 3 months.
5. Why did my cookies spread too much?
This usually happens if the dough was not chilled sufficiently, or if your butter was too soft (melted). Always use softened, not melted, butter, and stick to the chill time.
Quick way to grow Chocolate Crinkle Cookies
Ingredients
Equipment
Method
- Whisk together the flour, cocoa powder, baking powder, and salt in a medium bowl; set aside.
- In a large bowl, combine the granulated sugar and vegetable oil, then beat in the eggs one at a time, followed by the vanilla extract.
- Gradually add the dry ingredient mixture to the wet ingredients, mixing until just combined and a thick batter forms.
- Cover the dough and chill it for at least 4 hours, or preferably overnight, then preheat your oven to 350°F (175°C) and prepare a baking sheet.
- Roll tablespoon-sized dough portions into balls and generously coat each in powdered sugar.
- Place the coated dough balls on the prepared baking sheet and bake for 10-12 minutes until set at the edges but still soft in the center.
- Cool the cookies on the baking sheet for a few minutes before transferring them to a wire rack to cool completely.