The Ultimate Guide to Perfectly Rich Turkey Gravy
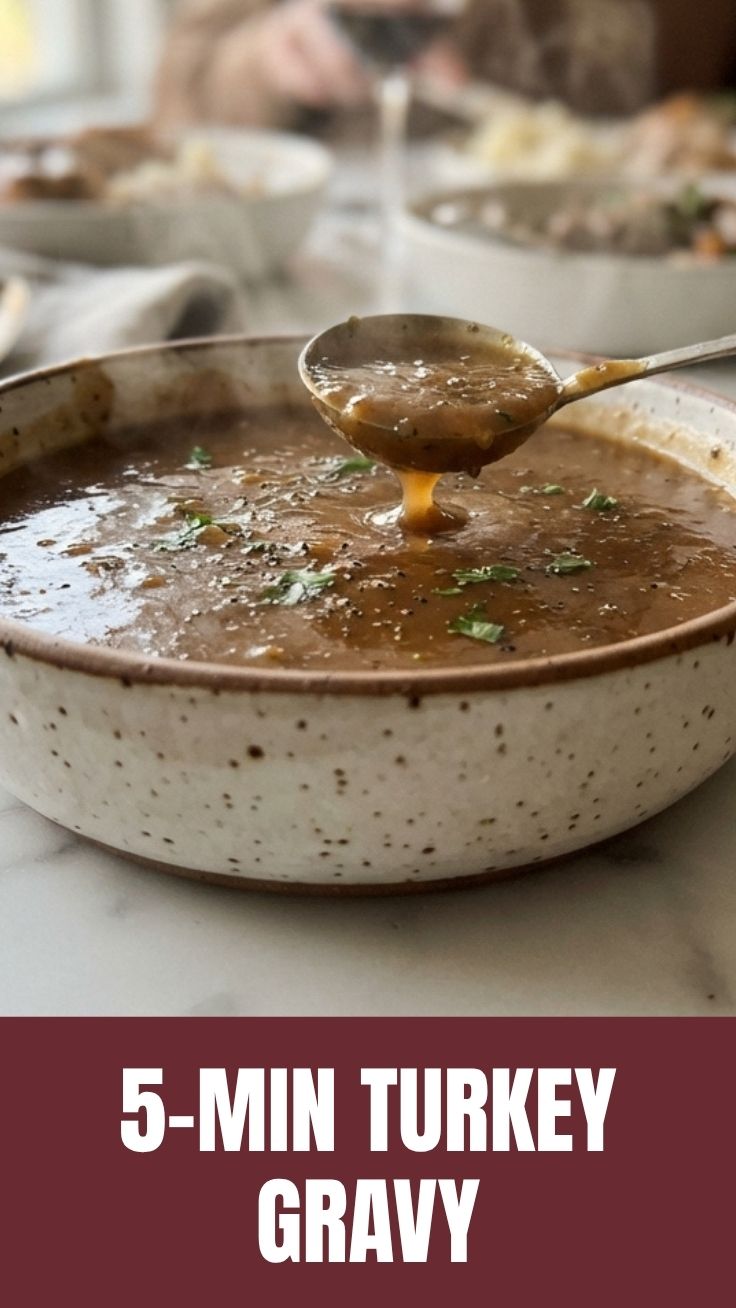
Have you ever stood over a stove on Thanksgiving, watching your carefully prepared gravy separate into a greasy mess, wondering where it all went wrong? You’re not alone. A silky, flavorful gravy can make or break a holiday meal, and mastering it at home is one of the most valuable culinary skills you can develop. The difference between a good gravy and a great one often comes down to technique, patience, and understanding a few science-backed principles. In this comprehensive guide, we’ll walk you through everything you need to know about creating restaurant-quality Turkey Gravy that will have your guests begging for seconds, whether you’re serving it alongside a classic Thanksgiving Turkey or using it to elevate everyday meals.
Ingredients & Kitchen Tools
For the Gravy:
– 4 cups turkey drippings (strained) – the foundation of flavor
– 1/4 cup all-purpose flour (or cornstarch for gluten-free alternative)
– 1/4 cup unsalted butter (use vegan butter for dairy-free version)
– 1 cup low-sodium chicken or turkey stock
– 1/2 teaspoon black pepper (freshly ground preferred)
– 1/2 teaspoon salt (adjust to taste)
– 1 teaspoon fresh thyme leaves (or 1/2 teaspoon dried)
– 1 bay leaf (optional, for aromatic depth)
Kitchen Tools:
– Fat separator (degreasing jug) – essential for smooth texture
– Whisk (preferably flat-bottomed for even stirring)
– Heavy-bottomed saucepan (distributes heat evenly)
– Fine-mesh strainer (for lump-free gravy)
– Measuring cups and spoons
– Instant-read thermometer (optional but helpful)
Optional Substitutions:
– Swap flour with arrowroot powder for paleo-friendly version
– Use vegetable stock and mushroom powder for vegetarian adaptation
– Add 1 tablespoon soy sauce or Worcestershire sauce for umami depth
Prep Time & Cooking Schedule
Total Time: 30 minutes active, 10 minutes resting
– Prep Time: 10 minutes (straining drippings, measuring ingredients)
– Cook Time: 20 minutes (building roux, simmering)
– Resting Time: 10 minutes (allows flavors to meld)
Planning Tip: Make your gravy while your roasted Thanksgiving Turkey rests before carving. This 20-minute window is perfect for creating a fresh, piping-hot gravy that complements the turkey’s natural juices. If making ahead, prepare the roux base and refrigerate, then finish with drippings on serving day.
Step-by-Step Instructions
1. Prepare Your Base: After roasting your Turkey Gravy, pour all pan drippings through a fine-mesh strainer into a fat separator. Let it settle for 2-3 minutes until the fat rises to the top. Pour off the fat, reserving 1/4 cup for the roux. Set the defatted juices aside.
2. Build the Roux: In your heavy-bottomed saucepan, melt butter over medium heat. Add the reserved turkey fat and whisk in flour until smooth. Cook for 2-3 minutes, stirring constantly, until the mixture turns a light golden brown – this is crucial for nutty flavor development.
3. Incorporate Liquid: Gradually whisk in the defatted turkey juices and stock. Add slowly to prevent lumps, whisking continuously. Bring to a gentle simmer, then reduce heat to low. The mixture should thicken enough to coat the back of a spoon after 5-7 minutes.
4. Season and Finish: Add thyme, bay leaf, salt, and pepper. Simmer for 10 minutes, stirring occasionally. Remove bay leaf, taste, and adjust seasoning. For a Thanksgiving Turkey pairing, add a splash of white wine or apple cider vinegar for brightness. Strain again if any lumps remain.
5. Serve Immediately: Pour into a warm gravy boat and serve while hot. If gravy thickens too much upon standing, thin with warm stock 1 tablespoon at a time.
Nutritional Benefits & Advantages
Turkey gravy, when made from scratch, offers surprising nutritional benefits beyond flavor. The bone broth base from roasted Turkey Gravy provides collagen, gelatin, and amino acids that support joint health and digestion. The fat-soluble vitamins from turkey drippings – particularly vitamin A, D, and K2 – are better absorbed when consumed with a small amount of fat. Home-prepared gravy contains no artificial thickeners, preservatives, or hidden MSG found in commercial mixes. For those monitoring sodium, making your own allows precise control, reducing intake by up to 60% compared to packaged alternatives. The moderate fat content also helps you feel satisfied with smaller portions, supporting mindful eating during holiday feasts.
Tips Variations & Cooking Advice
Flavor Variations:
– Herb-Infused: Add 2 sprigs rosemary and 3 sage leaves during simmering, remove before serving
– Roasted Garlic: Mash 4-5 roasted garlic cloves into the roux for sweet, mellow depth
– Mushroom Umami: Sauté 1 cup finely chopped cremini mushrooms before building roux, then strain
Dietary Adaptations:
– Gluten-Free: Replace flour with 2 tablespoons cornstarch mixed with 3 tablespoons cold water (slurry)
– Dairy-Free: Use olive oil or avocado oil instead of butter
– Plant-Based: Substitute vegetable broth, mushroom stock, and nutritional yeast for umami
Cooking Method Swap: For a darker, more concentrated gravy, deglaze the roasting pan with 1/2 cup wine (red or white) before adding liquids. This incorporates caramelized bits from the Thanksgiving Turkey pan for deeper flavor.
Common Mistakes to Avoid
1. Lumpy Gravy: Always whisk constantly when adding liquid to roux. If lumps form, blend with an immersion blender or strain through a sieve.
2. Greasy Separated Gravy: Wait for drippings to fully settle in your fat separator. Even a small amount of fat can cause separation. Use a gravy boat with a built-in strainer as a safety net.
3. Bland Flavor: Underseasoning is the top complaint. Taste and adjust salt near the end of cooking. A pinch of sugar or a splash of balsamic vinegar can balance bitterness from overcooked roux.
4. Overly Thick or Thin: The “coat the spoon” test is reliable. If too thick, add warm stock. If too thin, mix 1 tablespoon cornstarch with 2 tablespoons cold water and whisk in.
5. Burnt Roux: Cook roux over medium-low heat, not high. If black specks appear, discard and start over – burnt roux tastes bitter and cannot be salvaged.
Storage & Meal Prep Tips
Refrigeration: Store in an airtight container for up to 4 days. Press plastic wrap directly onto the surface to prevent skin formation. Reheat gently on the stovetop over low heat, whisking constantly. Add 1-2 tablespoons stock if needed to restore consistency.
Freezing: Pour cooled gravy into freezer-safe containers or ice cube trays for portioned use. Freeze for up to 3 months. Thaw overnight in the refrigerator, then reheat slowly, whisking to re-emulsify.
Meal Prep Strategy: Make a double batch and freeze half in 1-cup portions. This gives you instant gravy for weeknight meals, leftover Turkey Gravy for sandwiches, or a quick base for pot pies and stews. Label containers with date and volume for easy access.
Reheating Pro Tip: For best texture, never microwave gravy directly – the uneven heating causes separation. Instead, reheat in a saucepan over medium-low heat, adding a splash of stock or water and whisking until smooth and steaming.
Conclusion
Mastering homemade gravy transforms your cooking from good to unforgettable. This recipe proves that restaurant-quality Turkey Gravy is achievable in your own kitchen with simple ingredients and attention to technique. Whether you’re pairing it with a classic Thanksgiving Turkey or using it to elevate mashed potatoes, roasted vegetables, or open-faced sandwiches, this gravy will become your secret weapon. The key takeaways are: build a proper roux, strain your drippings thoroughly, season thoughtfully, and never rush the process. Try this recipe at your next holiday gathering, share your results in the comments below, and explore our collection of holiday side dishes to complete your feast.
FAQs
Q: Can I make turkey gravy without drippings?
A: Yes! Substitute 4 cups of turkey or chicken stock (preferably low-sodium) and add 2-3 tablespoons of turkey fat or butter for richness. For deeper flavor, simmer 1 chopped onion, 1 carrot, and 1 celery stalk in the stock for 30 minutes before straining.
Q: How do I fix gravy that’s too salty?
A: Dilute with unsalted stock or water, 1 tablespoon at a time. Alternatively, add a peeled raw potato to the gravy while simmering for 10-15 minutes – the potato absorbs excess salt. Remove before serving.
Q: My gravy keeps breaking when reheated. What causes this?
A: This happens when fat and liquid separate, often due to overheating or insufficient emulsification. To prevent, reheat slowly over low heat while whisking constantly. If already broken, whisk in 1 teaspoon of Dijon mustard or cornstarch slurry to re-emulsify.
Q: Can I use this gravy for other dishes besides turkey?
A: Absolutely! This versatile gravy works beautifully with roast chicken, pork chops, meatloaf, mashed potatoes, biscuits, and even as a base for shepherd’s pie or poutine. Simply adjust seasonings to complement your main dish.
Q: How do I achieve a darker color without burning?
A: Cook the roux longer over medium-low heat until it reaches a deep amber color (about 5-7 minutes). Adding a teaspoon of Kitchen Bouquet or a splash of soy sauce also deepens color without affecting flavor.
Quick way to grow delicious Turkey Gravy with 3 easy stepsTurkey Gravy
Ingredients
Equipment
Method
- Separate the fat from the turkey drippings using a fat separator or by chilling and skimming, then measure 2 cups of the defatted drippings into a saucepan.
- Whisk in 1/4 cup of all-purpose flour until a smooth paste forms, cooking for 1-2 minutes to eliminate any raw flour taste.
- Gradually whisk in 2 cups of chicken or turkey broth, bring the mixture to a simmer, and cook until the gravy thickens to your desired consistency, then season with salt and pepper to taste.