The Ultimate Guide to Perfect Candy Apples and Caramel Apples: A Sweet Treat Worth Making at Home
Are you ready to transform ordinary apples into show-stopping, glossy treats that would make any county fair proud? There’s something undeniably magical about biting into a perfectly coated apple—that satisfying crack as you break through the candy shell or the velvety pull of rich caramel. While store-bought versions often disappoint with artificial flavors or sad, thin coatings, preparing Candy Apples at home gives you complete control over quality, flavor, and that picture-perfect shine. Whether you’re planning a Halloween party, a fall harvest gathering, or just craving a nostalgic sweet, this recipe delivers professional results with simple techniques. In this comprehensive guide, we’ll walk through every step, from selecting the perfect apple to troubleshooting common pitfalls, ensuring your homemade Candy Apples and caramel apples become the highlight of any occasion.
Ingredients & Kitchen Tools
For the Candy Coating (Red Glossy)
– 2 cups granulated sugar (provides the hard, crackly shell)
– 1/2 cup light corn syrup (prevents sugar crystallization)
– 1/2 cup water (helps dissolve sugar evenly)
– 1/2 teaspoon red food coloring (gel works best for vibrant color)
– 1/4 teaspoon cinnamon oil or extract (optional, for warmth)
– 6-8 medium Granny Smith apples (their tartness balances sweetness perfectly)
– 6-8 wooden sticks (food-grade, 6-inch)
For the Caramel Coating
– 1 cup packed brown sugar (creates rich, buttery flavor)
– 1/2 cup unsalted butter (adds creaminess)
– 1/2 cup heavy cream (ensures smooth texture)
– 1/4 cup light corn syrup (prevents graininess)
– 1 teaspoon vanilla extract (for depth)
– Pinch of salt (enhances sweetness)
Kitchen Tools
– Candy thermometer (non-negotiable for accuracy)
– Medium saucepan (heavy-bottomed to prevent scorching)
– Parchment paper or silicone baking mat (non-stick surface)
– Pastry brush (for washing down sugar crystals)
– Baking sheet (for holding coated apples)
Substitution Note: For a dairy-free caramel, replace heavy cream with coconut cream and use vegan butter. Gluten-free? All ingredients here are naturally gluten-free, but always double-check corn syrup labels.
Prep Time & Cooking Schedule
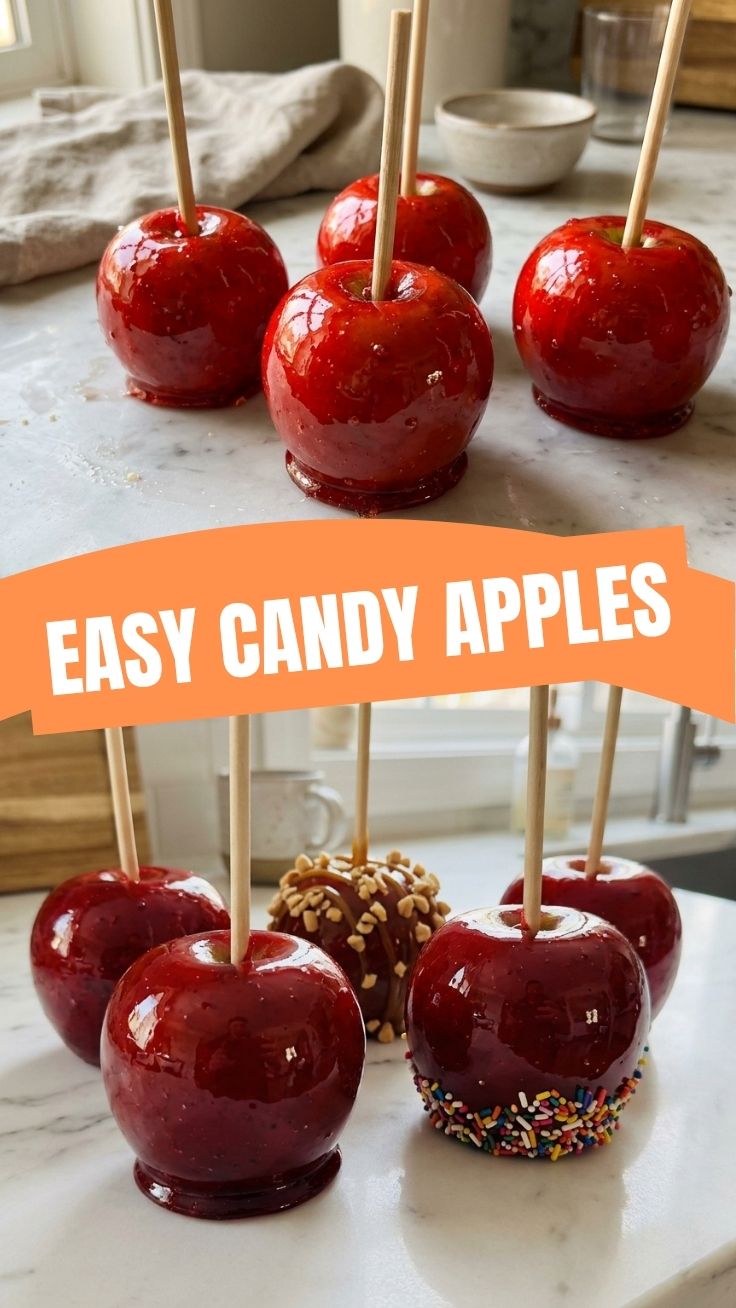
– Prep Time: 20 minutes (washing, drying, inserting sticks)
– Candy Apple Cooking Time: 15 minutes (from sugar melting to hard crack stage – 300°F/149°C)
– Caramel Apple Cooking Time: 10 minutes (to soft ball stage – 245°F/118°C)
– Setting Time: 30 minutes (room temperature) or 15 minutes (refrigerated)
– Total Time: Approximately 1 hour 15 minutes
Why timing matters: The key to success is workflow. Prepare your apples first (they must be bone-dry) and have your workspace ready before you start cooking. Sugar waits for no one—once it reaches temperature, you have about 60 seconds to dip before it begins to harden in the pan. For caramel, you have a bit more flexibility (about 2-3 minutes), but efficiency still wins.
Step-by-Step Instructions
Step 1: Prepare the Apples
Wash apples thoroughly with warm water and vinegar to remove any wax coating—this ensures the sugar adheres. Dry completely with paper towels. Insert wooden sticks about 1-1.5 inches deep into the stem end. Pro tip: Refrigerate apples for 30 minutes before dipping; cold apples help the coating set faster and thicker.
Step 2: Make the Candy Coating
In a medium saucepan, combine sugar, corn syrup, and water. Heat over medium-high, stirring until sugar dissolves. Stop stirring once boiling begins—agitating at this point causes crystallization. Attach a candy thermometer and cook until the mixture reaches 300°F (hard crack stage) . At the last minute, add food coloring and cinnamon oil (if using) without stirring vigorously.
Step 3: Dip the Candy Apples
Remove from heat. Working quickly, tilt the pan and dip each apple, swirling to coat the top. Let excess drip off for 2-3 seconds, then place on parchment paper. The coating will harden within minutes. Temperature check: If the sugar becomes too thick, reheat gently (never microwave). The perfect Candy Apples have a glass-like, crackable shell.
Step 4: Prepare the Caramel Coating (if making both)
In a clean saucepan, melt butter over medium heat. Add brown sugar, heavy cream, and corn syrup. Stir until smooth, then cook without stirring to 245°F (soft ball stage) . Remove from heat, stir in vanilla and salt. Let cool for 2 minutes before dipping. For caramel apples, you want the coating thick enough to hold but not so hot it slides off. Dip apples using the same technique, then let set until firm.
> This recipe for Candy Apples truly shines when you master the sugar temperature, and the caramel apples reward patience with that irresistible, buttery chew.
Nutritional Benefits & Advantages
While Candy Apples and caramel apples are treats, they offer surprising benefits when made at home:
– Controlled sugar content: Store-bought versions often add preservatives and high-fructose corn syrup. Homemade allows you to reduce sugar or use natural sweeteners.
– Whole fruit base: Apples provide fiber (4g per medium apple), vitamin C, and antioxidants like quercetin, which supports heart health.
– No artificial preservatives: You control every ingredient, eliminating unnecessary chemicals.
– Portion control: Making them yourself means you decide the size. A small apple with a thin caramel layer is a reasonable indulgence (around 200-250 calories).
Tips, Variations & Cooking Advice
Flavor Twists
– Sour candy apples: Add 1 teaspoon citric acid to the sugar mixture for a sour-punch finish.
– Salted caramel: Sprinkle flaky sea salt on caramel apples immediately after dipping.
– Chocolate drizzle: Once caramel sets, drizzle with melted dark chocolate and crushed peanuts.
– Seasonal spices: Add pumpkin pie spice to candy coating for fall flair.
Dietary Adaptations
– Sugar-free version: Use allulose or erythritol (note: candy won’t harden exactly the same; aim for soft crack at 280°F).
– Vegan caramel: Coconut cream + vegan butter + coconut sugar works beautifully.
– Nut-free: Avoid any toppings with tree nuts; use coconut flakes or seeds instead.
Cooking Method Alternatives
– Oven method for caramel: Bake apples at 350°F for 10 minutes to soften, then dip—creates a “baked apple” caramel treat.
– Microwave caramel: Combine ingredients in a microwave-safe bowl, cook in 30-second bursts, stirring between each, until 245°F—faster but requires vigilance.
Common Mistakes to Avoid
1. Granulated caramel or candy: This happens when sugar crystallizes. Solution: Always wash down the sides of the pan with a wet pastry brush during cooking. Never stir after boiling begins. Add a pinch of cream of tartar (1/8 teaspoon) to prevent crystallization.
2. Soggy apples: The coating slides off because apples are too wet or warm. Solution: Dry apples thoroughly; refrigerate for 30 minutes before dipping. For caramel apples, ensure caramel is not too hot (wait 2-3 minutes after reaching temperature).
3. Uneven coating: Thick on bottom, thin on top. Solution: When dipping, tilt the pan so sugar pools deeply. Submerge apple completely, then gently tap the stick on the pan edge to remove excess. Rotate while setting.
4. Sticky caramel: Caramel didn’t reach soft ball stage (245°F). Solution: Invest in a reliable candy thermometer and calibrate it annually. If caramel is sticky, reheat to 248°F and test again.
5. Candy apple cracks or breaks immediately: Coating is too thin or apples are cold. Solution: Ensure coating is at least 1/8-inch thick. If apples are too cold, the shock can crack; let them sit at room temperature for 5 minutes before dipping.
Storage & Meal Prep Tips
Short-term storage: Store coated apples at room temperature (not refrigerated) for up to 3 days. Why not fridge? Moisture causes sugar to weep and caramel to soften. Place them on parchment paper in a single layer, not touching. Cover loosely with plastic wrap.
Long-term storage: You can freeze caramel apples (but not candy apples—the shell will shatter). Wrap each caramel apple individually in plastic wrap, then foil, and freeze for up to 2 months. To thaw, refrigerate overnight, then let sit at room temperature for 30 minutes.
Meal prep hint: Make the caramel or candy base up to 5 days ahead. Store in an airtight container. Reheat gently over low heat, adding 1-2 tablespoons water for candy or cream for caramel to restore consistency. Then dip fresh apples when ready to serve.
Reheating caramel: If caramel becomes stiff, place the container in a warm water bath (not boiling) for 5-10 minutes, stirring occasionally.
Conclusion
There’s something deeply satisfying about mastering the art of Candy Apples and caramel apples—watching sugar transform into a glossy, jewel-toned shell or rich, buttery caramel that clings to every bite. By controlling the temperature, preparing your apples meticulously, and avoiding common pitfalls like sugar crystallization or soggy coatings, you’ll create treats that rival any bakery or fair stand. This recipe for Candy Apples rewards patience and precision, while the caramel apples offer that nostalgic, indulgent texture everyone craves. Whether you’re making them for a Halloween party, a gift, or a weekend project, the process is as rewarding as the crunch. Try this recipe, share your glossy masterpieces on social media, and don’t forget to explore more seasonal dessert ideas on our site! Happy dipping.
FAQs
Q: Can I use any type of apple for candy or caramel apples?
A: Granny Smith is ideal because its tartness contrasts beautifully with sweetness. Honeycrisp, Fuji, or Gala work too, but avoid overly soft varieties like Red Delicious—they may become mushy. For caramel apples, slightly less tart apples like Braeburn also perform well.
Q: My candy coating turned out cloudy instead of clear. What happened?
A: Cloudiness usually means sugar crystallized during cooking. To prevent this, avoid stirring once boiling, wash down pan sides with a wet pastry brush, and add 1/8 teaspoon cream of tartar to the sugar mixture at the start.
Q: How do I fix caramel that’s too hard or too soft?
A: If too hard, you cooked it past 250°F. Next time, remove from heat at 245°F. If too soft (won’t hold shape), it didn’t reach temperature. Simply reheat to 248°F, test on a cold plate, and re-dip.
Q: Can I make these sugar-free?
A: Yes, but expect textural differences. Allulose works best for hard candy (reaches hard crack at 300°F), but the shell is more brittle. For sugar-free caramel, use allulose or a monk fruit/erythritol blend—aim for 245°F but note it won’t pull as nicely.
Q: How long do these stay fresh for gifting?
A: Candy apples last 5-7 days at room temperature (in dry conditions). Caramel apples last 3-4 days at room temperature or up to a week in the refrigerator (but may weep moisture). For gifting, make no more than 2 days in advance.
Quick way to grow 5 Candy Apples
Ingredients
Equipment
Method
- Wash and dry the apples thoroughly, then insert a wooden skewer into the stem end of each apple.
- Combine sugar, corn syrup, and water in a saucepan over medium-high heat, stirring until the sugar dissolves.
- Bring the mixture to a boil and cook without stirring until it reaches 300-310°F (149-154°C) on a candy thermometer, then stir in the food coloring.
- Carefully dip each apple into the hot candy mixture, turning to coat evenly, and let any excess drip off.
- Place the coated apples on a greased baking sheet or parchment paper to cool and harden completely.