The Ultimate Guide to Making the Perfect Apple Crisp at Home
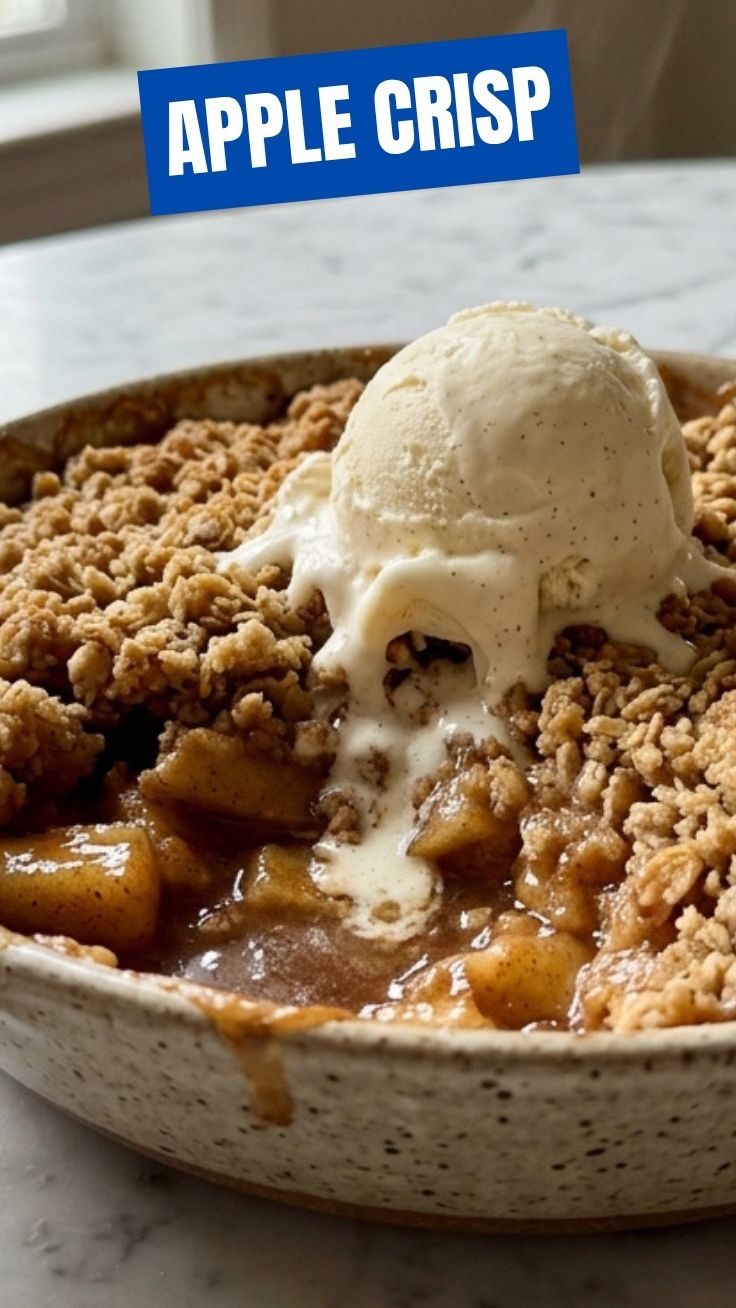
Is there anything more comforting than the aroma of cinnamon-spiced baked apples wafting through your kitchen? Whether you’re craving a warm, fruit-filled dessert or looking for a showstopper to bring to a fall gathering, making this Apple Crisp from scratch is a rewarding experience that beats any store-bought version. Not only does it fill your home with that irresistible scent, but it also gives you full control over the sweetness, texture, and quality of ingredients. While the classic Apple Pie holds a special place in dessert history, this crisp offers a quicker, crunchier alternative that feels just as indulgent. Preparing it at home allows you to customize the topping to your liking, ensuring a perfect balance of tender fruit and golden, buttery crumble every single time.
Ingredients & Kitchen Tools
For the Apple Filling
– 6–7 medium apples (Granny Smith, Honeycrisp, or Fuji) – Peeled, cored, and sliced into ¼-inch pieces. Tip: Use a mix of sweet and tart for depth.
– ½ cup granulated sugar – Adjust to taste depending on apple sweetness.
– 2 tablespoons all-purpose flour – Helps thicken the juices during baking.
– 1 teaspoon ground cinnamon – The star spice for warmth.
– ¼ teaspoon ground nutmeg – Adds a subtle earthy note.
– 1 tablespoon lemon juice – Prevents browning and balances sweetness.
For the Crisp Topping
– 1 cup old-fashioned rolled oats – Do not use instant oats; they turn mushy.
– ¾ cup all-purpose flour – Creates the crumbly texture.
– ½ cup packed brown sugar – Adds moisture and caramel notes.
– ½ cup unsalted butter – Cold and cubed; keeps the topping flaky.
– ¼ teaspoon salt – Enhances all flavors.
Kitchen Tools
– 9×13-inch baking dish (or 10-inch cast iron skillet)
– Large mixing bowl
– Small mixing bowl
– Pastry cutter or fork
– Apple peeler (optional but time-saving)
– Measuring cups and spoons
– Knife and cutting board
Optional Substitutions
– Gluten-free: Use gluten-free oat flour or a blend of almond flour and rice flour.
– Dairy-free: Substitute coconut oil or vegan butter for butter.
– Sugar-free: Use coconut sugar or a monk fruit blend.
Prep Time & Cooking Schedule
– Prep Time: 20 minutes – This includes peeling, slicing, and mixing the topping.
– Cook Time: 40–45 minutes at 375°F (190°C) – The filling should be bubbly and the topping golden brown.
– Resting Time: 10–15 minutes after baking – Essential for the juices to set, preventing a runny mess when served.
– Total Time: Approximately 1 hour 15 minutes.
Plan ahead: If you’re serving this for a dinner party, you can assemble the entire dish (without baking) up to 24 hours in advance. Just cover and refrigerate, then bake directly from the fridge, adding 5–10 minutes to the cooking time.
Step-by-Step Instructions
Step 1: Prepare the Apples
Preheat your oven to 375°F (190°C). In a large bowl, toss the sliced apples with granulated sugar, flour, cinnamon, nutmeg, and lemon juice. Make sure every slice is evenly coated. This mixture will create a syrupy sauce as it bakes. For a deeper flavor, let the apples sit for 5–10 minutes to release some natural juices.
Step 2: Make the Crisp Topping
In a separate bowl, combine the oats, flour, brown sugar, and salt. Add the cold, cubed butter. Using a pastry cutter, two forks, or your fingertips, work the butter into the dry ingredients until the mixture resembles coarse crumbs with pea-sized butter pieces. Do not overmix – the butter should remain visible to ensure a crumbly, not pasty, topping.
Step 3: Assemble and Bake
Transfer the apple mixture to your greased baking dish, spreading it evenly. Sprinkle the crisp topping over the apples in an even layer. Do not press down – leaving it loose allows steam to escape and creates the signature crunch. Bake for 40–45 minutes, rotating halfway through, until the filling is bubbling around the edges and the topping is deep golden brown. If the topping browns too quickly, loosely tent with foil during the last 10 minutes.
Step 4: Cool and Serve
Remove from the oven and let it rest for at least 10 minutes. This resting time is crucial for the juices to thicken. Serve warm, ideally with a scoop of vanilla ice cream or a drizzle of heavy cream. For a twist, try a dollop of crème fraîche to cut the sweetness.
Pro Tip: The key to a perfect texture is undercooking the apples slightly in the oven. They will continue to soften from residual heat. Also, remember that while this Apple Crisp is wonderfully rustic, it can be elevated with a pinch of cardamom or a splash of bourbon in the filling. If you’re looking for a more traditional, pastry-based dessert, the classic Apple Pie is a timeless choice, but this crisp delivers that same comforting flavor with half the effort.
Nutritional Benefits & Advantages
– Apples are rich in dietary fiber (especially pectin) and vitamin C. One medium apple provides about 4 grams of fiber, aiding digestion and heart health.
– Oats are a whole grain packed with beta-glucan, a soluble fiber that helps lower cholesterol levels.
– Cinnamon has anti-inflammatory properties and may help regulate blood sugar.
– Butter in moderation provides vitamin A and healthy fats needed for nutrient absorption.
Dietary Advantage: This dessert is naturally vegetarian and can be easily adapted to vegan or gluten-free diets without sacrificing flavor. Compared to a traditional pie, the crisp contains less refined flour and fat in the crust, making it a lighter option while still feeling indulgent.
Tips, Variations & Cooking Advice
– Flavor Variations: Add ½ cup dried cranberries or chopped pecans to the apple mixture. Swap half the oats with chopped almonds for extra crunch.
– Ingredient Swaps: Replace Granny Smith apples with Bosc pears for a pear crisp. Use maple syrup instead of brown sugar for a deeper sweetness.
– Cooking Methods: For individual servings, bake in ramekins for 20–25 minutes. For a stovetop version, cook the filling in a skillet, then crumble on a pre-toasted oat topping.
– Portion Changes: Halve the recipe for an 8×8-inch dish. Double it for a crowd, using a 9×13-inch pan and increasing bake time by 5–10 minutes.
– Dietary Adaptations: For a gluten-free version, use certified gluten-free oats and a 1:1 gluten-free flour blend. For dairy-free, substitute coconut oil or vegan butter, chilling it well before cutting in.
Common Mistakes to Avoid
– Using the wrong apples: Avoid Red Delicious or Gala – they turn mushy. Stick to firm, tart varieties like Granny Smith or Honeycrisp.
– Overmixing the topping: This develops gluten and makes the topping tough. Mix until just combined.
– Skipping the resting time: Cutting into the crisp immediately causes the juices to run everywhere. Let it set for at least 10 minutes.
– Not adjusting for altitude: At high altitudes, increase flour by 1 tablespoon and reduce sugar by 1 tablespoon to prevent excessive bubbling.
– Baking in a dish that’s too deep: A shallow dish (9×13 or 10-inch skillet) ensures the filling cooks evenly and the topping crisps properly.
Storage & Meal Prep Tips
– Refrigeration: Store leftovers in an airtight container in the fridge for up to 4 days. The topping will soften slightly, but the flavor remains excellent.
– Freezing: Assemble the unbaked crisp (without the topping) in a freezer-safe dish. Freeze the topping separately in a zip-top bag. When ready to bake, thaw the filling overnight, sprinkle on the frozen topping, and bake as directed, adding 10–15 minutes.
– Reheating: For the best texture, reheat individual portions in a 350°F oven for 10–12 minutes. The microwave works in a pinch (30–45 seconds) but will make the topping soggy.
– Meal Prep: Make the topping ahead of time and store it in the fridge for up to 1 week. You can also slice and freeze the apples (tossed with lemon juice) for up to 3 months.
Conclusion
This Apple Crisp is the perfect balance of tender, spiced fruit and a crunchy, buttery topping that comes together in under an hour. Whether you’re serving it for a weeknight treat or a holiday gathering, the rewards of making it at home are undeniable – better flavor, fresher ingredients, and the satisfaction of a job well done. While the classic Apple Pie remains a beloved dessert, this crisp offers a simpler, equally delicious path to that same comforting apple experience. Now it’s your turn – preheat that oven, grab your favorite apples, and create a dessert that will have everyone asking for seconds. Share your results in the comments below, and don’t forget to explore more seasonal recipes on our site!
FAQs
1. Can I use pre-sliced canned apples instead of fresh?
Yes, but drain them well and reduce the sugar by half since canned apples are often packed in syrup. The texture will be softer, so bake for 30–35 minutes instead.
2. Why is my crisp topping not crunchy?
This usually happens if the butter is too warm when mixed, or if you used rolled oats that are too fine. Ensure your butter is cold and your oats are old-fashioned. Bake uncovered until the topping is visibly golden.
3. Can I make this apple crisp without oats?
Absolutely. Replace the oats with an equal amount of chopped nuts (almonds, pecans, or walnuts) or use a crumble topping made with just flour, sugar, and butter.
4. How do I prevent the apples from becoming too watery?
Use a combination of flour and cornstarch (1 tablespoon each) as a thickener. Also, avoid over-ripe apples, which release more moisture during baking.
5. Can I use a different fruit with this recipe?
Definitely! This works beautifully with pears, peaches, or a mix of berries. Adjust the sugar to taste – berries may need less, while under-ripe pears may need more.
Quick way to grow 5 Apple Crisp apple trees
Ingredients
Equipment
Method
- Choose a sunny location with at least 6-8 hours of direct sunlight daily and well-draining soil.
- Amend the soil with compost or aged manure to improve fertility and drainage.
- Dig holes twice as wide as the root ball and deep enough for the graft union to be 2-4 inches above the soil line.
- Gently spread the roots and place the tree in the center of the hole, backfilling with soil and lightly tamping to remove air pockets.
- Water thoroughly after planting and apply a 2-3 inch layer of mulch around the base, keeping it away from the trunk.
- Install stakes or tree supports immediately after planting and secure the trees with tree ties, allowing for some movement.
- Prune the central leader to 30-36 inches and select 3-5 strong branches for scaffolding, removing others and any crossing branches.
- Water regularly, especially during dry periods, ensuring the soil remains consistently moist but not waterlogged.
- Fertilize in early spring and mid-summer with a balanced slow-release granular fertilizer, following product instructions.
- Continue pruning annually in late winter or early spring to maintain an open canopy and remove dead or diseased wood.
- Monitor for pests and diseases, applying organic solutions like insecticidal soap or neem oil as needed.
- Consider thinning fruit in early summer to promote larger, healthier apples and prevent branch breakage.
- Protect young trees from extreme weather by wrapping trunks in winter and providing temporary shade in intense heat.