The Ultimate Homemade Pumpkin Pie Recipe
Creamy, spiced, and perfectly sliceable – discover why this classic belongs on your holiday table.
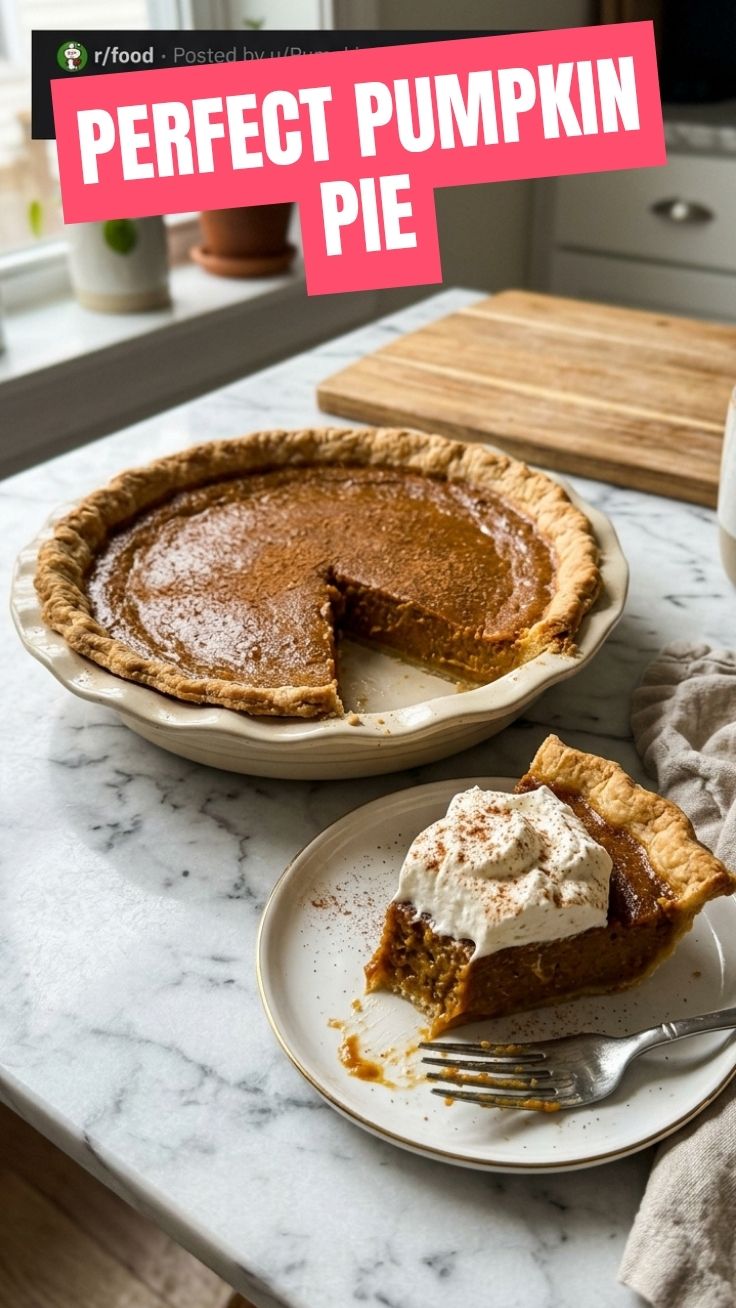
Have you ever wondered why store-bought pies never taste as good as grandma’s? The secret lies in a homemade Pumpkin Pie — a classic that transforms any gathering, especially when paired with other Thanksgiving Desserts. Preparing it at home is valuable because you control the ingredients, the spices, and the love that goes into every slice. Plus, the aroma of cinnamon, nutmeg, and clove filling your kitchen is an unmatched reward.
Ingredients & Kitchen Tools
For the filling:
– 1 can (15 oz) pumpkin purée (not pumpkin pie mix) – pure pumpkin gives you control over sweetness.
– ¾ cup granulated sugar – you can reduce to ½ cup if using sweeter pumpkin varieties.
– 1 teaspoon ground cinnamon, ½ teaspoon ground ginger, ¼ teaspoon ground cloves, ¼ teaspoon nutmeg – fresh-ground spices elevate flavor.
– 2 large eggs – room temperature for smooth incorporation.
– 1 can (12 oz) evaporated milk – adds richness without thinning. Swap with coconut milk for dairy-free.
– 1 tablespoon vanilla extract – optional but recommended.
For the crust (or use store-bought):
– 1¼ cups all-purpose flour, ½ teaspoon salt, ½ cup cold butter (cubed), 3–4 tablespoons ice water.
Tools: 9-inch pie dish, mixing bowls, whisk, rolling pin, pie weights (or dried beans), and a fine-mesh strainer for silky texture.
Prep Time & Cooking Schedule
– Prep time: 20 minutes (crust) + 15 minutes (filling)
– Chill time: 30 minutes for the dough.
– Bake time: 15 minutes for blind-baking + 40–50 minutes for the filled pie.
– Cool time: At least 2 hours (or overnight) – this sets the custard and prevents cracks.
Plan ahead: Make the crust a day early, or use a frozen crust to save time. The pie tastes even better after 24 hours as the spices meld.
Step-by-Step Instructions
1. Prepare the crust. Combine flour and salt, cut in cold butter until pea-sized crumbs form. Add ice water tablespoon by tablespoon until dough holds together. Flatten into a disc, wrap, and chill 30 minutes.
2. Roll and blind-bake. Roll dough on a floured surface to ⅛‑inch thickness, fit into a 9-inch pie dish, trim and crimp edges. Prick bottom with a fork, line with parchment, fill with pie weights, and bake at 375°F for 15 minutes. Remove weights and bake 5 more minutes until lightly golden.
3. Make the filling. Whisk pumpkin purée, sugar, and spices. Add eggs one at a time, then stir in evaporated milk and vanilla. Strain through a fine sieve into the prebaked crust – this removes any lumps, ensuring a velvety Pumpkin Pie that rivals the best Thanksgiving Desserts.
4. Bake. Reduce oven to 350°F. Carefully transfer pie to oven and bake 40–50 minutes. The center should jiggle slightly – it will set as it cools. If crust edges brown too quickly, cover them with foil.
5. Cool completely. Let pie rest on a wire rack for 2 hours, then refrigerate until serving. Serve chilled or at room temperature.
Texture tip: Overmixing the filling incorporates air bubbles that cause cracks. Stir gently, just until combined.
Nutritional Benefits & Advantages
Pumpkin purée is packed with vitamin A (beta-carotene), fiber, and antioxidants. This homemade Pumpkin Pie uses controlled sugar and no preservatives, making it a smarter choice than store-bought slices. The evaporated milk adds calcium without excess fat – and you can easily swap for oat milk to lower calories. A single serving (1/8 pie) provides roughly 280 calories, 11g fat, 38g carbs, and 5g protein.
Tips, Variations & Cooking Advice
– Flavor twists: Add 1 teaspoon orange zest for brightness, or replace cloves with allspice.
– Dietary swaps: Use a gluten-free flour blend for the crust (add ¼ teaspoon xanthan gum). For dairy-free, substitute evaporated milk with full‑fat coconut milk.
– No-bake option: Use a graham cracker crust and skip blind‑baking – just bake the filled pie 10 minutes less.
– Portion change: This recipe fits a deep-dish 9-inch pan; for mini pies, divide among 6 ramekins and bake 25–30 minutes.
Common Mistakes to Avoid
– Cracks on top? Likely overbaking. Pull the pie when the center wobbles like Jell-O.
– Soggy bottom crust? Always blind‑bake the crust thoroughly. Brush with egg white before adding filling for extra protection.
– Curdled filling? Using cold eggs or milk causes separation. Bring all liquids to room temperature.
– Too sweet? Reduce sugar to ½ cup; the spices and pumpkin sweetness will still shine.
Storage & Meal Prep Tips
– Refrigerate: Cover leftover pie with plastic wrap or foil and store up to 4 days.
– Freeze: Bake and cool completely, then wrap tightly in plastic wrap and foil. Freeze up to 3 months. Thaw overnight in the fridge.
– Reheat: For warm pie, place slices on a baking sheet at 300°F for 10 minutes (avoid microwaving – it makes the crust soggy).
Conclusion
Mastering this Pumpkin Pie will earn you praise at every holiday, and it’s a fantastic addition to your Thanksgiving Desserts repertoire. With a buttery crust, silky spiced filling, and simple steps, you’ll wonder why you ever bought a pre-made pie. Give this recipe a try, share your results, and explore more autumn treats on our site.
FAQs
1. Can I use fresh pumpkin instead of canned?
Yes. Roast a small sugar pumpkin at 375°F for 45 minutes, scoop out flesh, and purée until smooth. Drain excess water in a cheesecloth – canned pumpkin is drier, so your fresh purée may need an extra 10 minutes of baking.
2. Why did my pie crust shrink?
Overworking the dough develops too much gluten. Handle it minimally, and always chill before rolling. Let the crust rest in the fridge after fitting into the dish.
3. How do I know when the pie is done?
Use a thermometer: the center should reach 180°F. Or gently shake the pie – the outer 2 inches should be set, while the center jiggles slightly. It will firm up as it cools.
4. Can I make this pie gluten‑free?
Absolutely. Use a 1:1 gluten-free flour blend with a binder (like xanthan gum) for the crust. All other ingredients are naturally gluten-free.
5. What’s the best way to cut neat slices?
Chill the pie for at least 4 hours (or overnight). Use a sharp, wet knife and wipe it clean between cuts. For extra clean edges, dip the knife in hot water before each slice.
How to grow the perfect Pumpkin Pie in 1 easy stepPumpkin Pie
Ingredients
Equipment
Method
- Place your pre-made pumpkin pie in a prominent location and admire its perfect, fully-grown state.