New York Cheesecake vs Philadelphia Cheesecake: The Ultimate Guide to Baking Perfection
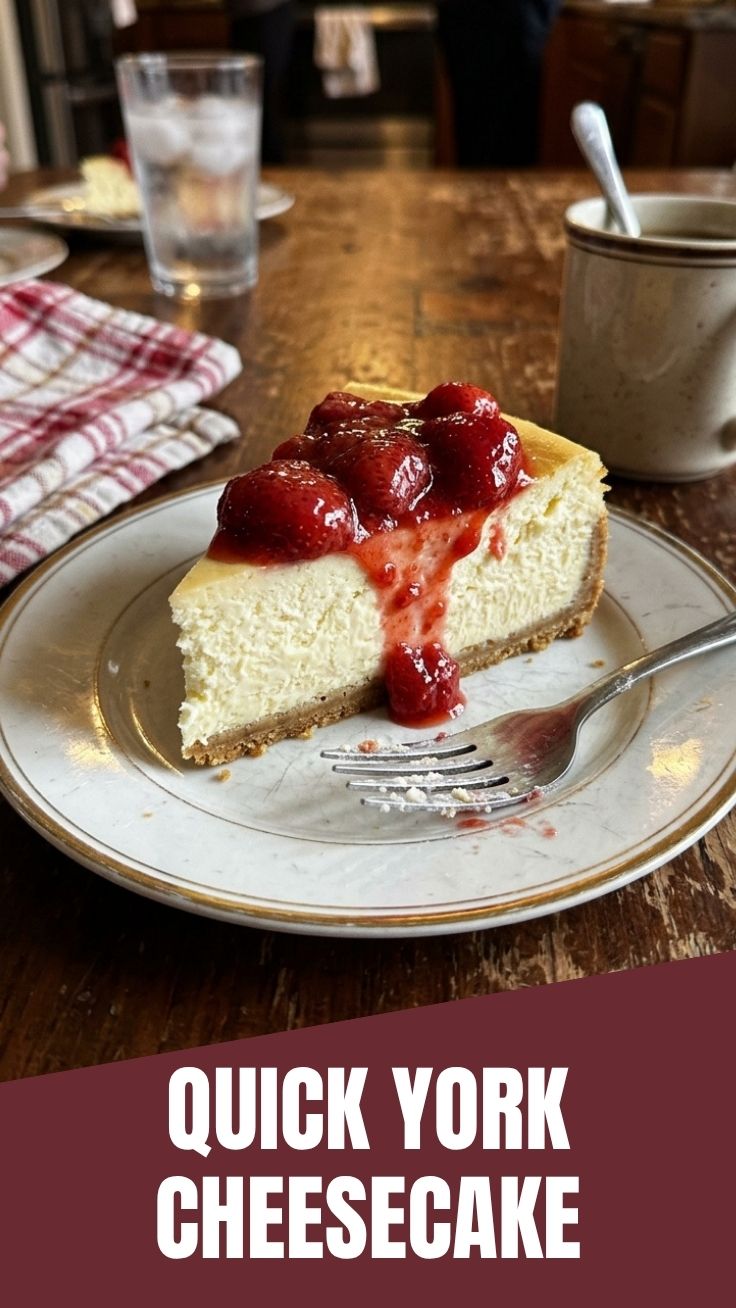
Have you ever wondered what makes a cheesecake truly iconic? Whether you crave the dense, creamy richness of a New York Cheesecake or the lighter, airier texture of a Philadelphia Cheesecake, baking this beloved dessert at home is deeply rewarding. Homemade cheesecake lets you control every ingredient—from the quality of cream cheese to the sweetness level—making it healthier than store‑bought versions, which often rely on preservatives and artificial flavors. Plus, the satisfaction of pulling a perfectly set cheesecake from your oven is unmatched. In this data‑driven guide, you’ll learn the precise techniques, ingredient science, and pro tips to nail both styles, complete with troubleshooting advice and storage hacks.
Ingredients & Kitchen Tools
For the crust:
– 1½ cups graham cracker crumbs (or digestive biscuits for a less sweet base).
– ¼ cup granulated sugar (adds caramelization).
– 6 tbsp unsalted butter, melted (binds crumbs; use vegan butter for dairy‑free).
For the filling:
– 32 oz (four 8‑oz blocks) full‑fat cream cheese, softened (room temperature is critical for a silky texture).
– 1 cup granulated sugar.
– 1 tsp vanilla extract (pure, not imitation).
– 1 tbsp lemon juice (brightens flavor; optional, but traditional in many versions).
– 4 large eggs, room temperature (cold eggs can curdle the batter).
– 1 cup sour cream (adds tang and tenderness; for a lighter variation, substitute Greek yogurt).
– 2 tbsp all‑purpose flour (stabilizes the filling; use cornstarch for gluten‑free).
Essential tools:
– 9‑inch springform pan (ensures easy removal).
– Electric mixer (hand or stand).
– Large mixing bowls, rubber spatula, measuring cups/spoons.
– Roasting pan or deep baking dish for water bath.
– Aluminum foil (to wrap the springform pan).
Optional substitutions:
– Low‑fat cream cheese yields a less creamy result but reduces calories.
– Crust alternatives: crushed Oreo (for chocolate lovers) or almond flour (low‑carb).
Prep Time & Cooking Schedule
– Prep time: 20 minutes (softening cream cheese, making crust, mixing filling).
– Bake time: 60–70 minutes at 325°F (160°C).
– Cooling time: 1 hour at room temperature in the oven (door ajar).
– Chilling time: Minimum 4 hours or overnight (essential for clean slices).
Plan ahead: start baking the day before serving. The overnight rest allows the flavors to meld and the texture to set perfectly.
Step‑by‑Step Instructions
1. Prepare the crust. Mix graham cracker crumbs, sugar, and melted butter until it resembles wet sand. Press firmly into the bottom of a greased springform pan. Bake at 325°F for 10 minutes, then cool completely.
2. Make the filling. In a large bowl, beat softened cream cheese until smooth (scrape sides often). Add sugar and beat until fluffy. Mix in vanilla and lemon juice. Add eggs one at a time on low speed—overmixing incorporates too much air, causing cracks. Fold in sour cream and flour until just combined.
3. Water bath. Wrap the springform pan tightly with two layers of wide aluminum foil. Place it inside a roasting pan and pour hot tap water until it reaches halfway up the sides. The steam ensures even, gentle heat.
4. Bake. Pour filling into the crust. Bake 60–70 minutes; the edges should be set, and the center should jiggle like Jell‑O when shaken. Turn off the oven, crack the door, and let the cheesecake cool inside for 1 hour.
5. Chill. Remove from water bath, uncover foil, and refrigerate uncovered for 1 hour (prevents condensation), then cover with plastic wrap and chill at least 4 hours.
Temperature control tip: For a classic New York Cheesecake, bake at 325°F and use a water bath to avoid over‑browning. If you’re aiming for a lighter texture reminiscent of a Philadelphia Cheesecake, reduce sour cream to ¾ cup and add 2 extra tablespoons of heavy cream—this produces a fluffier, less dense crumb.
Nutritional Benefits & Advantages
Cheesecake may be indulgent, but it offers surprising nutritional perks. Cream cheese provides calcium (about 8% of daily value per slice) and protein (4‑5g). Eggs contribute high‑quality protein and choline, which supports brain health. Using full‑fat dairy increases satiety, meaning a smaller slice satisfies cravings longer. Homemade cheesecake contains no artificial stabilizers or high‑fructose corn syrup—you control the sugar content. Pair a thin slice with fresh berries for added fiber and antioxidants.
Tips, Variations & Cooking Advice
– Flavor twists: Swirl in raspberry purée, melted dark chocolate, or caramel before baking. Add lemon zest for brightness.
– Dietary adaptations: Use gluten‑free graham crackers or almond flour crust. For dairy‑free, substitute vegan cream cheese (e.g., Tofutti) and coconut cream for sour cream.
– No water bath alternative: Place a pan of hot water on the lower oven rack to create steam—less fussy but slightly less even heat.
– Portion changes: Mini cheesecakes in a muffin tin bake 18–22 minutes and are perfect for parties.
Common Mistakes to Avoid
– Cracks in the surface: Overmixing, sudden temperature changes, or overbaking. Solution: Use low speed, cool slowly, and test with a jiggle test.
– Dense, gummy texture: Overbaking or under‑mixing eggs. Solution: Remove from oven when center still wobbles; residual heat finishes cooking.
– Soggy crust: Butter leaks through foil in water bath. Solution: Double‑wrap and use heavy‑duty foil, or use a silicone springform band.
– Cheesecake sticks to pan: Run a thin knife around edge before releasing springform.
Storage & Meal Prep Tips
– Refrigerator: Store covered in plastic wrap for up to 5 days. Place a paper towel under the wrap to absorb condensation.
– Freezer: Wrap cheesecake (whole or individual slices) in plastic then foil. Freeze for up to 2 months. Thaw overnight in the fridge.
– Reheating: Serve chilled or at room temperature. If you prefer a warm slice, microwave for 15 seconds—watch for melting.
For meal prep, bake the cheesecake on a Sunday, chill it overnight, and slice it Monday. Perfect for grab‑and‑go dessert all week.
Conclusion
Mastering homemade cheesecake is a journey of texture, temperature, and patience. Whether you choose a dense New York Cheesecake or a fluffy Philadelphia Cheesecake, you’ll enjoy a slice of heaven that’s free from additives and full of flavor. The key is precise techniques: room temp ingredients, a water bath, and a slow cool‑down. Try this recipe this weekend, and don’t forget to share your results in the comments—did you stick to classic or experiment with a twist? For more dessert inspiration, check out our guide to no‑bake cheesecakes.
FAQs
1. Can I use low‑fat cream cheese in either cheesecake style?
Yes, but expect a less creamy texture and slightly firmer set. Increase sour cream by 2 tablespoons to compensate for lost fat.
2. Why did my cheesecake turn out dense even though I followed the recipe?
Likely overmixing after adding eggs or overbaking. Beat eggs on low just until incorporated, and remove the cheesecake when the center still jiggles.
3. How long should I chill cheesecake before slicing?
At least 4 hours; overnight is best. Chilling firms the structure and makes slicing clean. Use a hot, dry knife for perfect cuts.
4. Can I freeze a cheesecake with fruit topping?
Freeze the plain cheesecake first, then add topping after thawing. Fruit sauces can become watery and make the crust soggy.
5. What’s the ideal crust for a gluten‑free version?
Crushed gluten‑free graham crackers, almond flour mixed with butter, or a simple nut‑date base. Press firmly and pre‑bake for better structure.
Proven way to grow 7-layer New York Cheesecake
Ingredients
Equipment
Method
- Preheat oven to 350°F (175°C). Combine graham cracker crumbs, sugar, and melted butter; press into a 9-inch springform pan.
- Bake for 10 minutes, then let it cool on a wire rack while preparing the filling.
- Reduce oven temperature to 325°F (160°C). Beat cream cheese until smooth, then gradually add sugar and flour until combined.
- Mix in sour cream and vanilla extract, then add eggs one at a time, mixing just until combined after each addition.
- Pour the filling over the cooled crust and place the springform pan in a large roasting pan.
- Pour hot water into the roasting pan to reach halfway up the sides of the springform pan.
- Bake for 70-80 minutes, or until the edges are set and the center jiggles slightly.
- Turn off the oven and leave the cheesecake inside with the door ajar for 1 hour.
- Remove from the oven, remove from the water bath, and cool completely on a wire rack.
- Refrigerate for at least 6 hours or overnight before serving.