Transform Your Morning Routine: The Ultimate Guide to Wholesome Back-to-School Lunches
Are you tired of tossing packaged snacks into a lunch bag while secretly worrying about your child’s energy levels by 2 PM? You are not alone. Preparing homemade meals bridges the gap between convenience and nourishment, ensuring your little ones get sustained focus throughout the school day. Mastering creative Back-to-School Lunches doesn’t have to mean spending hours in the kitchen, and contrary to popular belief, you can absolutely balance flavor with wholesome ingredients. When you focus on assembling Nutritious Lunches that actually appeal to young palates, you invest in their learning capacity and long-term health. This guide will walk you through building balanced meals that are quick to assemble, visually appealing, and packed with the fuel growing bodies need.
Ingredients & Kitchen Tools
To build versatile lunch boxes that stay fresh until noon, gather these core components:
– Whole grain tortillas or bread – Provides complex carbohydrates for steady energy release
– Lean protein (grilled chicken strips, hard-boiled eggs, or turkey slices) – Essential for muscle repair and satiety
– Fresh vegetables (cherry tomatoes, cucumber sticks, bell pepper strips) – Adds crunch, fiber, and essential vitamins
– Fruit (berries, apple slices, grapes) – Natural sweetness with antioxidants
– Yogurt or hummus – Creamy dips that encourage vegetable consumption
– Cheese cubes or shredded cheese – Calcium source that pairs well with whole grains
Kitchen tools required: Bento-style lunch box with compartments, small silicone muffin cups (for separating wet items), vegetable stick cutter, and reusable ice packs. Optional substitutions: Swap tortillas for lettuce wraps (low-carb) or use sunflower seed butter if nut-free policies apply.
Prep Time & Cooking Schedule
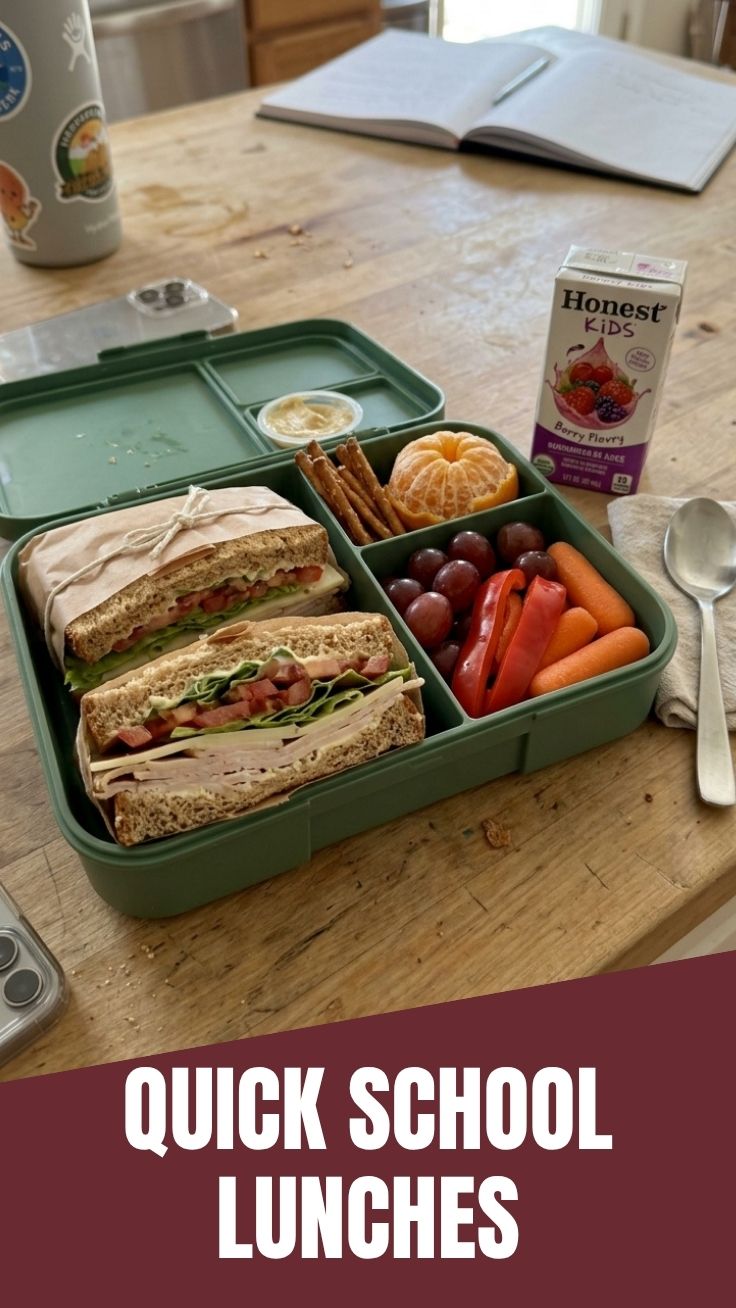
Total active time: 20 minutes (including assembly). Batch prepping on Sunday evening streamlines weekday mornings. Cook grains and proteins in advance—grill chicken breasts or boil eggs while you wash and cut vegetables. Allow cooked items to cool completely (approximately 15 minutes) before packing to prevent condensation that can make bread soggy. Marinate vegetables with a light lemon juice drizzle overnight to enhance flavor without extra salt.
Step-by-Step Instructions
1. Prepare the base layer: Slice whole grain tortillas into 3-inch rounds using a cookie cutter. Spread a thin layer of cream cheese or hummus to act as a moisture barrier against vegetable juices.
2. Build the protein component: Shred pre-cooked chicken breast and mix with a tablespoon of plain Greek yogurt and a pinch of paprika. This keeps the meat moist and adds flavor without artificial additives.
3. Layer vegetables strategically: Place cucumber rounds on the bottom compartment, then add cherry tomatoes on top to prevent them from being crushed. Use silicone cups for wet items like salsa or ranch dressing.
4. Assemble the fruit skewers: Thread alternating berries and melon cubes onto short bamboo sticks—this makes eating fun and prevents fruit from bruising.
5. Temperature control tactic: Always pack a frozen water bottle or reusable ice pack beneath the protein section. Keep dips and dairy in a separate insulated pouch.
Throughout this process, remember that creating memorable Back-to-School Lunches is about consistency, not perfection. Similarly, packing colorful Nutritious Lunches ensures your child receives a spectrum of vitamins without feeling like they are eating “diet food.”
Nutritional Benefits & Advantages
This meal structure provides approximately 400-500 calories, 20g protein, 15g fiber, and essential micronutrients including vitamin A (from bell peppers) and calcium (from cheese). The combination of complex carbohydrates and lean protein stabilizes blood sugar levels, preventing the afternoon energy crash commonly associated with processed lunch options. Including fermented foods like yogurt supports gut health, which research links to improved mood and cognitive function.
Tips Variations & Cooking Advice
Flavor variations: Replace hummus with avocado mash for healthy fats, or add a sprinkle of everything bagel seasoning to hard-boiled eggs for extra appeal. Dietary adaptations: For gluten-free needs, substitute rice cakes or corn tortillas. For dairy-free options, use coconut yogurt and nut-based cheese alternatives. Portion changes: Younger children (ages 4-7) need smaller portions—reduce protein to 1/3 cup and vegetables to 1/4 cup. Save extra components in airtight containers for next-day use.
Common Mistakes to Avoid
– Overpacking moist ingredients: Avoid placing sliced cucumbers directly on bread without a barrier—use lettuce leaves or a thin spread as a sealant.
– Ignoring temperature zones: Packing warm food next to cold items creates a breeding ground for bacteria. Always cool proteins to refrigerator temperature before sealing the box.
– Skipping texture variety: Children reject lunches that are all soft or all crunchy. Balance crispy vegetables with creamy dips and chewy grains.
– Using improper containers: Sandwich bags cause crushed items and leaks. Invest in compartmentalized containers with secure silicone seals.
Storage & Meal Prep Tips
Assemble lunch boxes the night before and store them in the refrigerator (not the pantry). Most ingredients stay fresh for 24-36 hours when properly chilled. Reheating instructions: If your lunch includes a thermos, heat soups or pasta to 165°F before sealing. For cold items, do not reheat—instead, refresh cucumber sticks and apple slices with a lemon-water rinse to restore crispness. Avoid freezing assembled lunches; freezing alters vegetable texture and breaks down dairy dips. Instead, freeze individual components like cooked quinoa patties or pre-portioned fruit cups separately.
Conclusion
Building wholesome Back-to-School Lunches is a practical skill that pays dividends in your child’s health and academic performance. By focusing on vibrant Nutritious Lunches, you create a foundation for lifelong healthy eating habits without sacrificing flavor or convenience. Start with one new recipe this week, observe what your child gravitates toward, and gradually expand your repertoire. Share your creations with our community—your success might inspire another parent’s breakthrough moment.
FAQs
1. Can I substitute chicken with plant-based protein?
Absolutely. Tempeh cubes marinated in soy sauce and maple syrup work beautifully. Alternatively, chickpea “tuna” (mashed chickpeas with vegan mayo and relish) provides similar texture and protein content.
2. How do I prevent apples from browning?
Slice apples just before packing, then toss with a mixture of one tablespoon lemon juice and one cup water. Drain thoroughly before placing in the container.
3. My child refuses vegetables—what should I do?
Disguise vegetables by spiralizing zucchini into noodle shapes and mixing with pasta, or finely grate carrots and zucchini into muffin batter. Small, consistent exposures are more effective than pressure.
4. Is it safe to pack yogurt without a cold pack?
No. Perishable dairy needs to stay below 40°F. Always include an ice pack or use a frozen yogurt tube as both a cooling element and a treat.
5. How many hours can a packed lunch sit unrefrigerated?
The U.S. Department of Agriculture recommends discarding perishable foods left at room temperature for more than two hours. Use an insulated bag with two ice packs to extend safe duration to four hours.
Best way to grow Back-to-School Lunches: 5 Fast Ideas
Ingredients
Equipment
Method
- Spread cream cheese evenly over each tortilla, then layer with turkey and cheese slices.
- Roll the tortillas tightly and slice each into 6-8 pinwheels. Pack them in lunchboxes with a side of fruit.
- Spread hummus over each tortilla, then layer with shredded carrots, sliced cucumber, and bell pepper.
- Roll the tortillas tightly and slice each in half. Serve with a small container of extra hummus for dipping.
- Spread pizza sauce on each English muffin half, then sprinkle with mozzarella cheese and desired toppings.
- Bake at 350°F (175°C) for 8-10 minutes, or until the cheese is melted and bubbly. Let cool before packing.
- Alternatively, prepare ahead and allow to cool before packing.
- In a bowl, combine shredded chicken, mayonnaise, and finely chopped celery; season with salt and pepper.
- Pack the chicken salad in a separate container along with whole grain crackers for assembly at lunchtime.
- In a lunch container, layer Greek yogurt, granola, and mixed berries or sliced fruit.
- Pack individual yogurt cups, granola, and fruit separately for assembly just before eating to prevent sogginess.