The Ultimate Guide to Making a Fluffy Dutch Baby Pancake at Home
Have you ever craved a breakfast that’s both impressive and effortless—something that puffs up dramatically in the oven yet requires minimal hands-on work? That’s the magic of a Dutch Baby Pancake. This versatile, eggy dish is like a cross between a pancake, a popover, and a crepe, and it bakes into a golden, puffy bowl perfect for toppings. Whether you’re hosting brunch or treating yourself on a lazy Sunday, preparing this recipe at home is rewarding, cost-effective, and surprisingly simple. In this post, I’ll show you how to nail this Dutch Baby Pancake every time—and introduce you to its cousin, the German Pancake, which shares a similar batter but a slightly different texture and history.
Ingredients & Kitchen Tools
For the Batter:
– 3 large eggs (room temperature – crucial for rise)
– ½ cup all-purpose flour (or gluten-free blend, see tips)
– ½ cup whole milk (or almond/oat milk for dairy-free)
– 1 tablespoon granulated sugar (optional, for sweetness)
– ½ teaspoon vanilla extract (adds flavor depth)
– ¼ teaspoon salt (balances sweetness)
– 2 tablespoons unsalted butter (for the pan)
Toppings & Aromatics (optional):
– Fresh berries, sliced bananas, or caramelized apples
– Maple syrup, honey, or powdered sugar
– Lemon juice or cinnamon (for zing)
Kitchen Tools:
– 10-inch cast-iron skillet or oven-safe nonstick pan
– Blender or whisk and mixing bowl
– Spatula and oven mitts
– Measuring cups and spoons
Substitutions:
– Use coconut oil or ghee instead of butter for lactose-sensitive diets.
– Replace milk with buttermilk for a tangier flavor (reduce flour slightly).
– For egg-free, try a flax egg slurry (1 tbsp flaxseed meal + 3 tbsp water per egg) but expect less puff.
Prep Time & Cooking Schedule
– Prep Time: 5 minutes (blend batter) + 10 minutes rest
– Cook Time: 20–25 minutes
– Total Time: ~40 minutes
Context: This recipe requires minimal active work but needs a hot oven and a well-rested batter. Let the batter sit at room temperature for 10 minutes after blending—this hydrates the flour and relaxes gluten, leading to a lighter, airier rise. Meanwhile, preheat your oven to 425°F (220°C) with the skillet inside. The pan must be screaming hot before adding butter and batter—this initial blast of heat drives the dramatic puff.
Step-by-Step Instructions
1. Preheat Your Oven and Skillet – Place your cast-iron skillet in the oven and preheat to 425°F (220°C). Let the pan heat for 15 minutes—this ensures immediate contact searing and puff.
2. Blend the Batter – In a blender, combine eggs, flour, milk, sugar, vanilla, and salt. Blend on high for 20 seconds until frothy. Don’t over-mix; a few lumps are fine. Let rest at room temperature for 10 minutes. The secret to a perfect Dutch Baby Pancake is to let the batter rest so it relaxes gluten, ensuring an even rise without toughness.
3. Prepare the Hot Pan – Once the oven is hot, remove the skillet using oven mitts. Add 2 tablespoons butter and swirl until melted and sizzling. Immediately pour the batter into the center of the pan. Work quickly—don’t let the pan cool down.
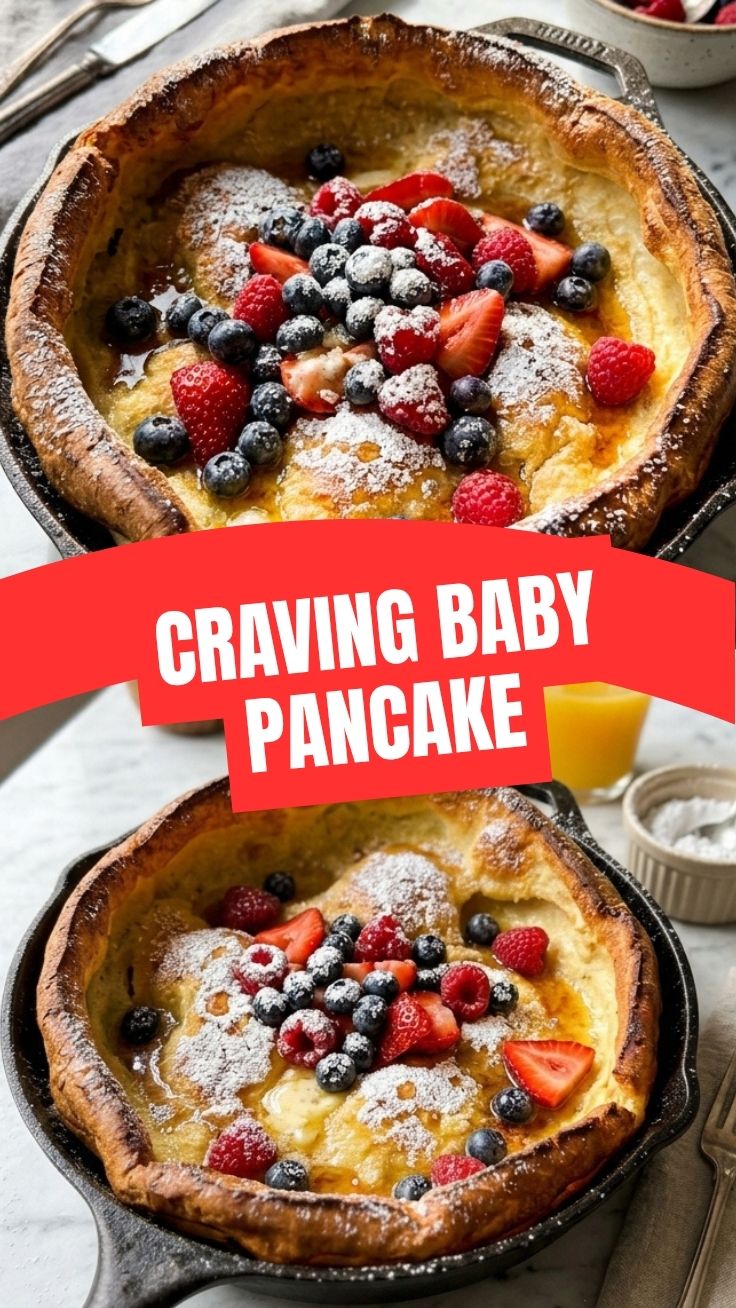
4. Bake Without Peeking – Return the skillet to the oven and bake for 18–22 minutes. The pancake will puff dramatically and turn golden brown. For the best German Pancake results, resist the urge to open the oven door; cold air causes collapse. It’s done when the edges are deep golden and the center is slightly jiggly.
5. Add Toppings Quickly – Remove from oven, top with fresh fruits, syrup, or a squeeze of lemon. Serve immediately—the pancake will start deflating within minutes.
Nutritional Benefits & Advantages
This Dutch Baby Pancake is a nutritious breakfast option thanks to its simple, whole-food ingredients. Eggs provide high-quality protein (6g per serving) and essential vitamins like B12 and choline, which support brain health. Whole milk adds calcium for bone strength. The butter, while higher in saturated fat, offers vitamins A and D, and baking at high heat keeps the recipe lighter than stovetop pancakes (which absorb more oil). Compared to traditional pancakes or waffles, this baked version uses less added sugar and fewer carbs per serving—especially if you skip the sugar altogether. It’s naturally vegetarian and can be made gluten-free easily.
Tips Variations & Cooking Advice
Flavor Variations:
– Do a savory twist: add shredded cheese, herbs (thyme, rosemary), and cracked pepper—serve with bacon or smoked salmon.
– Go tropical: top with toasted coconut, mango, and passionfruit.
– Make an apple cinnamon version: sauté diced apples with butter and cinnamon before adding batter.
Dietary Adaptations:
– Gluten-free: Use a 1:1 gluten-free flour blend (with xanthan gum) and add 1 extra egg for structure.
– Dairy-free: Substitute milk with oat or almond milk, and use coconut oil instead of butter.
Cooking Advice:
– For a thicker, more custardy texture, bake at 375°F for 25 minutes.
– For a crisper, thinner pancake, bake at 450°F for 15 minutes.
– Always use room-temperature eggs and milk—cold ingredients temper the batter and reduce puff.
Common Mistakes to Avoid
– Using cold ingredients: Eggs and milk straight from the fridge slow down the rise. Always rest batter at room temp.
– Opening the oven door: Even a quick peek releases heat and deflates the pancake. Trust the process.
– Under-preheating the pan: A lukewarm skillet means the batter won’t get the initial blast it needs to puff. Heat the pan for at least 15 minutes.
– Over-blending the batter: Over-mixing develops too much gluten, making the pancake chewy. Blend just until combined.
– Using too much butter: While butter adds flavor, excess oil can weigh down the batter and cause sogginess. Stick to 2 tablespoons.
Storage & Meal Prep Tips
Refrigeration: Let the pancake cool completely, then store in an airtight container in the fridge for up to 2 days. For best texture, don’t stack slices—use parchment between layers.
Freezing: Slice the pancake into portions, wrap each in plastic wrap, then place in a freezer-safe bag. Freeze for up to 1 month. Thaw overnight in the fridge.
Reheating: To revive puffiness, reheat slices on a bare baking sheet at 350°F for 5 minutes. Avoid microwaving—it makes the pancake rubbery. For a quicker fix, toast slices in a dry skillet over medium heat for 1 minute per side.
Conclusion
This Dutch Baby Pancake is a showstopper that requires just 5 minutes of prep and delivers an impressive, puffy result that friends and family will love. Whether you stick to classic toppings or explore savory variations, the key is a hot pan, rested batter, and a no-peek baking rule. Try this recipe for your next brunch or lazy weekend breakfast—and feel free to swap in your own favorite toppings. I’d love to see your results—tag me in your photos! And don’t forget to check out its close relative, the German Pancake, for another easy, delicious variation. Happy baking!
FAQs
1. Can I make a Dutch Baby Pancake without a cast-iron skillet?
Yes! Use any oven-safe pan (stainless steel or ceramic) as long as it can withstand 425°F heat and is at least 10 inches in diameter. Nonstick is fine, but avoid pans with plastic handles.
2. Why did my pancake deflate immediately after baking?
This is normal—they all puff dramatically in the oven and shrink about 30% once out. To minimize collapse, serve immediately and don’t add heavy toppings until it’s on the table.
3. Can I prepare the batter the night before?
You can, but it’s best to let the batter rest at room temperature for only 10–15 minutes. If prepared ahead, refrigerate for up to 8 hours, then let it sit for 30 minutes before baking. You may need to add 1 tablespoon milk to loosen it.
4. What’s the difference between a Dutch Baby Pancake and a German Pancake?
The terms are often used interchangeably, but traditionally a Dutch Baby Pancake is baked in a cast-iron skillet with a rim, while a German Pancake is similar but sometimes thinner and baked in a square or rectangular dish. Both rely on the same eggy batter and oven puff.
5. Can I make this gluten-free?
Absolutely. Use a good gluten-free all-purpose flour blend (such as Bob’s Red Mill 1:1) and add one extra egg. The texture will be slightly denser but still delicious. Avoid coconut or almond flour—they don’t puff properly.
Quick way to grow a 6-inch Dutch Baby Pancake.
Ingredients
Equipment
Method
- Preheat your oven to 425°F (220°C) and place a 6-inch cast-iron skillet inside to heat up.
- In a blender, combine the flour, eggs, milk, sugar, vanilla extract, and salt; blend until smooth.
- Carefully remove the hot skillet from the oven, add the butter, and swirl to coat the bottom and sides.
- Pour the batter into the hot skillet and immediately return it to the oven.
- Bake for 15-20 minutes, or until the pancake is puffed and golden brown, then serve immediately with your favorite toppings.